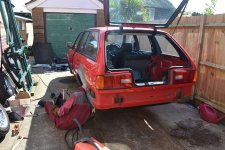
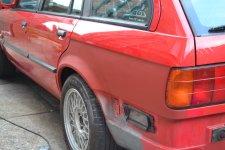
** Acme [Akagi] bought a pink estate car - E30 325i project log! **

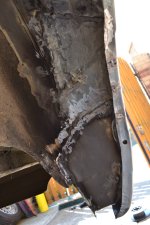
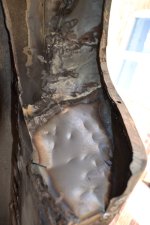
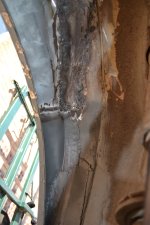
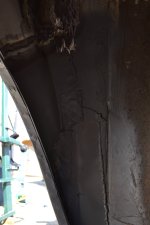
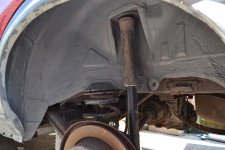
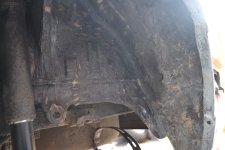
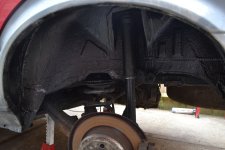
Today then... Inner rear arch finished. :)

Started by emptying out the car and hoovering it out and cleaning off all the parts that have been living in it, and finding various things... Putting them in bags, and putting it all back... :p

[pic removed]

Dave-o hard at work...

edACEsJ.jpg

Boot pocket

H7g7cVM.jpg

MBewuTt.jpg

gvWCjcm.jpg

Inner

N9zP0b9.jpg

0yBF8M0.jpg

KdYnKUN.jpg

zZRJQCj.jpg

aUe0qGl.jpg

73Qz0tC.jpg

Seam sealed and primered...

UEB87Ns.jpg

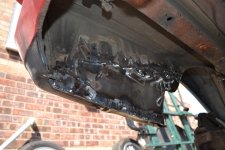
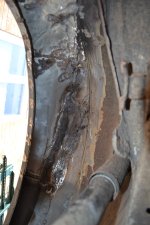
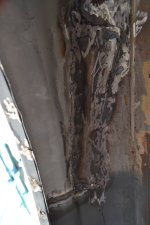
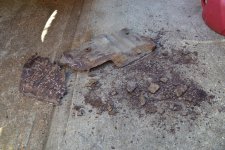
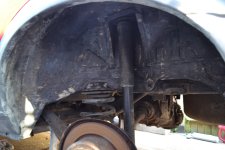
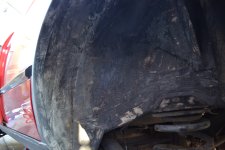
Aaaaaaaaand then instead of leaving the primer to dry overnight, I had the bright idea of spraying the stonechip on top when it was touch try... Leading to the stonechip reacting with the primer, and then I had to spend ages scraping and wire wheeling to get everything off, including the seam sealer (which I have run out of) - So now I'm left with this mess, and more seam sealer on order.......
cQnK4Vj.jpg

MLUkW3B.jpg

6R8rx20.jpg

Re seam seal and then stone chip, will skip the primer, its not really needed under stone chip paint... Whats left is all rock hard and bone dry and wont even come off with a wire wheel on a drill, so I've brushed it out and will do the necessary work over the top. :o

Oh and RIP exhaust heat shield.

rNIDoJR.jpg
 
Last edited:
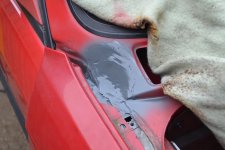
Scuttle rot ground and patched.

nNzetfF.jpg

PUsliOP.jpg

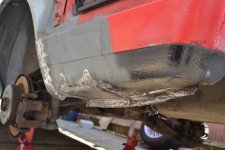
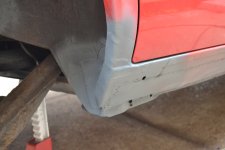
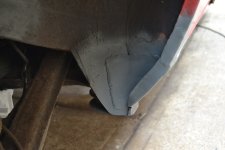
Other arch bottom chopped and patched.

M1CYIYB.jpg

N2JZVWj.jpg

And arch re-stone chipped.

T9iBdtE.jpg

This concludes Acme's welding adventures... Until I find more.

Next is Acme's filling adventures... :o

Oh and my Momo steering wheel boss kit came. And then I realised that Nardi's have a different bolt pattern... So now I've ordered an adapter...
 
Last edited:
It's good that you're trying to fix it, but, the holes in those welds and that hammer smashed...christ I'd not want that work on my car. It's going to rust out again in nearly all of those spots and probably more. :(

Better than if I tried to do it! Its not a 10/10 job but a 10/10 job would be thousands for all this work...

No the welds aren't perfect, some bits are worse than others, but will be fine once the welds are all seam sealed and stone chipped, or ground back and filled over and painted (depending on where they are), and the cavities are all waxed.

If the welds were a work of art, I wouldn't seam seal them all. But theyre not. So every single bit gets smeared with seam sealer, whether it has holes in or not... Do not want this bitch going rotten on me again, for years.
 
Last edited:
I know I know. I wont be recommending Dave to people unless they just need a simple patch or something, but its good enough and it was hard finding someone reasonably competent who would do it on my driveway.
 
Well, turns out I'm a bit **** with filler, so I'm just skimming the welds with it and sticking two coats of primer on so that the welds are actually covered up, and then will have to rub it back and get someone who knows what theyre doing to help somewhen... :p
 
Have you treated the welds and bare metal before whopping the bodge arl ower?

Several people say its fine to stick the filler over the bare metal, so I do it, and THEN someone comes along and asks this.....

Sigh.....

Treated how..? It was previously sitting in primer, I took it back to bare metal, cleaned it, and then applied filler. I thought filler was best applied to bare metal so it adheres better?
 
Yeah but I did some searching after reading what vanpeebles said and people do recommend painting it or coating it in something first... :(

I thought, with the weld being in a waxed cavity, it would be OK to just fill over it and paint, but I dunno.
 
Can you actually see the weld?

Well, no, on the one side it is inside the sill, which has been cavity waxed. On the other side, it has been fillered and painted over, having first been wire wheeled and cleaned.

Its not the tidiest job though hence my saying that at some point it will get sanded back a bit and have someone who has a delicate touch, do it neatly.
 
That would be great if they were the sort of welds that allowed for them to be ground flat. They are lap joins. And the welds go all perforated if I grind them back too much....... Bloody useless.
 
Would rather not. More time, and either money or arguing.

Plus not sure if he would actually be able to do it to such a standard if I did ask him to. I don't mind skimming it with filler, it was how I thought it would go from the start, I just don't know the "process" clearly.
 
If your plan is to fill and prime for now, then please remember that most fillers and the majority of primers will absorb moisture if not protected by a top coat.
True. I thought that red primer was fairly water resistant? Might be wrong.
Stop acting like you are so hard done by.
I am. :p ;)
The only reason to apply filler to bare metal would be adhesion (there is also a chance of solvent reaction)
Modern primers sick to pretty much anything though.
So then, do I start again and put some primer on first, do I leave it as it is for now, or do I squiz a quick dusting of top-coat onto it and leave it like that, then sort it at a later date... Decisions...
 
In a few years you'll probably need to cut the repairs out and replace properly

Chances are you'll have to re-do some of it within a couple of years or so.


I think my seam sealing/cavity waxing/stone-chipping/painting efforts should keep it at bay no?

The repairs to the front footwells have been painted, seam sealed, painted and stone chipped on both sides, the repairs to the sills have been painted on the outside, the lower lips seam sealed, painted, and stone chipped. The inner arch has been painted, seam sealed, painted, and stone chipped. The rear of the inner arch where I can't reach with seam sealer etc, as well as inside the sills, have had a liberal coating of Ditrinol ML cavity wax. The rear boot pockets have been painted in primer so far, and I still need to clean them up with a wire wheel, and then they will be painted, seam sealed, and painted again. Outer visible sections will be painted with primer, then filled, then painted with primer and then top coat, with the exception of the sill which I have already filled and painted with primer.

Really hoping I don't have to re-do some of it in a couple of years. Its a bit of a weird standard its been done to really... A level above doing patches because in some areas whole sections have been cut out, but a level below a proper professional job. If I start having a few issues in say, 5 years, that I can live with.
 
Last edited:
Faffed around with the exhaust...

Discovered there are three types of exhaust manifold flange, three stud, four stud small, and four stud large, and naturally my exhaust front section was the wrong sized one... I thought there were only two types, 3 and 4 stud... :p

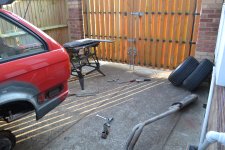
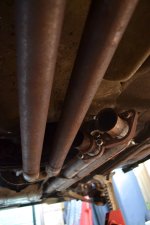
So I thought sod it and went about mocking up a middle section out of pipe with no middle box... Nicked the flanges off a spare middle box I had laying around...

OUdWSmk.jpg

Need to shorten these bits and then fit 45 degree angled sections in...

hPip4Hv.jpg

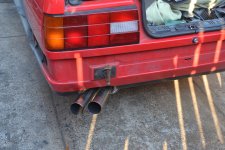
ASBO exhaust tips. Sorry not sorry.

N6amUf0.jpg

Also did more seam sealing and painting. Now at the point where I can start putting it back together. Finally!! :)

Not 100% sold on the exhaust tips to be honest, they are a bit big!! But I think the sound will make it seem worth it... Having heard this backbox on a similar system before, it does sounds the mutts nuts...
 
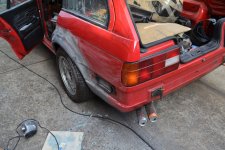
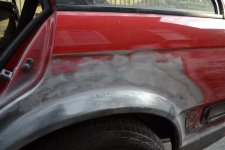
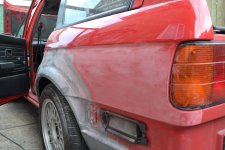
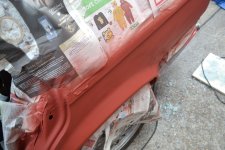
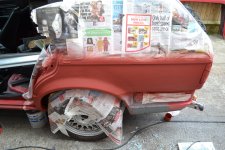
First time with the filler, was a days work... :p

Also featuring can holder.

fDfPt2S.jpg

vkl3fDp.jpg

swvKdJa.jpg

Painted with red oxide.

0Of1NhD.jpg

Not perfect. You can see a high spot I somehow missed... Will need to sort that!

fpij4RZ.jpg

4CtRvdu.jpg

yseaOwA.jpg

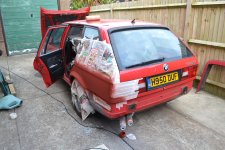
Looking vaguely car-like again... :p

dSxQMGT.jpg
 
I'm sure they will. Otherwise no bodyshop would ever spray old cars. Most of them have filler in them somewhere. Unless you're asking if I will be taking it to a bodyshop like this having just filled it myself? In which case no I'm not doing that, and I can understand why they wouldn't want to. :)

I'm painting these bits with cans for now but it will probably go for a re-spray somewhen in the fairly distant future...
 
Back
Top Bottom