

You are using an out of date browser. It may not display this or other websites correctly.
You should upgrade or use an alternative browser.
You should upgrade or use an alternative browser.
-----'PARVUM MATE'-----
- Thread starter parvumsystems
- Start date
More options
Thread starter's posts- Joined
- 6 Mar 2013
- Posts
- 444

The piece was cut on time however we had to transport it to a secure location to ensure it was safe from the raging Parvum fan girls.

Seeing as its getting rather close to bed time for those in the UK a full size original image has been uploaded for your viewing pleasure
")
Soldato
- Joined
- 29 Dec 2014
- Posts
- 2,627
- Location
- The "North"
Damn, this is gonna look stealthy yet flashy at the same time 
- Joined
- 6 Mar 2013
- Posts
- 444
A work of art!
Truly beautiful
Damn, this is gonna look stealthy yet flashy at the same time
Christ alive, this is going in a special place on my hard drive. The planning and accuracy that this must have needed is incredible. Good job, lads. Keep it coming!
right then.
Thanks for all the support. Really cant wait to see this block filled in person. Should be cracking on with the PSU cable work the coming week.
")
With the hyperblock cut much preparation is required to get ready for fitment of the components. One of the critical things being figuring out how to securelly attach it to the severely cut back M9 chassis, but first... some tapping!
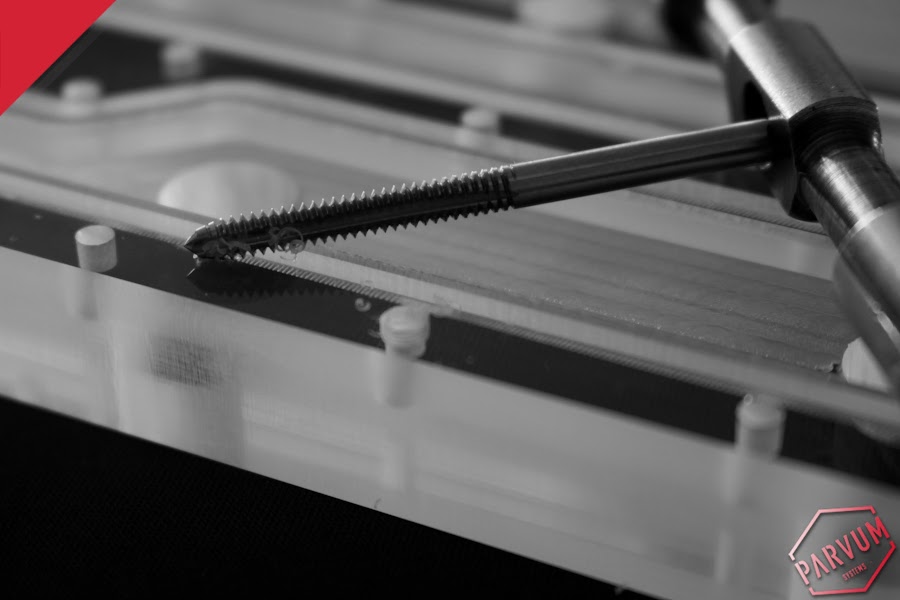

Dat feel when you just tapped 91 holes...

...and there are more on the other side...

With all of the 6-32 threads cut it was time to break out the 1/4" BSPF taps, first using the #1 in a pillar drill to start cutting perpendicular to the piece.


Following that they were finished with the #2 and #3 by hand so I could see how deep to go as a few of the ports were drilled such that the threads would break out the o-ring groove if tapped all the way through.


The GPU cold plate mounting holes didn't quite cut through when the part was machined so they were quickly cleaned out and drilled through while working on the block.

That just left the task of attaching the entire block to the case. Firstly the block was positioned in the case using an off cut of acrylic to pack it to the right height.
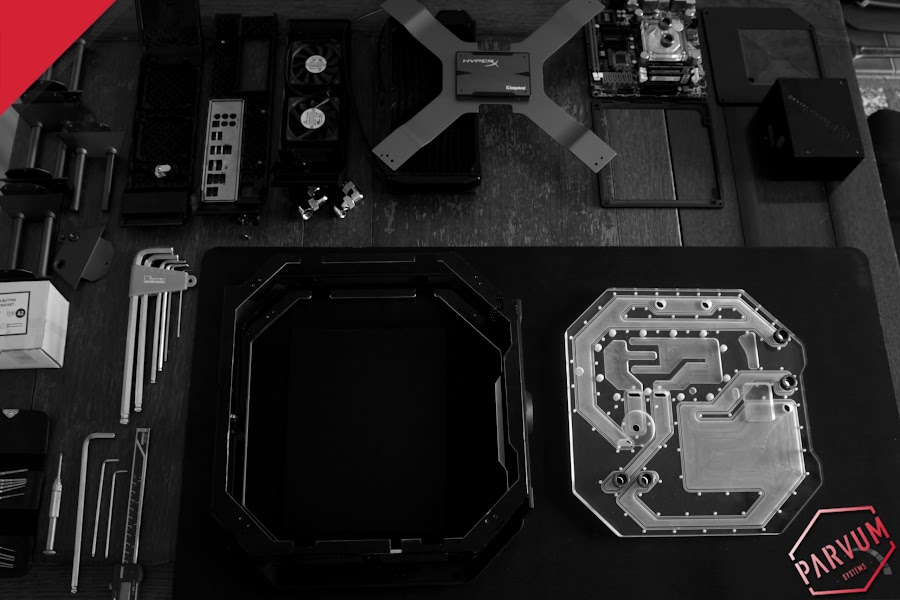
A few solutions had crossed my mind, fabricating further acrylic parts or using Parvum cubes however it had to be something that wouldn't prevent the block being pushed directly on to the ports of the CPU block and radiator.

Looking around the case there was a significant amount of conveniently placed holes hidden behind the plastic exterior panels.


So the block was marked up and drilled into it's sides.

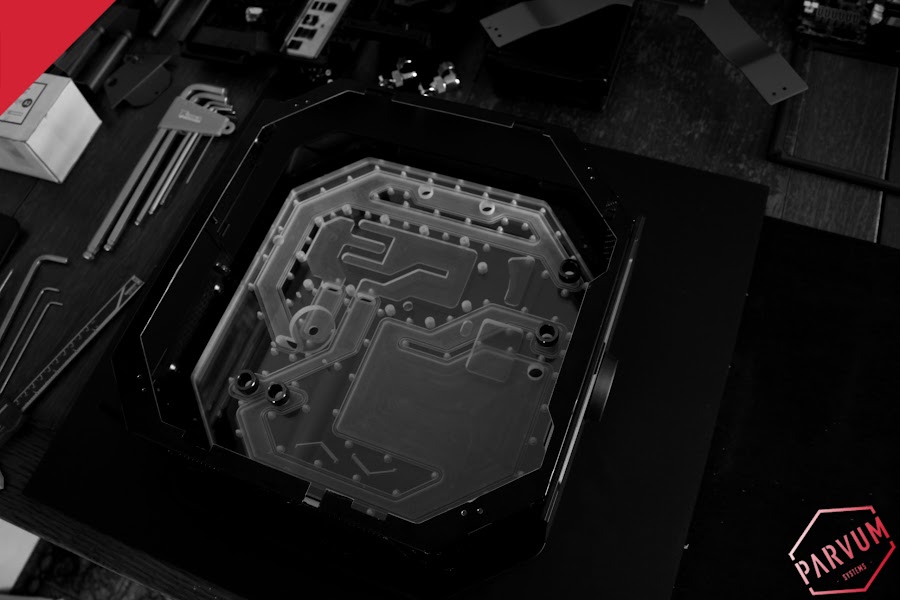
There was some deceptively tense moments as holes and channels intersected each other.

Moar tapping in imersa's favourite thread 6-32 UNC!


With all of that done an initial test fit was in order!

Now i'm just awaiting some more suppliez, to ensure the immense weight of the block is nicely supported I will fabricate some spacers from 4/6mm acrylic tubing so the full force of 6-32 can be felt without distorting the case.
JR
Soldato
- Joined
- 29 Dec 2014
- Posts
- 2,627
- Location
- The "North"
Wow, just wow .
This looks absoloutley fantastic, some genius has gone into this build and it has not dissapointed. Can't wait to see it finished and all assembled
.This looks absoloutley fantastic, some genius has gone into this build and it has not dissapointed. Can't wait to see it finished and all assembled

Soldato
- Joined
- 18 Mar 2012
- Posts
- 5,518
- Location
- Eastbourne
All these builds I see, it makes me want a Parvum more and more, seeing them at i55 didn't help either.
This is insane. The time and effort gone into that block is just something else. Can't wait to see it finished!
This is insane. The time and effort gone into that block is just something else. Can't wait to see it finished!
Associate
- Joined
- 29 Oct 2014
- Posts
- 831
- Location
- Chesterfield, UK
That looks unbelievable

Before, after and during insomnia we managed to squeeze a lot of effort into getting the cables finished for MATE. With it being such an odd form factor there are certainly some obscurities but we are really pleased with the results. Still using up my stock of MDPC-X and many suppliez from Shakmodz I think the entire Parvum team has been involved in making these.
Single SATA power to Silverstone peripheral, this was a critical one due to it's prominent location when viewed from behind.


Cloverleaf male to kettle female mains lead, quite an odd one this for the internally mounted PSU. It's been drastically shortened and cleaned up then hit with double MDPC-X SATA sleeve.


By far the most annoying was this Silverstone 8-pin to dual PCI 6-pin. Many splits and weird little short wires to sleeve, easily four times the work of a straight 6 to 6.


This was some weird IO connector for the front panel of the case, quite similar to an internal USB except smaller.

Pretty straight up SATA data, i'm a big fan of latchless SATA's for baby builds.


Beast of a 24-pin, Silverstone made this super easy with the pinout. Definitely looks weird until you see where it fits.


These all tested first time so it's on to final assembly for MATE! Much excite.
JR

Before the final assembly could commence, there was one important job still left to do. Cut the tubing!

Thankfully that didn't take very long


Final preparations to the block, GPU power attached, tubes inserted and greased.
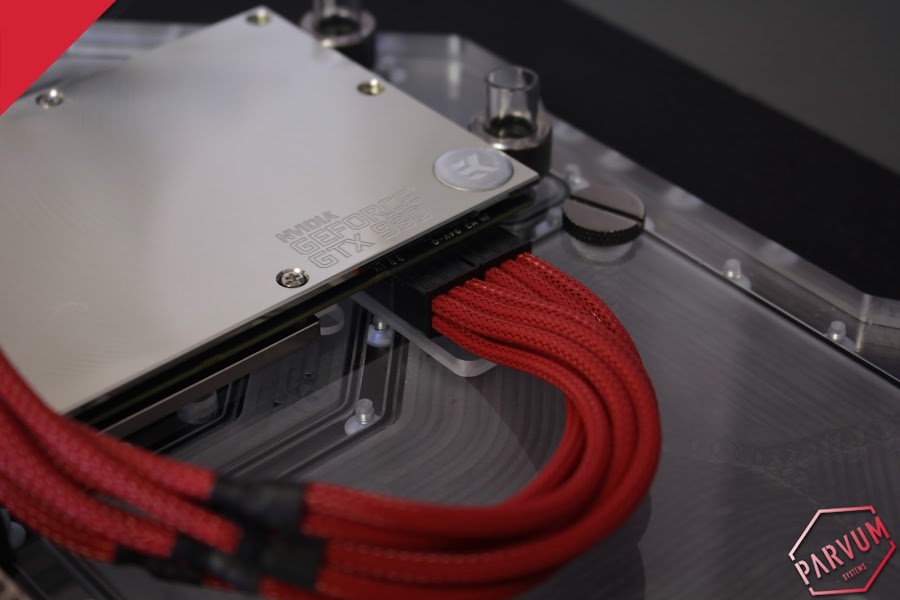


So close now!


Once the block is pressed into place 4 screws secure it in position.


With everything united the exterior cladding of the case can go back.

I guess that just leaves... coolant...

Sorry I couldn't get more pictures of the process, most things required about 9 hands to simultaneously align pipes, screws, cables, risers and the physical part which fits the case with 1mm clearance on all sides. The block looks to have sealed perfectly and things are gradually settling in.

As with most builds there are a few little things that need addressing before it's finalized. The pump is if anything a little too effective and the PCIe riser is dangerously short, easily solved, at least the block is solid.
JR
Associate
- Joined
- 26 Aug 2015
- Posts
- 57
- Location
- York
Beautiful work dude