Rise of the triad, The 2014 Area 51

Soldato
OP
Joined
23 Apr 2010
Posts
11,890
Location
West Sussex
3-2-1 GRRR.

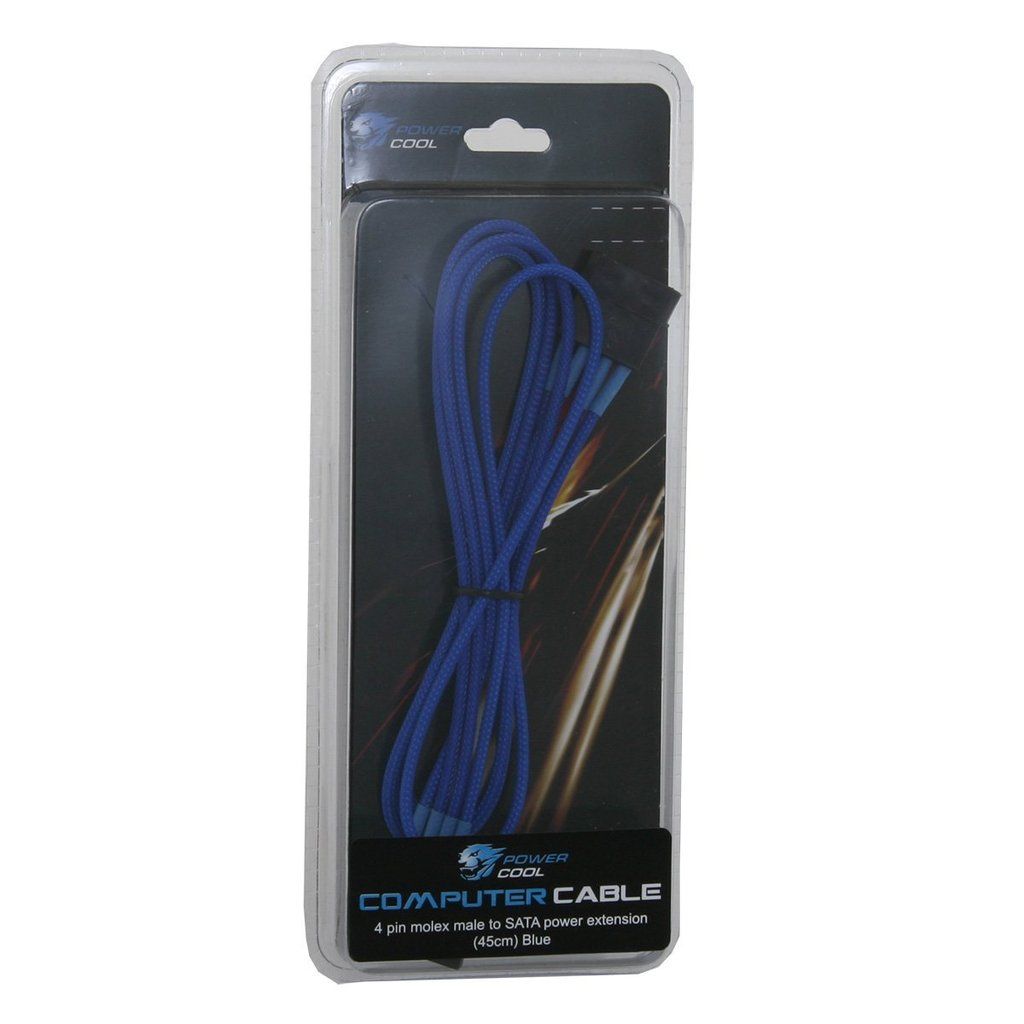
SATA cable issue !. I ordered these the other day.


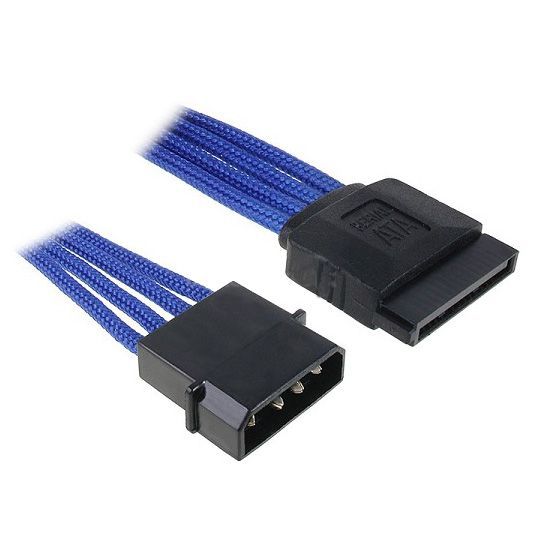
They were supposedly Powercool cables. However, I was beginning to seriously doubt that because they look like paracord to me. I was right to have my doubts too, as the cable in the picture is actually a Bitfenix Alchemy. It seems that somewhere every single vendor online selling these Powercool cables got the wrong memo and are actually selling these.


HONK HONK. Nasty shrink, not even black. So I grumbled to the seller who said to return them. However, when my eyes had gotten over the nasty shock I decided to take a closer look. It turned out that the braid went all the way up and was clamped in :confused: so the shrink was completely unnecessary. Why on earth would you use honking nasty shrink in a god awful shade of blue if it wasn't even necessary?

The mind boggles. Any way, thankfully I did not snap any of the little plastic flaps (lol) and they all look quite nice now.

Sorry for lack of updates BTW. Had two days from heck and am finally back to normality.
 
Soldato
OP
Joined
23 Apr 2010
Posts
11,890
Location
West Sussex
OK so final test fit and adjustments (cable holes for SSDs etc)


I've also edged off the purple cover so it should look nicer and have filled the panels ready for final final prep :D


Next stage : test painting different types of plastic to see how they react.
 
Soldato
OP
Joined
23 Apr 2010
Posts
11,890
Location
West Sussex
Things that go 'eww' in the night. OK so today I decided to give my hands a rest from being in dirty water etc and sort out the cards. If you have been reading this log daily you will remember I modded the sound cards but stopped short of finishing them because time ran out.

OK, so today I wanted to finish up the sound cards as well as take care of a couple of other things.

1. Stop the Asus RAIDR (the PCIE SSD) lighting up red. I hate it, I hate it I hate it.
2. Paint the edges of the sound cards.
3. Remove annoying white sticker on top of Asus D2X that you can see.
4. Change the Titan X. I liked it, but I have now decided on a different theme for it, I think it will look better :)

OK so if you take a look at the rig here and look at the arrows you can see the offending areas.


Right, so first I took out the XFI Titanium HD.


And took it apart.


Matt black model paint and some cotton buds.


And fashion a holder out of a clamp and plenty of tissue.


And then paint. The technique I used was to basically squeeze paint into the tip of the bud until it was nice and full then simply roll the bud along the edges. Don't try and paint, the cotton bud will get ripped to bits.


And now it was Asus' turn.


Yay.


Then the Titan X came out (god, what a faff that was !)


And the shoulder.


OK so I was going to paint the edge I promise. Then I remembered this is a very very expensive card and it's still in warranty. Having said that, looking at the rig now? there's a very strong possibility I will do it.

 
Soldato
OP
Joined
23 Apr 2010
Posts
11,890
Location
West Sussex
Machining the nose cone by hand. OK, so as you saw I cut out the centre of a fan a few days back and then shaped it and polished it by fitting it into a drill. I wanted a secondary piece that I could mount it to but I wasn't quite sure of what I wanted. Then I came up with an idea for a base that I could then light up.

So it basically went 3mm black acrylic - 5mm smoked acrylic - 5mm black acrylic - 5mm smoked acrylic - 3mm black acrylic.

I cut out all of those with my donut cutter that was sadly a bit blunt, so it was kinda rough as you can see from the pic.


As you can see I have put a bolt through the sanwich and done it up in order to make them all weld. I put that into the drill and set it to reverse.


And began shaping with aluminium fabric sand paper.


Checking the measurements as I went...


Then I started to wet sand. I went 400 - 600 - 800 - 1000 - 1200 - 1500 - 2000 - 2500 - 3000 - 3500.


And with it off the drill you can see the layers now.


And a test fit for size.


Fits perfectly. The only thing I don't like is how one of the joins is not so good and the line sticks out. However, it doesn't look like that when the cone is wet so I think I am going to just blow it over with some clear coat.
 
Soldato
Joined
4 Jun 2007
Posts
2,645
Location
Watford, UK
Very nice. Wish my attempts at black Hammerite were as even :(
Runs: check. Wrinkles: check. Dry patches: check Bubbles: check. It's only for protection from the weather but still, doesn't mean a bad job sits well.
 
Soldato
OP
Joined
23 Apr 2010
Posts
11,890
Location
West Sussex
Painting anything is all about prep fella. The more time you put into prep the better the finish will be.

Paint has improved over the past few years so long as you avoid the cheap crap. You can get a very good finish on things these days with a rattle can but that doesn't mean prep is any easier.

Talking of prep I had an idea last night, given that the weather has been playing peek-a-boo. Watch this space :D
 
Soldato
OP
Joined
23 Apr 2010
Posts
11,890
Location
West Sussex
Another side project. However, this one is very important. I won't say what it is yet, let's see if any one can guess :D (and no, me making a huge mess doesn't count :p )

OK so last night I was poking around on Ebay (as you do) and I saw something that filled me with want. However, it was expensive and when I broke it into logic I realised I could make my own for almost nothing.

So the first thing I needed to do was empty out two plastic storage boxes (I know right, this is weird but I promise it will make sense in the end !)


I then needed to mark and draw lines so I busted out the heavy gear, my metre ruler.


And drew a line.


And then drew another line.


Then I marked the centre and two more markings 1/4" apart.


Then came the "lots of markings" bit.


And then I went off to the kitchen and drilled some holes, then drew a cross through each set to make a centre point.


And cut them out.


It then looked like this after I had cut along all of the lines.


Then it was time to introduce the other box. I bolted it on.


And cut a third hole in the bottom.


And maybe this pic will help people to identify what it will be. A hint, this pic is side on.


And a final clue.


And a video :)

https://www.youtube.com/watch?v=QWtq_W93XWg&feature=youtu.be
 
Soldato
OP
Joined
23 Apr 2010
Posts
11,890
Location
West Sussex
Time to explain :)

It's a paint booth. I saw this on Ebay a couple of nights ago.


It costs £60. However, firstly it's too small (I would not be able to rotate the parts) and also it's for air brushing, not painting out of a fast rattle can. I did some research and it appears it has one 120mm fan in the front behind that blue paper filter. That's it. Inside it is stuffed with the same breathable fluffy stuff you find inside a fake pillow (I only have feathers me).

OK so you can see how I have sort of copied the design, only made it much larger. I am also using two 120mm Nidec fans (brutal) for extraction and then a further 92mm fan on a 120mm plate for exhaust.

OK, so basically at the back I am going to insert this (£2, tumble dryer hose)


I am then going to snip around the edges and duct tape it. Then i put on the back fan and bolt it in and hey presto, we have exhaust. Not sure the Polish bloke in the flat downstairs will appreciate it when he sees it dangling out of my window but DILLIGAF right?

The front paper filter is nothing but this.


£1. And of course I will need me one of these.


£6. The only other thing I will need is this, which is £3.


That goes inside and prevents the fans from sucking in the fluff. As for the fluff? we're due some new pillows ;) (we're actually not, but hey, we are now :D )

Oh BTW you may be saying to yourself "But it's full of gaps !" Yeah, I know :) that's where liberal use of Gorilla tape will occur :D
 
Soldato
OP
Joined
23 Apr 2010
Posts
11,890
Location
West Sussex
Some more work on the nose cone :) First up I did some measuring and calculating and soldered two LEDs together like this. This is so that when fitted they will be at the right place to light up the clear rings in the bottom.


OK so they are stacked 5mm apart. I then shrunk and braided them.


Machined a channel into the bottom.


And built.


And how it will look.


All I need now is another of those adjustable voltage PCBs so I can put exactly 3.5v through it. I've fitted the resistor into the cable :)
 
Back
Top Bottom