

You are using an out of date browser. It may not display this or other websites correctly.
You should upgrade or use an alternative browser.
You should upgrade or use an alternative browser.
Tiger Style: Build log
- Thread starter w3bbo
- Start date
More options
Thread starter's postsSoldato
- Joined
- 11 Mar 2008
- Posts
- 3,259
- Location
- Norn Iron
sorry to jump in here as a new member but id just like to thank the OP as he made the difference between me thinking "hmmm will i water cool or not" and taking the plunge.
This work log and others are quite inspiring its only a shame my ham fisted efforts may not work out so well but this thread was def one of the embers which sparked up my interest")
This work log and others are quite inspiring its only a shame my ham fisted efforts may not work out so well but this thread was def one of the embers which sparked up my interest

Did a few more little bits and pieces over the weekend :
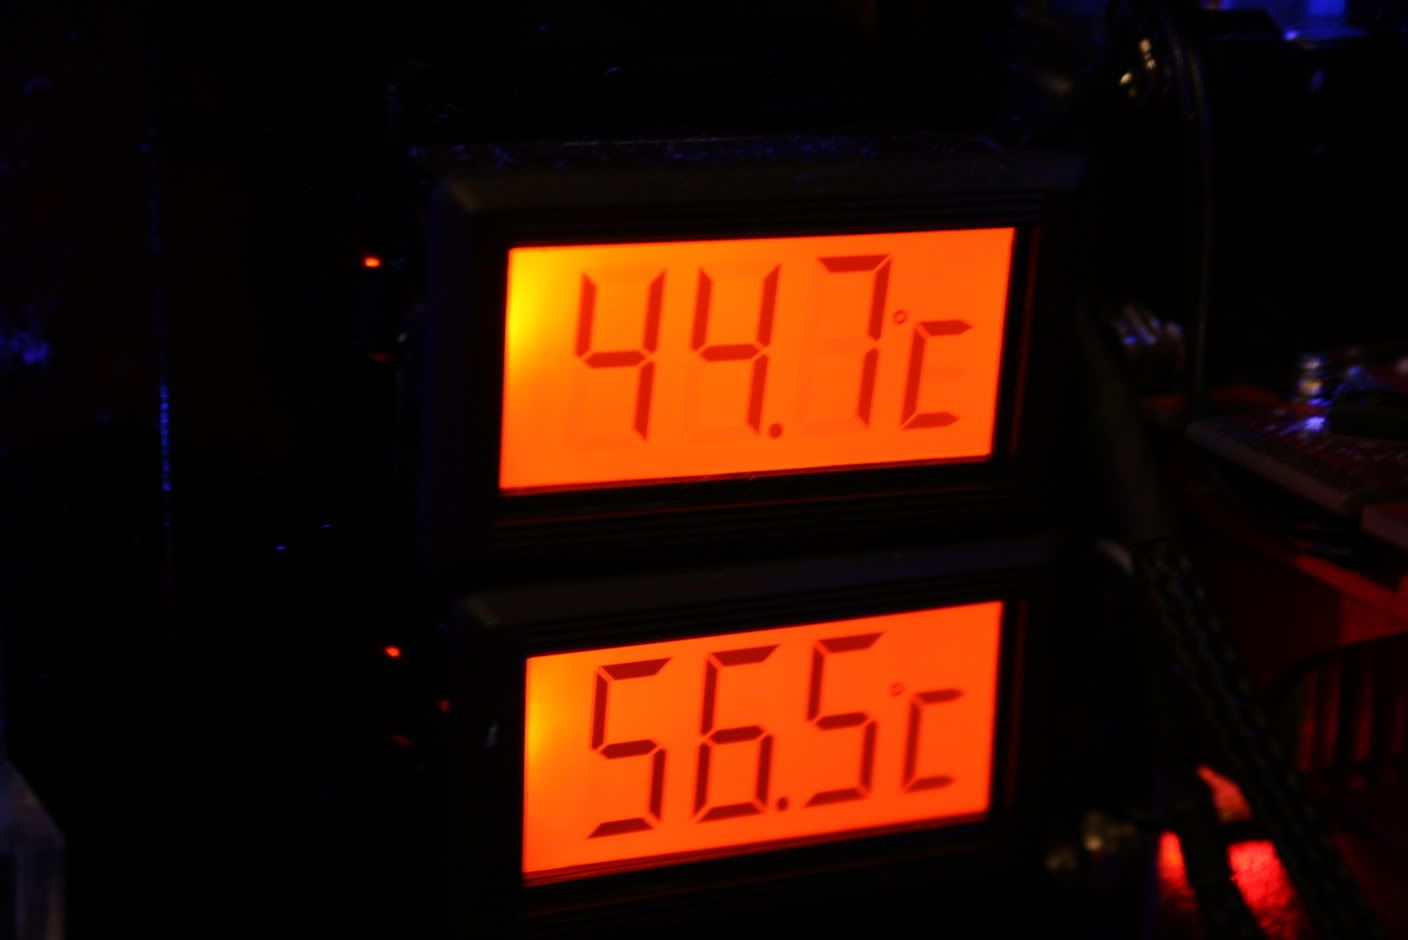
A pair of Temp gauges (orange of course!). Top is the board mosfet temp and the bottom is the exhaust air from the 3870x2.
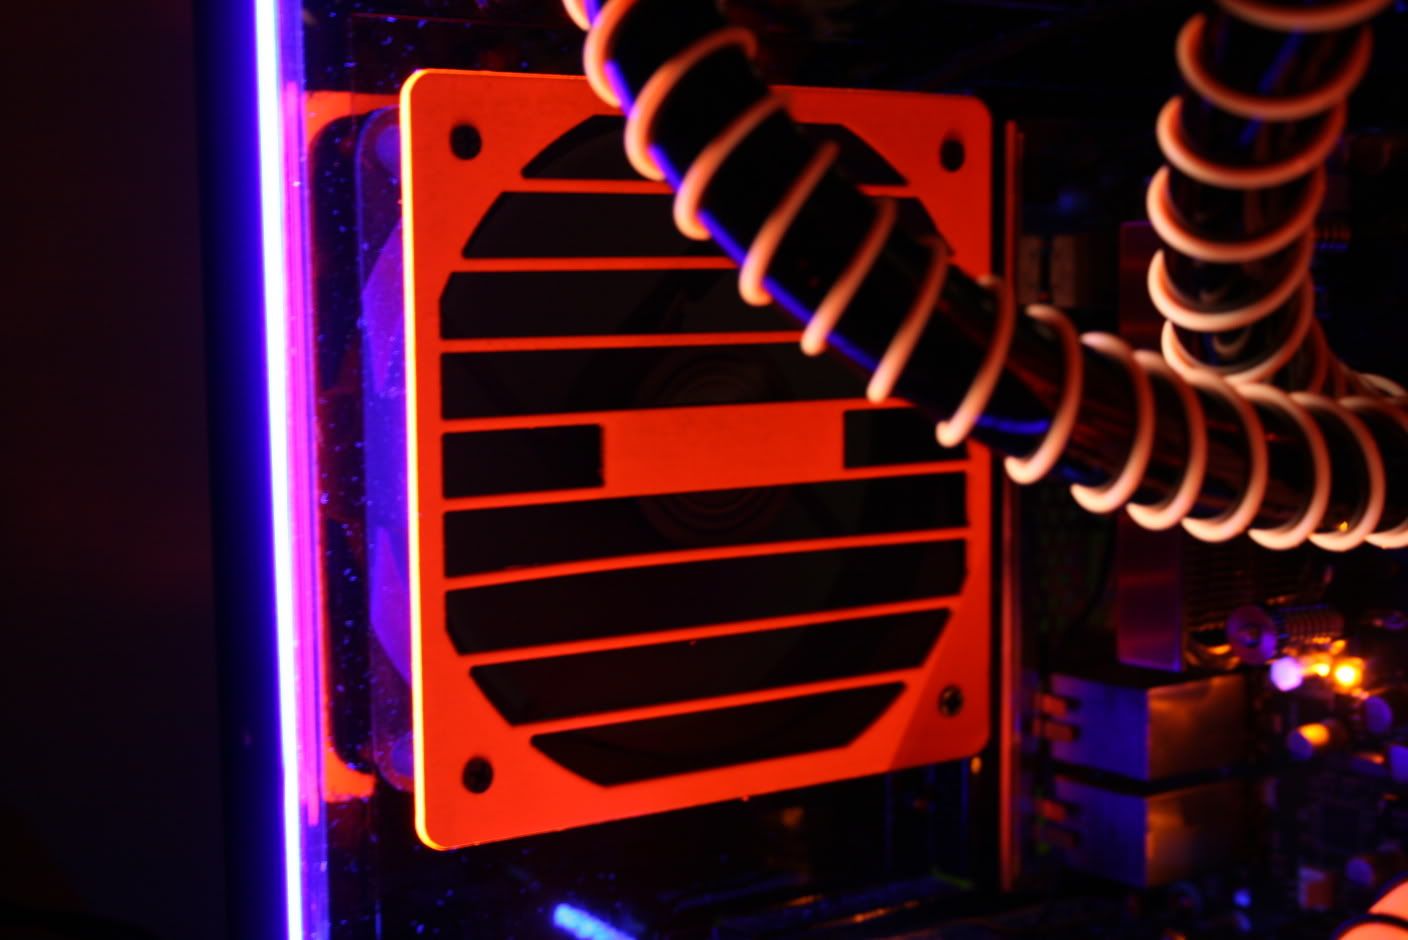
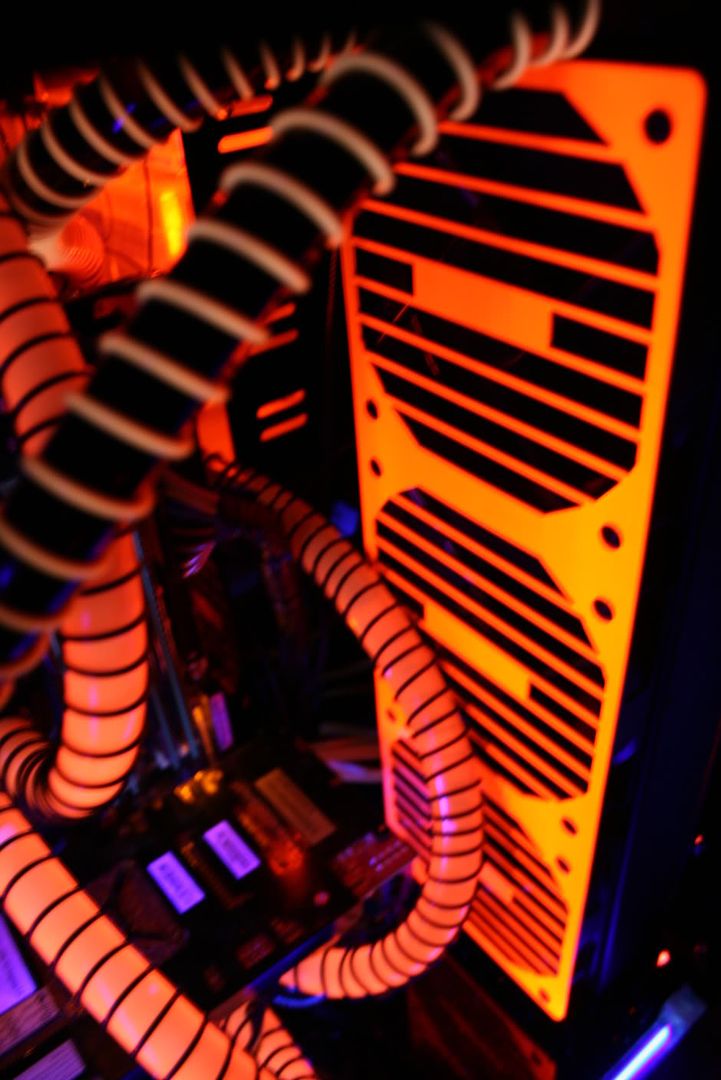
I also painted a couple of thermochill grills for the inside of the case (black powdercoated ones just arrived for the exterior), a 120.1 and 120.3 which look great under UV and perfectly match the theme:
I still need to even out the coils but thats will be one of the last things I do after doing the final cable tidy.
More to come soon....
A pair of Temp gauges (orange of course!). Top is the board mosfet temp and the bottom is the exhaust air from the 3870x2.
I also painted a couple of thermochill grills for the inside of the case (black powdercoated ones just arrived for the exterior), a 120.1 and 120.3 which look great under UV and perfectly match the theme:
I still need to even out the coils but thats will be one of the last things I do after doing the final cable tidy.
More to come soon....
Associate
- Joined
- 19 Sep 2006
- Posts
- 1,266
- Location
- MCR/North Sea
fantastic work mate, really impressed with the time and effort
Coming along nicely w3bbo!
Very good thread with all the info and pics n what not!
Whats this Feser name I keep hearing in watercooling thread? special coloured water or?
I'm liking all this LED modding stuff, did you read up how to do it on the web or do u have a basic background in electronics?
Very good thread with all the info and pics n what not!
Whats this Feser name I keep hearing in watercooling thread? special coloured water or?
I'm liking all this LED modding stuff, did you read up how to do it on the web or do u have a basic background in electronics?
Cheers lads. I make no bones of the fact that my soldering skills leave a lot to be desired. I just asked around, read up a few things and cracked on with it - pretty much self taught. Having an old psu and leds that cost £3 for 100 also helps as you don't mind if things go pop when you get it wrong. 
Feser comes in either pre-mix or dye. I have had some good (green/blue) results and some very poor results (purple/orange). If you stick to green blue then feser is quite good and I know a couple of people who have had massive leaks but their components still worked afterwards - a testiment to feser's non conductive properties (or luck!).
Feser comes in either pre-mix or dye. I have had some good (green/blue) results and some very poor results (purple/orange). If you stick to green blue then feser is quite good and I know a couple of people who have had massive leaks but their components still worked afterwards - a testiment to feser's non conductive properties (or luck!).
Ok so its not water then?testiment to feser's non conductive properties (or luck!).

Well it is yeah, with dye in it. I don't know the 'secret recipe' but distilled isn't very conductive afaik as all the minerals (that conduct electricity) have been taken out thus making it non conductive.
I have gone of dyes and prefer coloured tubing these days as all clear tubing eventually goes 'milky' which requires replacing, dyes only accelerate this process. You don't really get that with coloured tubing so maintenance is a lot less.
I have gone of dyes and prefer coloured tubing these days as all clear tubing eventually goes 'milky' which requires replacing, dyes only accelerate this process. You don't really get that with coloured tubing so maintenance is a lot less.
Last edited:
Soldato
- Joined
- 30 Dec 2004
- Posts
- 4,681
- Location
- Bromley, Kent
Well it is yeah, with dye in it. I don't know the 'secret recipe' but distilled isn't very conductive afaik as all the minerals (that conduct electricity) have been taken out thus making it non conductive.
Aye water (H2O) is an insulator, its the minerals and dirt that conducts
I'm loving this build w3bbo, looks damn good, can't wait for it to be done
- Pea0n
It's almost done now m8 just waiting for a couple of 60mm fans(!) to arrive and some more UV paint for the last mod and then its pretty much complete, save for an imported custom etched acrylic psu plate .
.
Needs another wash'n'wax tho before the final shots as the fingerprints on this case are a nightmare!
.Needs another wash'n'wax tho before the final shots as the fingerprints on this case are a nightmare!
")
Update :
OCZ Ram cooler
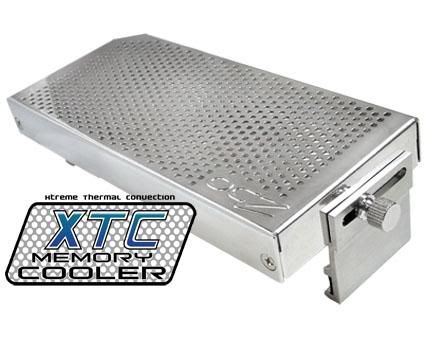
I bought this ram cooler after having one previously and being impressed with it. However three things let it sown imo. The fans are a little 'whiney' and get a little irritating after a while and they also don't exactly push a lot of air. They are also blue led versions which dont fit in well with my build at all. So I got a couple of replacement fans:
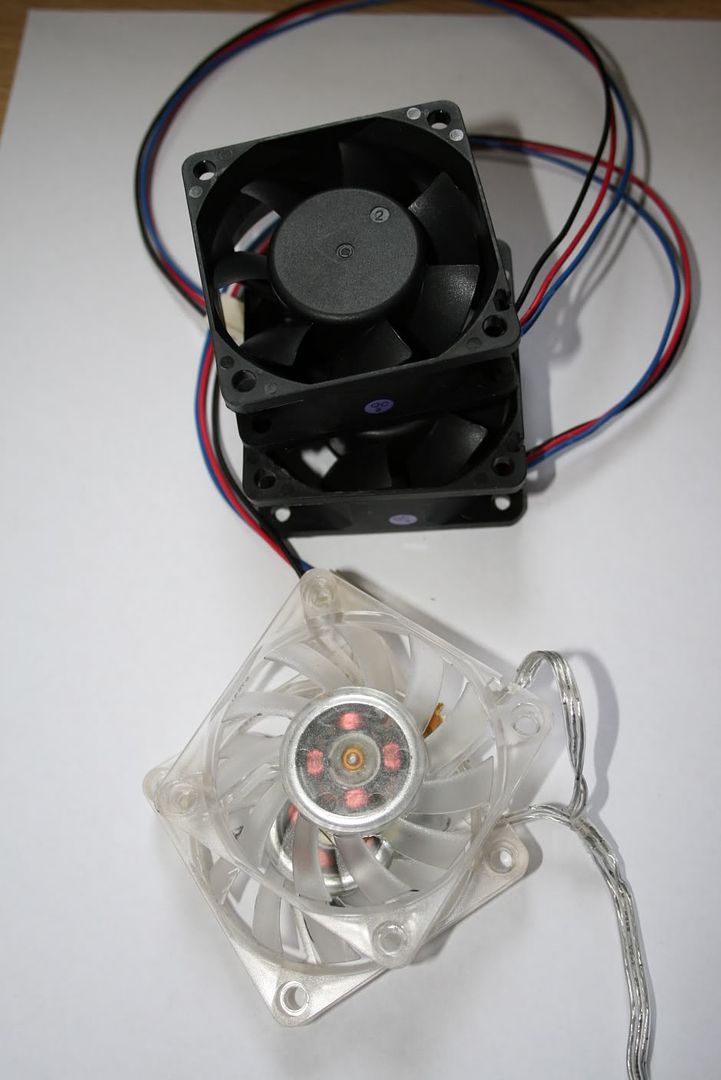
These 60mm fans are almost twice as thick as the original fans but push a lot more air through without being 'whiney'. They are however very loud as you would expect being 60mm but run quite @60% speed while still pushing more air than the stock fans. Fitting them was relatively easy as I just bent out the original screw holes and then bent them over the top of the new fans after they were replaced. So thats the blue led, noise and airflow problem sorted - now onto the aesthetics.
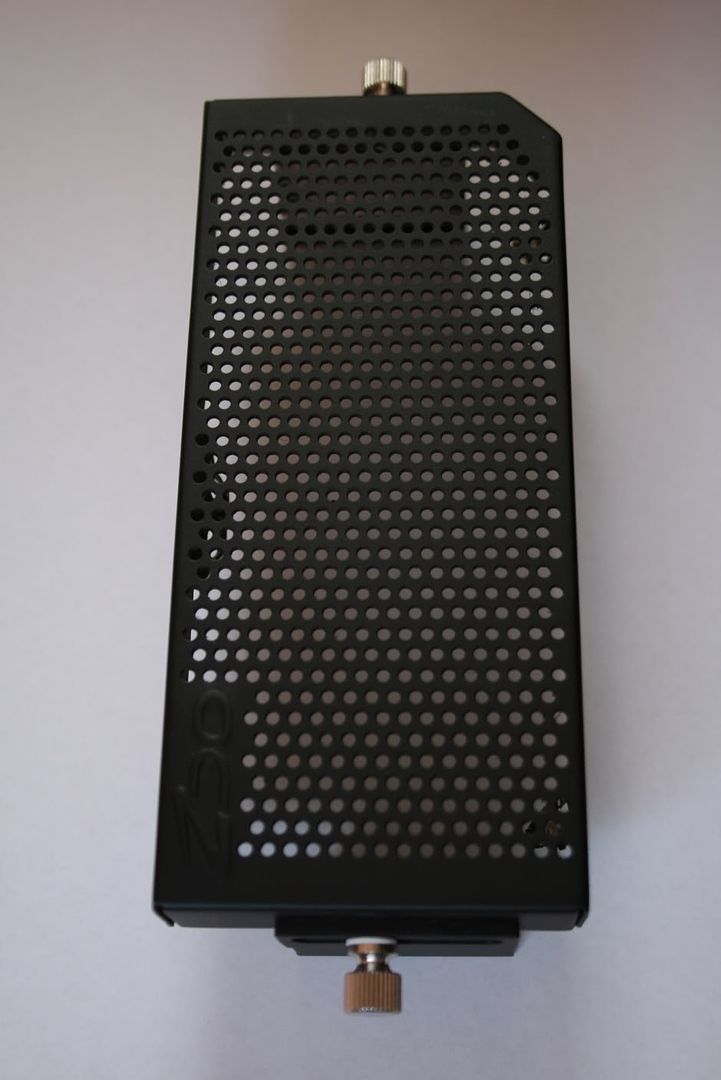
The main unit, while having a fantastic chrome effect sticks out like a sore thumb in my new build so something had to be done about it. A little sanding, priming and spraying and hey presto, a more sullen but subdued look:
OCZ Ram cooler
I bought this ram cooler after having one previously and being impressed with it. However three things let it sown imo. The fans are a little 'whiney' and get a little irritating after a while and they also don't exactly push a lot of air. They are also blue led versions which dont fit in well with my build at all. So I got a couple of replacement fans:
These 60mm fans are almost twice as thick as the original fans but push a lot more air through without being 'whiney'. They are however very loud as you would expect being 60mm but run quite @60% speed while still pushing more air than the stock fans. Fitting them was relatively easy as I just bent out the original screw holes and then bent them over the top of the new fans after they were replaced. So thats the blue led, noise and airflow problem sorted - now onto the aesthetics.
The main unit, while having a fantastic chrome effect sticks out like a sore thumb in my new build so something had to be done about it. A little sanding, priming and spraying and hey presto, a more sullen but subdued look:
Now while black looks a lot better, I still felt it still didn't 'fit' with my theme. It left a big dark area on the motherboard area which looked kinda out of place. I tried using some orange leds behind the mesh but that didn't look right either so I got a little creative:
Note to self - must wait for things to dry before taking pics :
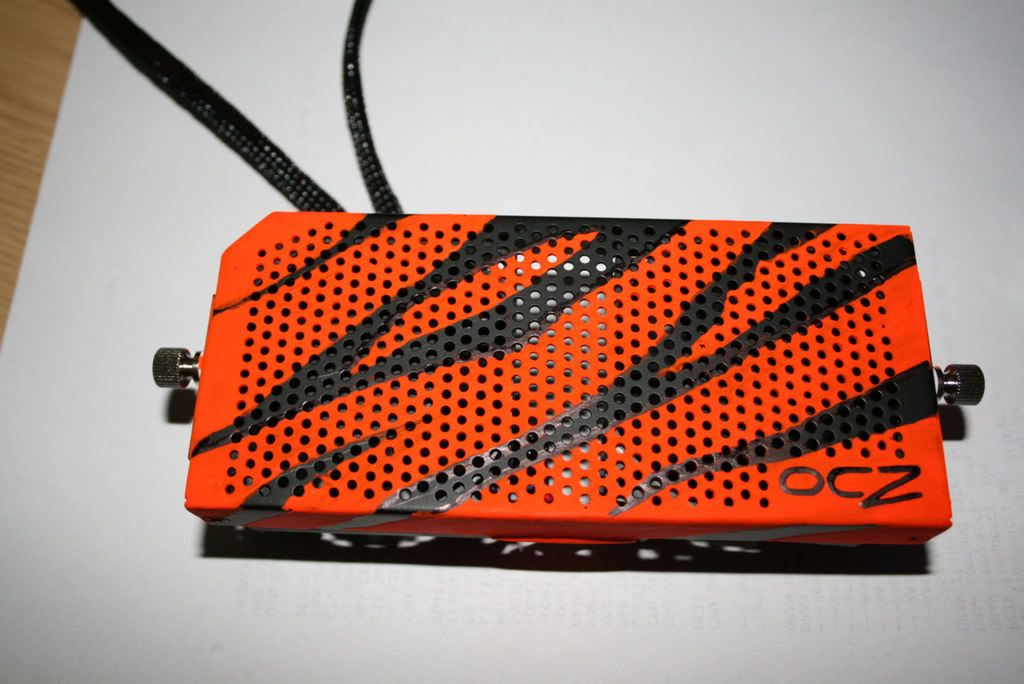
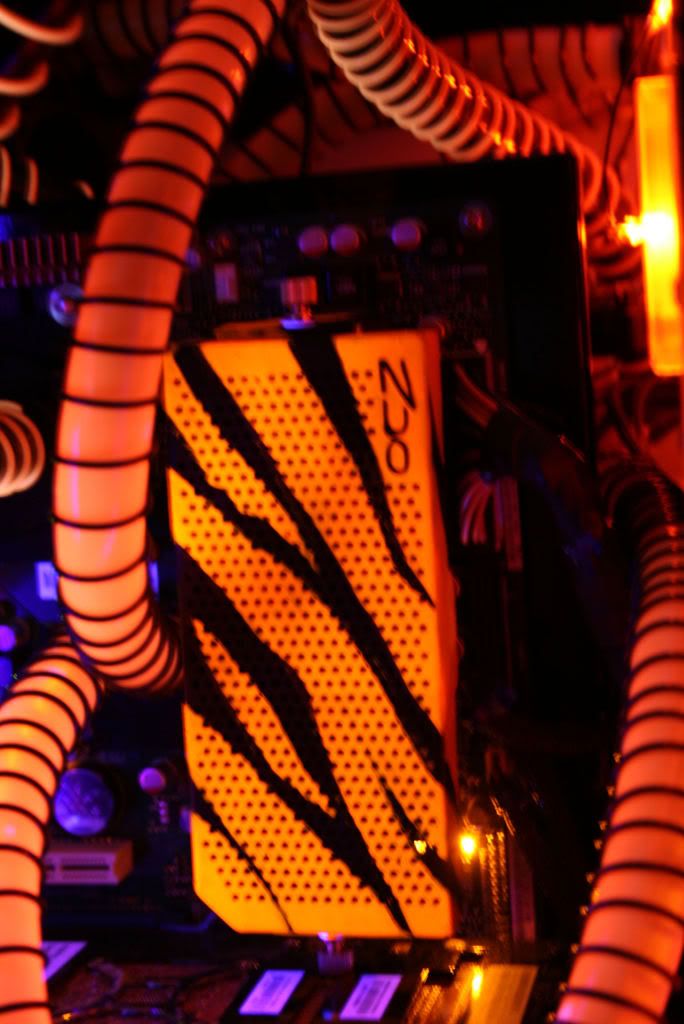
The paint is AC ryan acrylic UV wasn't exactly easy to use on a mesh surface but the effect I was after comes out fine under UV I think you'll agree:
Well thats pretty much all the work done now so I just need to do a few tidyup operations and then I'll take the 'money' shots.
Note to self - must wait for things to dry before taking pics :
The paint is AC ryan acrylic UV wasn't exactly easy to use on a mesh surface but the effect I was after comes out fine under UV I think you'll agree:
Well thats pretty much all the work done now so I just need to do a few tidyup operations and then I'll take the 'money' shots.
Last edited:
