circa 1970 Honda Monkey Bike- Project/Resto

Transmission breaker
Don
OP
Joined
20 Oct 2002
Posts
16,809
Location
In a house
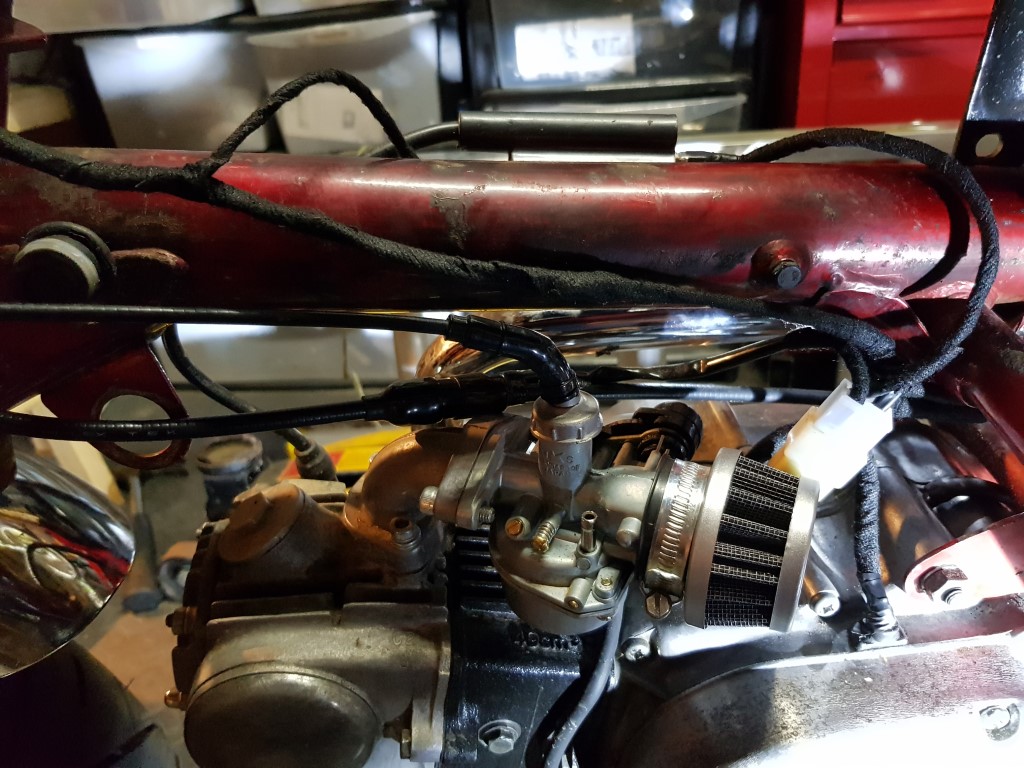
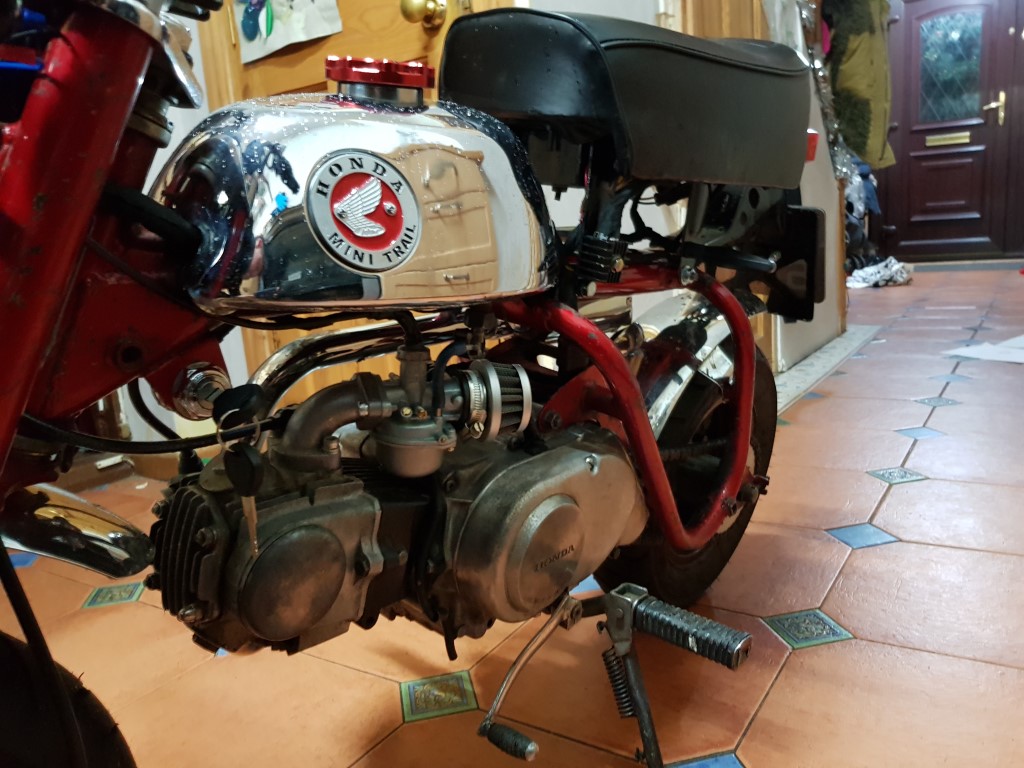
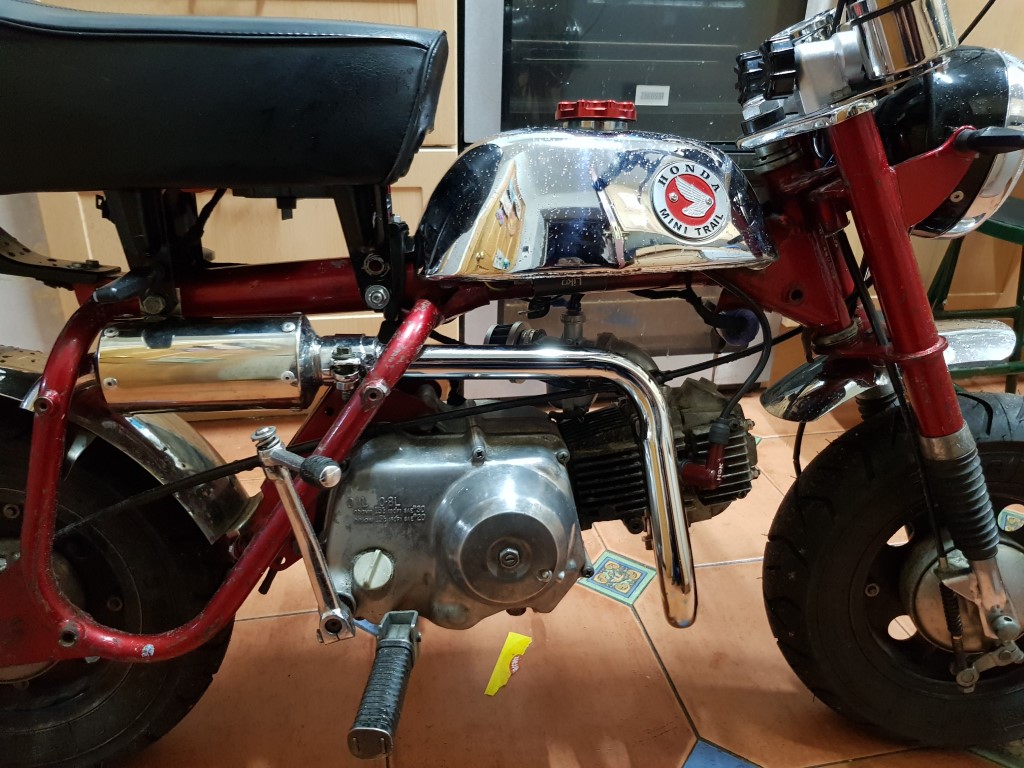
So after some discussions with the vendor and fitting a rev counter for testing on some longer trips, I am almost certain this lack of speed is down to gearing. (27mph at the 8500 rpm in third)
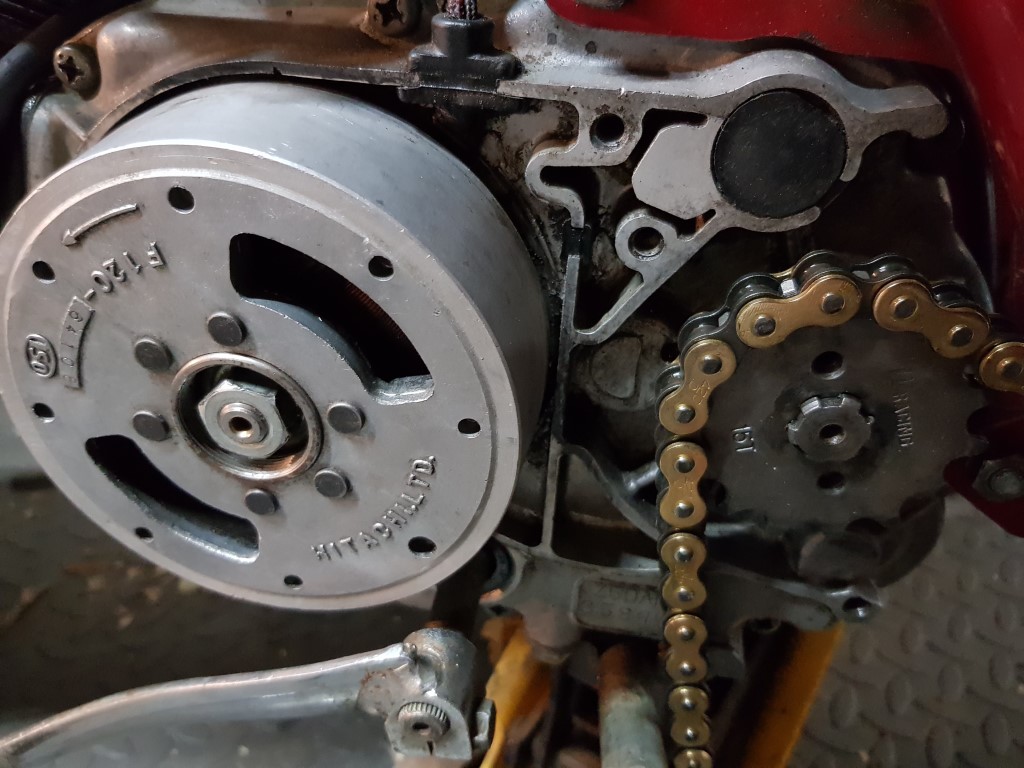
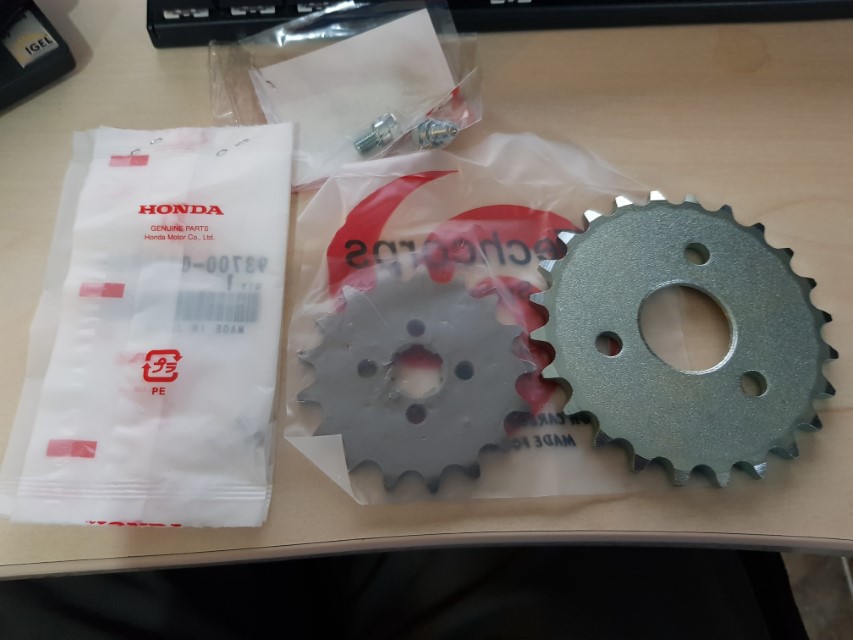
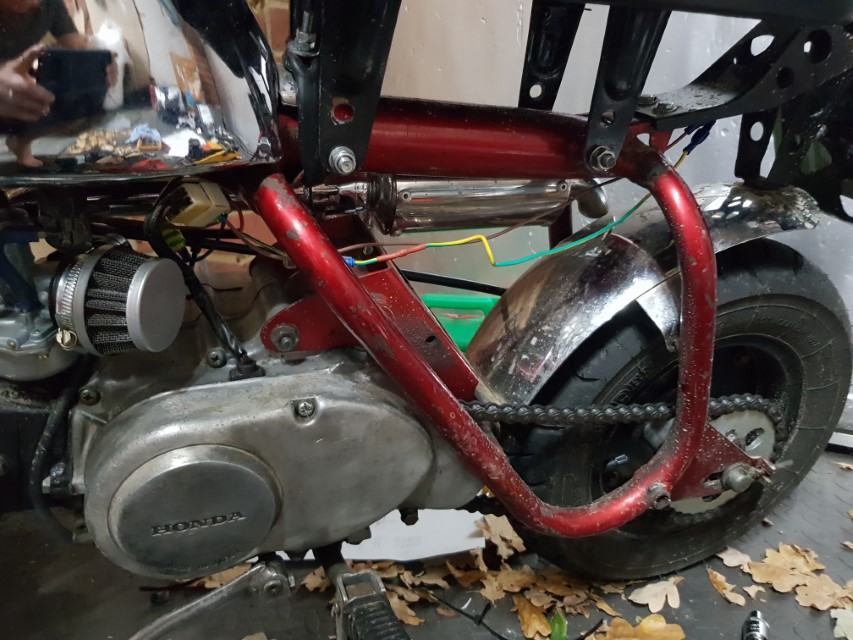
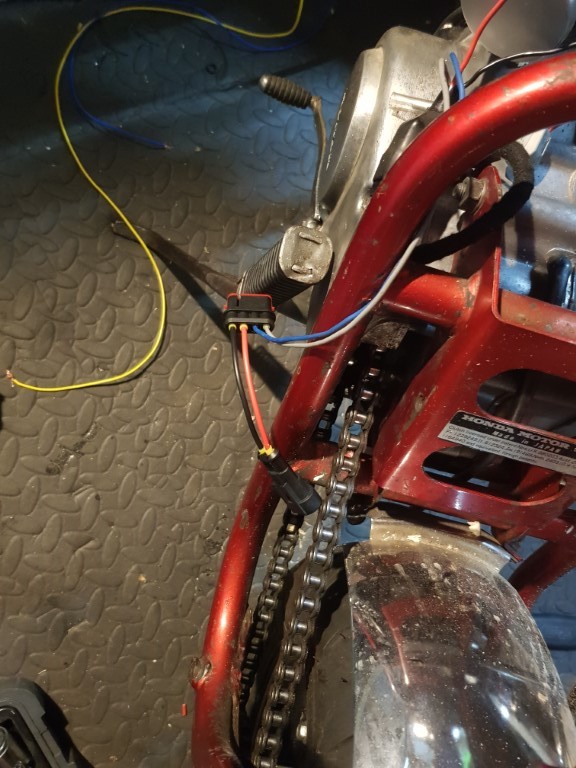
Going to try a few larger front sockets. Standard is 13t, so going to get a 14t and 15t to try ASAP.

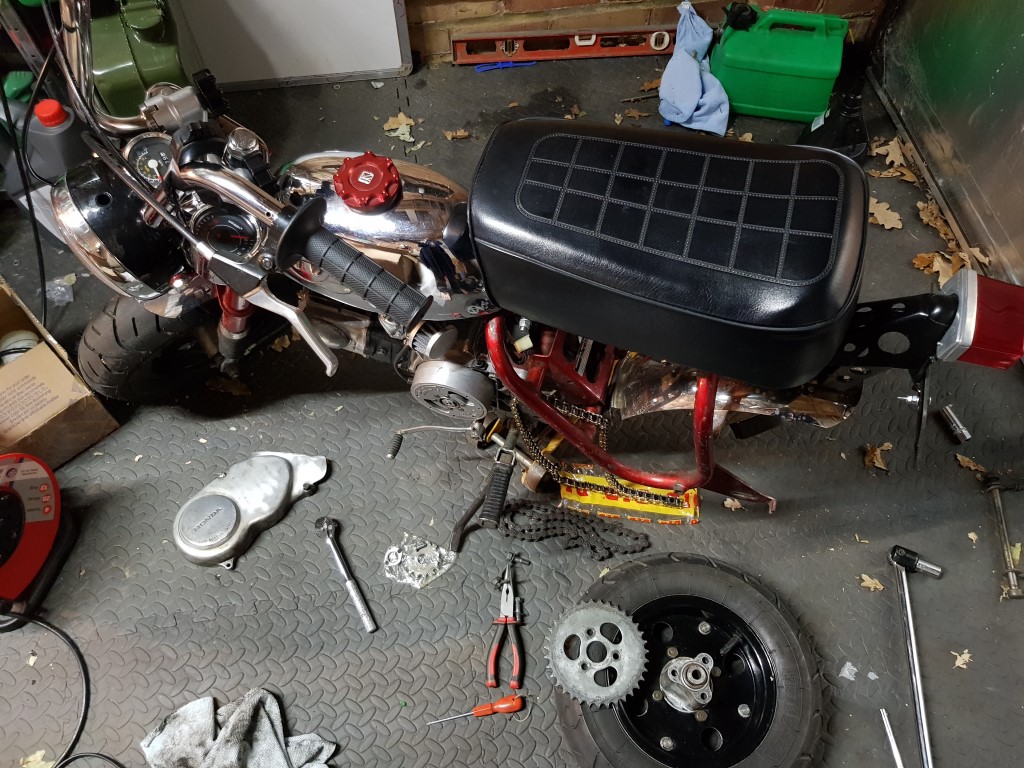
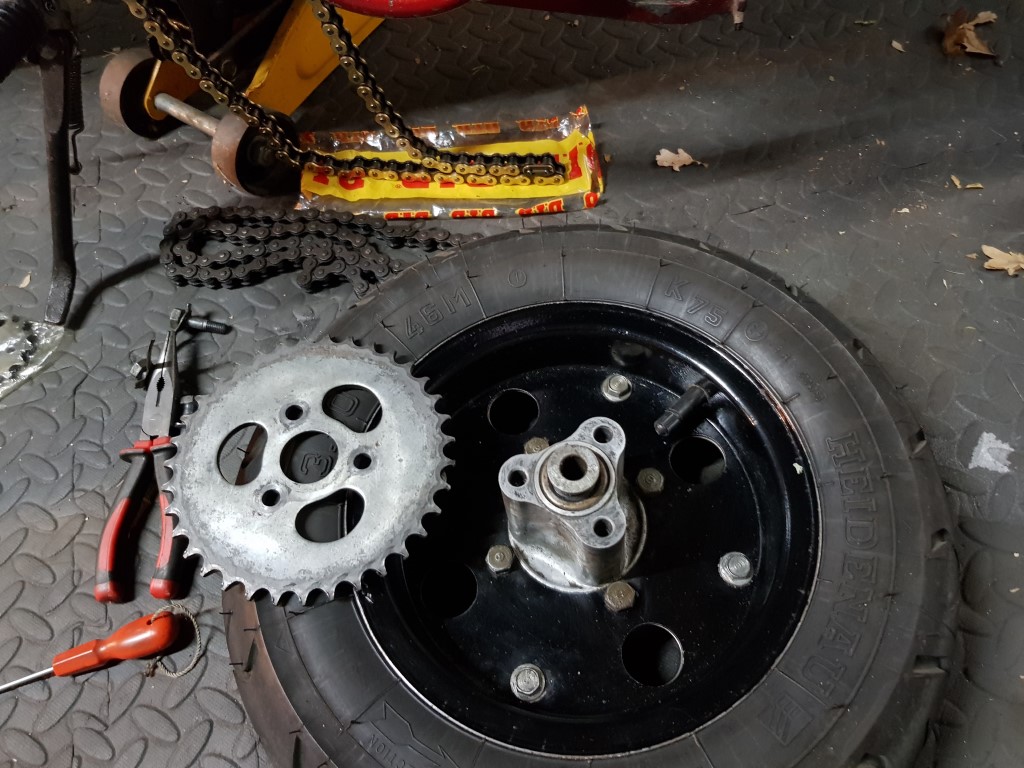
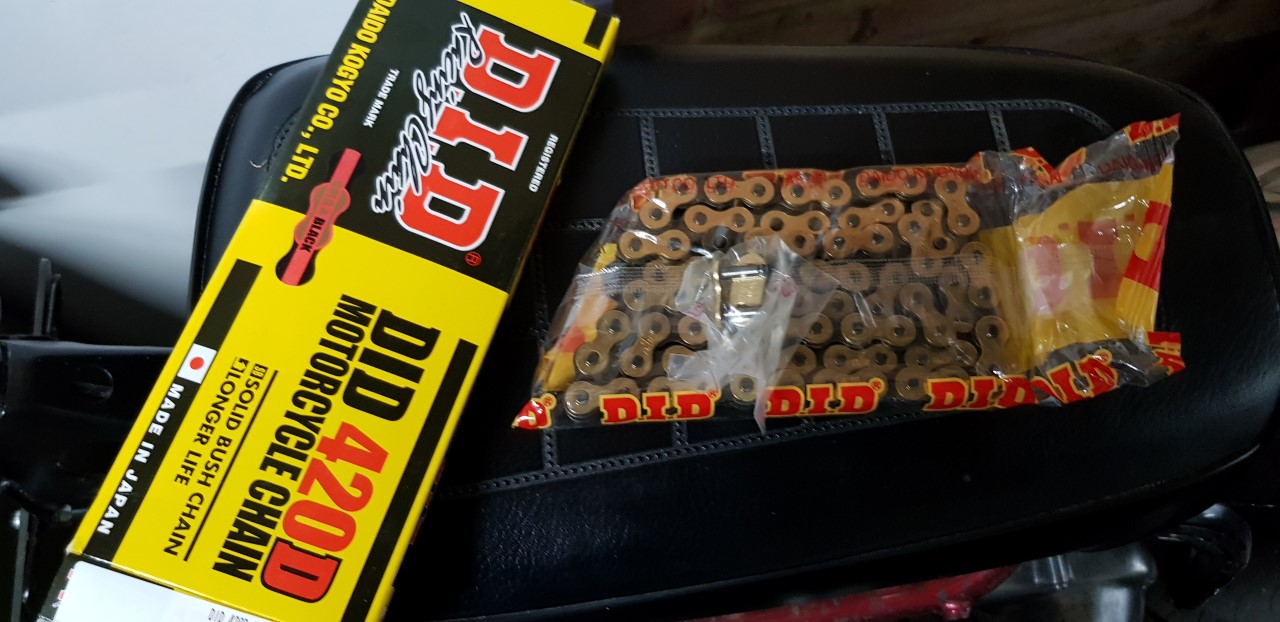
Yup, just ordered a 15t front and 31t rear. Should get me about 30% increased top speed, and a corresponding lower acceleration. But as first gear is almost useless, I hope this will be fine, and just make it seem a bit longer!

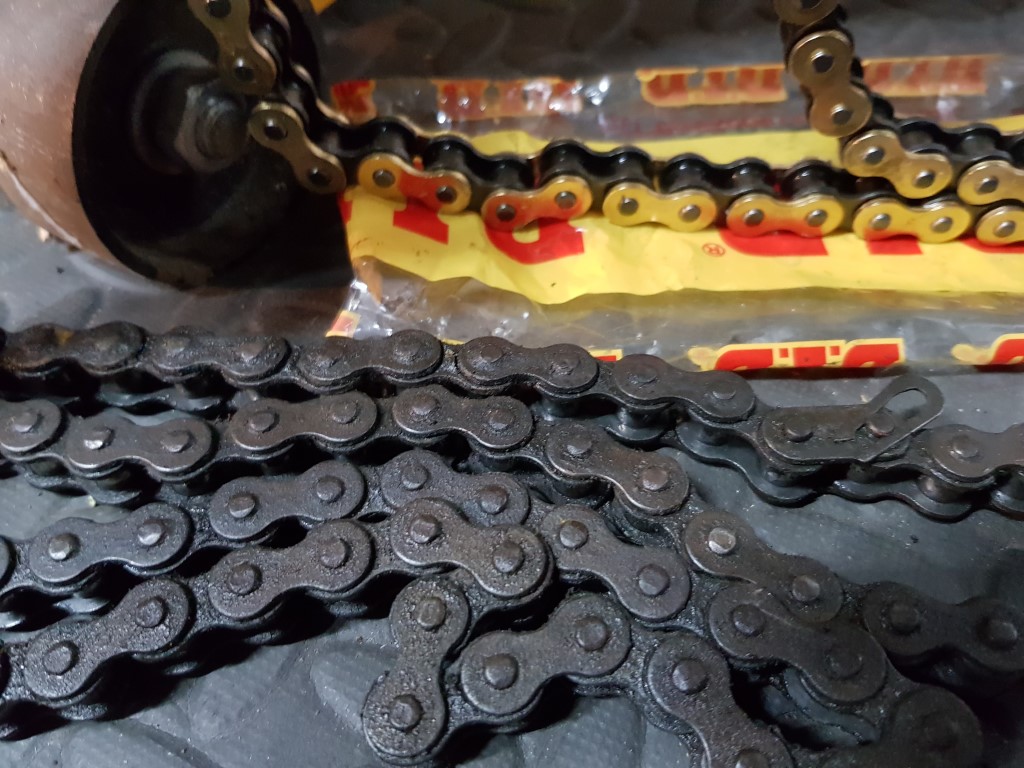
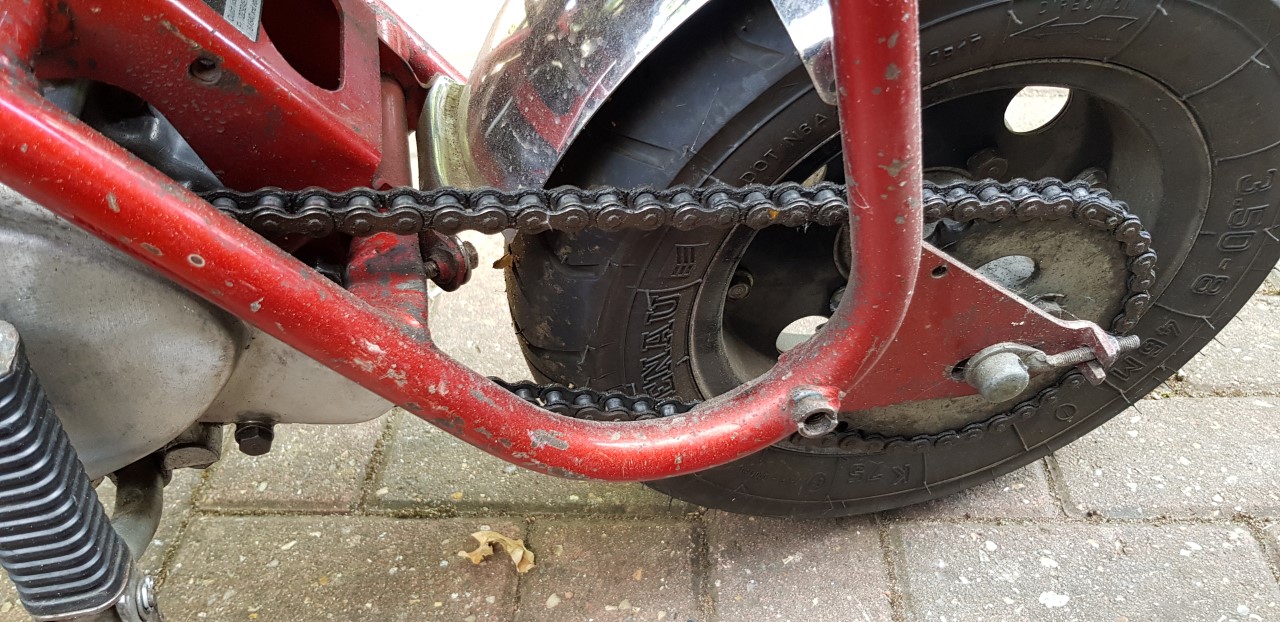
Should be able to get away with the chain already in use on the bike for testing purposes.

Wow, that's quite a difference @Diddums with the 2 stroke upgrade! However, I have spoken to other owners of this kit, and they are all happy with it. So it's likely to be something specific to mine.
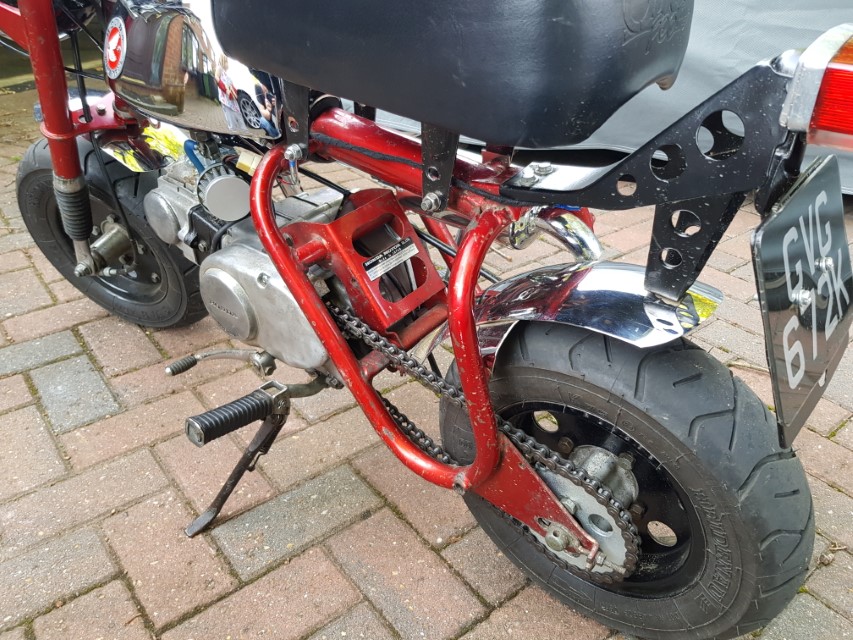
 
Last edited:
Transmission breaker
Don
OP
Joined
20 Oct 2002
Posts
16,809
Location
In a house
Ok, so I have done a few things to the bike recently.
Firstly, I was not happy with the rear of the bike, so I wanted to clean it up a bit..

So, first step was to clean up the numberplate/light bracket. You can see in the pics earlier in the thread, it was looking a bit tatty. So, it came off, I stripped the paint, cleaned it up, and gave it the usual paint treatment.
So it looked a bit more like this:
MonkeyRear1.jpg

MonkeyRear2.jpg

MonkeyRear3.jpg


The original part quality leaves a bit to be desired, and the welding is somewhat agricultural, but it should be a little better protected, and looks less rusty.

Then I was not happy with the rear lens. I did my best to clean it up with a bit of white spirt, and then it just fell to bits. :( 
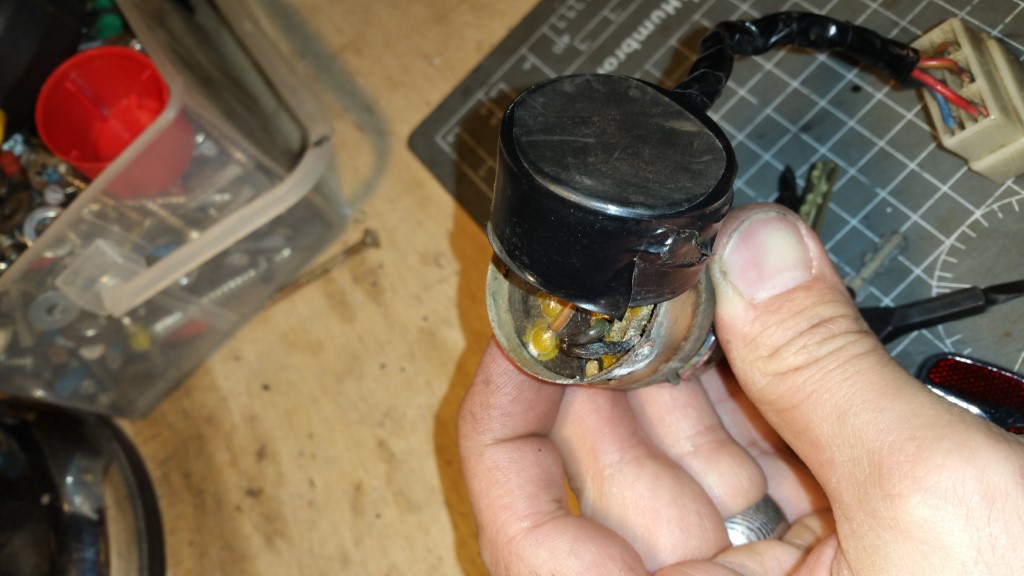
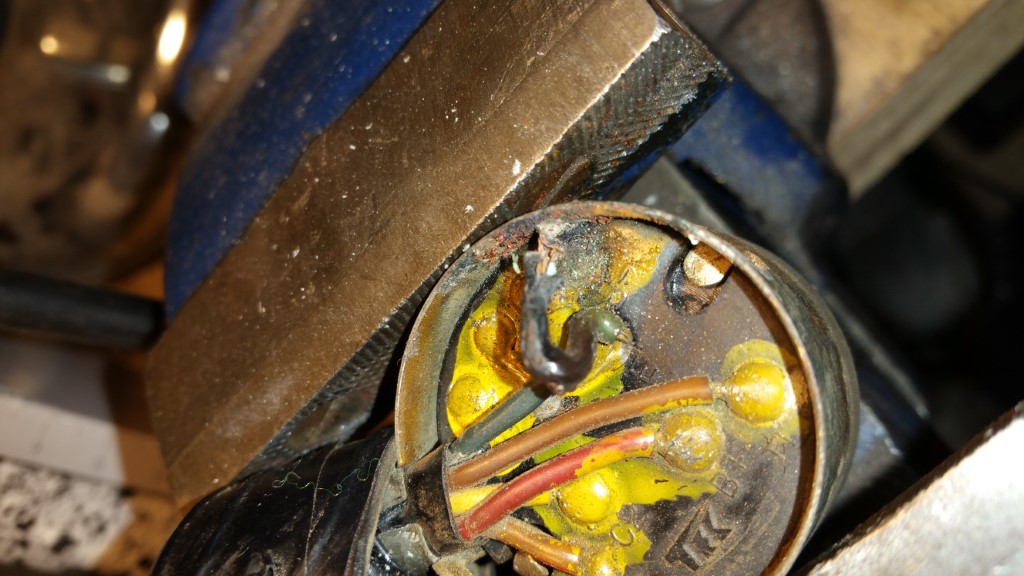
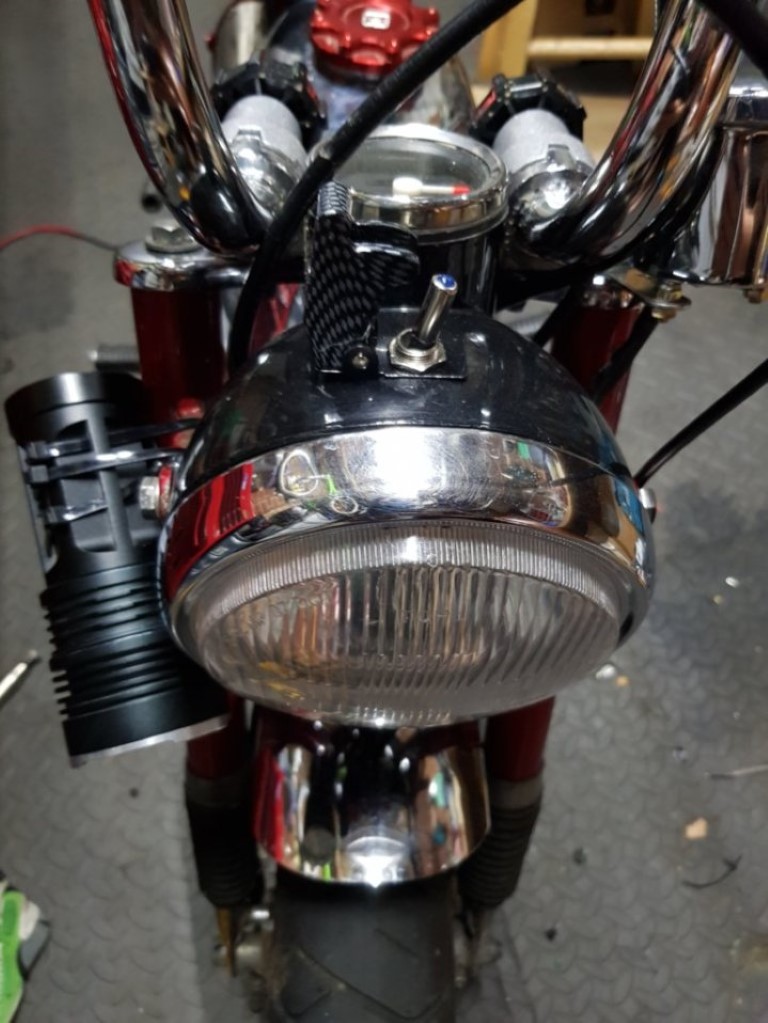
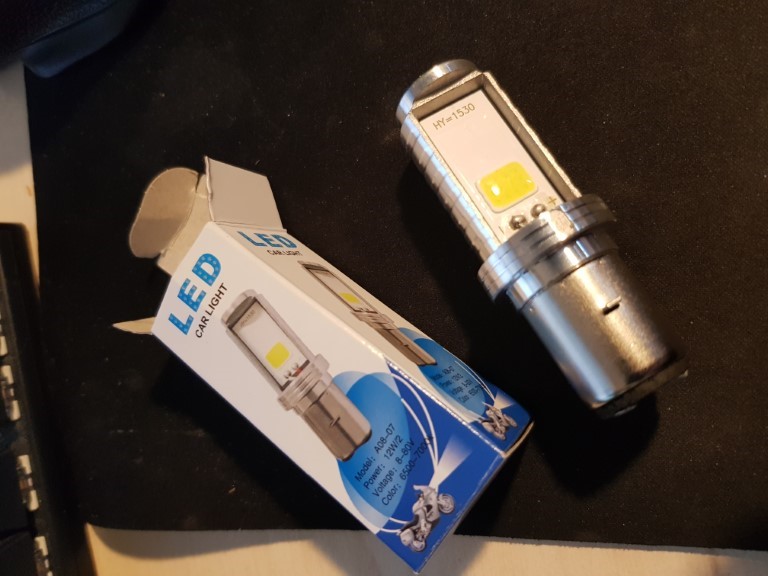
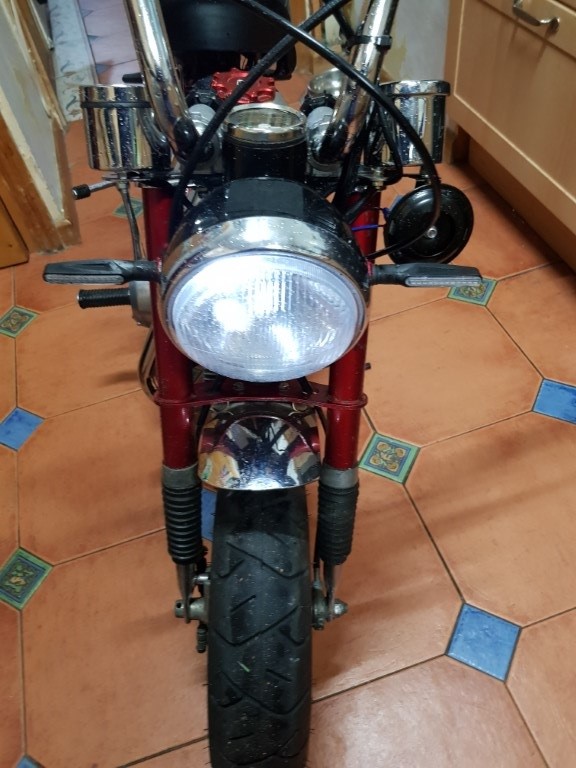
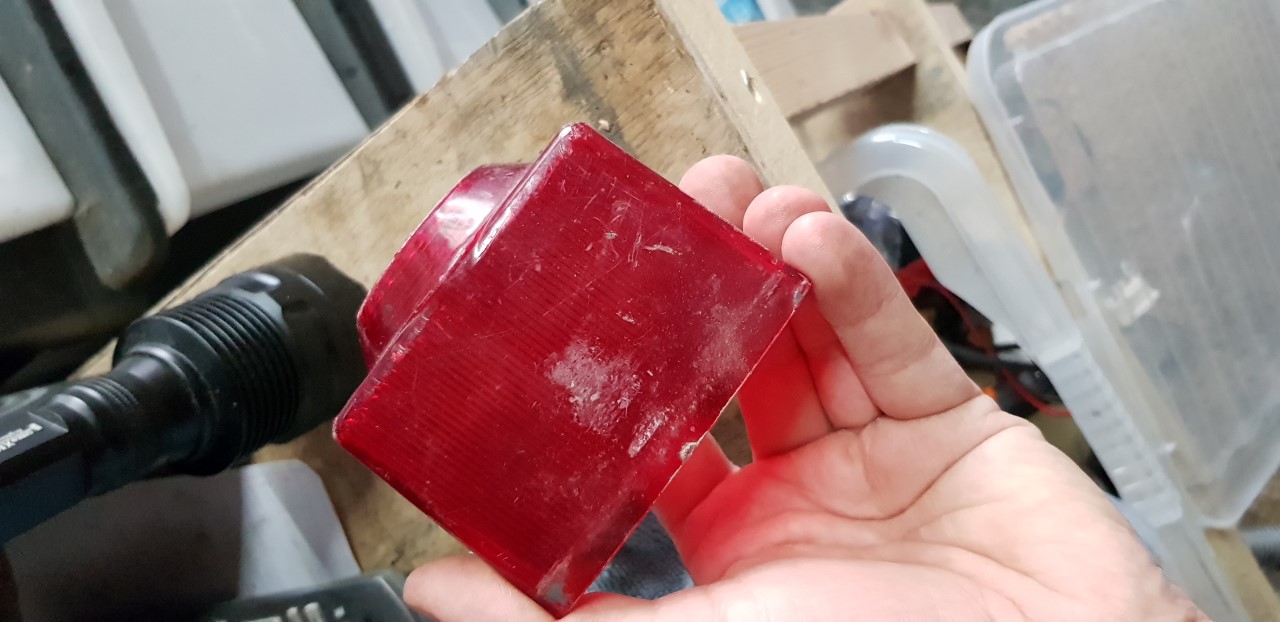
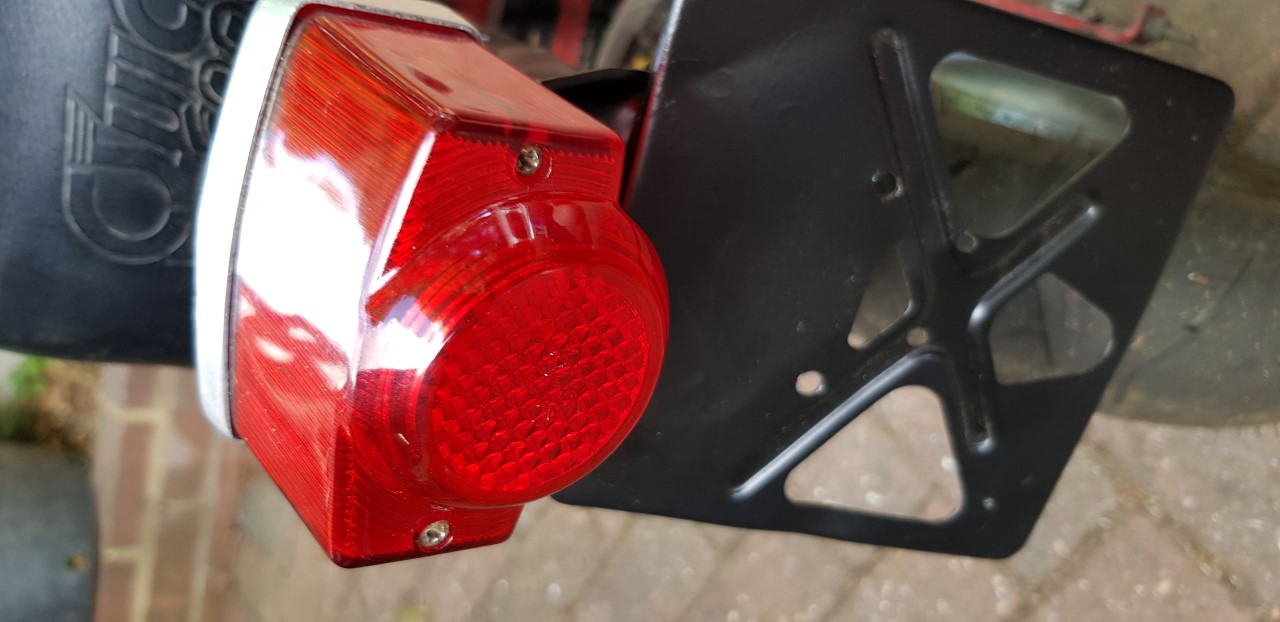
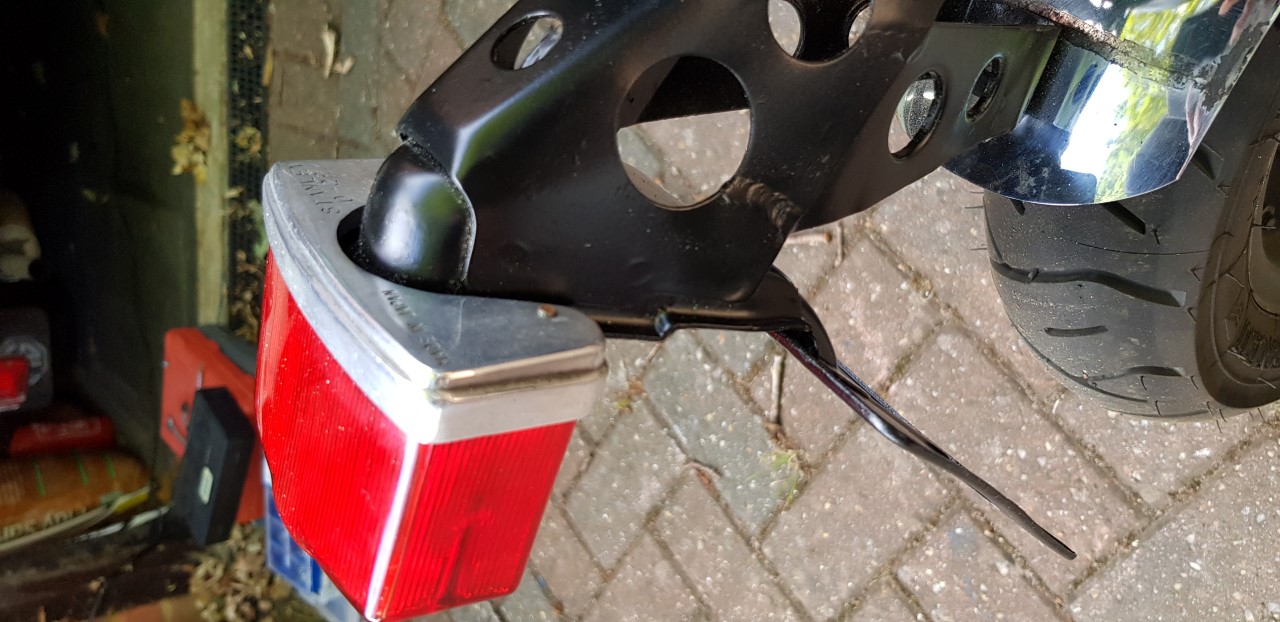
I tried epoxy, and superglue to bring it back, but it just looked terrible. So i ordered in a part from the Philippines and it looked a lot better! here is the original lens before I killed it :(
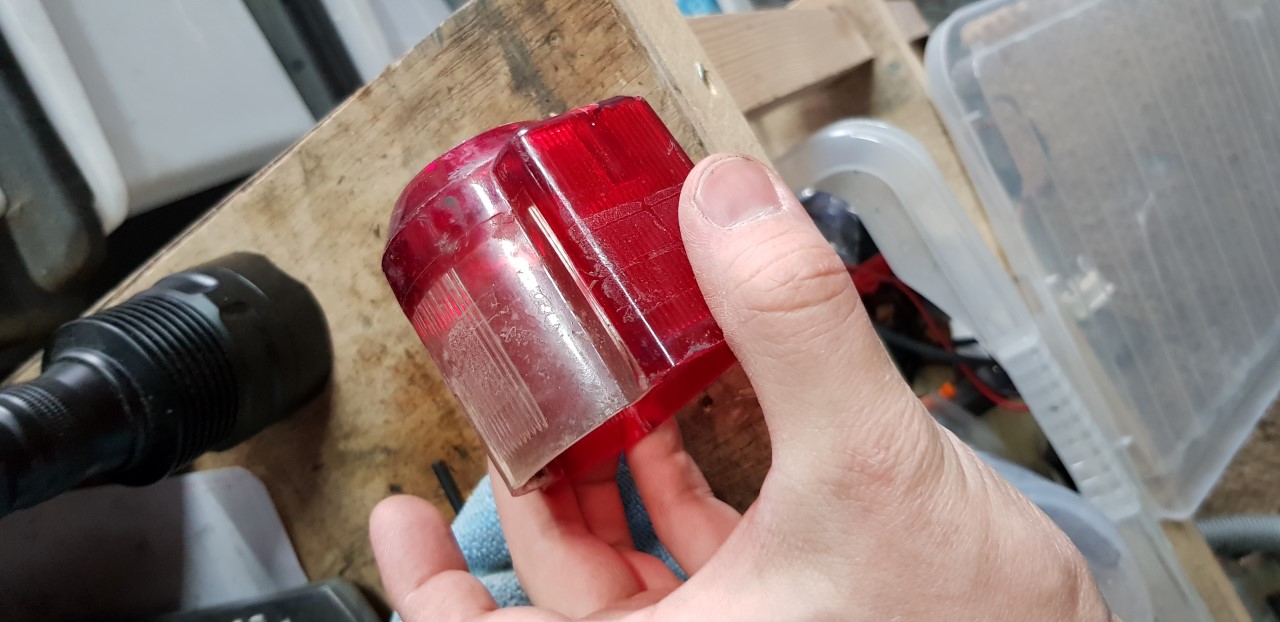
Deadlens1.jpg


Deadlens2.jpg


Then with the new lens fitted, and back on the bike, with the metal parts newly polished:

MonkeyRear4.jpg


MonkeyRear5.jpg


MonkeyRear6.jpg


I also had ordered a new "big bore" exhaust for the bike! he it is next to the old one:

MonkeyBigBore1.jpg


Fitted!! I had to raise the seat up to its top height to allowthe kit to bolt up, had a quick ride, and it actually feels a bit nicer to sit on - Just got to hacksaw off the extra long number plate bolts next...

MonkeyBigBore2.jpg


I was hoping this might unlock a bit more power, and it does feel/sound a lot better, but still not as quick as I would like. Next up, points cleaning/adjustment just to check that is not the issue. I will also check the valve clearances again, just to be sure they are spot on. If not, i will do some carb adjusting again with the new exhaust, and see how it goes then. If no more speed, I need to replace the points/check the timing, then if no change... Time to find a 70cc/90cc head to drop on the top to increase the port sizes!

I also have a spangly new gold and black chain to replace the old one, as seen here...

MonkeyChain1.jpg


I am just to lazy to fit it yet...

MonkeyNewChain1.jpg
 
Caporegime
Joined
24 Oct 2012
Posts
25,052
Location
Godalming
Transmission breaker
Don
OP
Joined
20 Oct 2002
Posts
16,809
Location
In a house
Bike is running well, but just not as quick as I would have liked, and there were a few niggles that were annoying me!

Firtly, I suspected the throttle was not allowing full opening with the new carb, it was topping out at thirty, and the dropping revs on slight hills in top gear.
The right handlebar was rocking in the mount, and it had cracked the original socket it fitted into.
The throttle itself was also not returning correctly, as the slide in the bars was providing too much friction. Great for a pseudo cruise control, but not for safety!
The original brake levers are VERY rudimentary, and just have no feel, and limited throw and look terrible, bent and dull.

The speed issue is very annoying, and as such I wanted to add a new throttle and cable. However, if I am doing this, I wanted to try and fix the wobbly bars. So I decided to get a new yoke, top plate, handlebars, throttle+cable and brakes....
MonkeyYoke1.jpg


MonkeyYoke2.jpg


The new top plate is MUCH thinner than the original combined top plate/yoke, but I managed to use a small spacer on the head bolt to allow it to be clamped down fully. Not happy with how this looks, so will try to get a silver or red spacer, and clean up the top bolt/washer to look a bit nicer!

MonkeySpacer.jpg


It took about 30 minutes to replace everything, and as the handle bars are 22mm I suspected I could mount mountain bike aluminium brake levers... Then, if I removed the adjusters, they would almost fit perfectly to the cable ends. Bit of adjustment with a big pair of pliers, and it was nice and snug for the front brake, and the rear needed a bit of filing out of the cable holder, but worked out fine.

MonkeyBrake1.jpg


MonkeyThrottle1.jpg


I really should have checked what my camera focused on...

Still the brakes feel a million times better, and more powerful, the throttle opens fully, and returns correctly.

Best thing is that the bike is now feeling like it is gear limited. First and second gear are almost useless, they are gone very quickly, and need to be much longer. I had changed the front sprocket to a 15T from a 12T, and the rear sprocket is currently a 34T, so I have a 28T rear sprocket somewhere that I put away and cannot find.. So just in case I ordered a 26T to arrive in a few days, and a 17T front. This should give me a good selection of sprockets to adjust and play about with the gearing. I am waiting to fit the new chain till I know what gearing I am running.
 
Last edited:
Caporegime
Joined
24 Oct 2012
Posts
25,052
Location
Godalming
I love this bike, good to see it being enjoyed as it should :D


(Teflon grease or that stuff maccapacca ordered will do wonders for cables and moving bits, unless pre-lubed).
 
Transmission breaker
Don
OP
Joined
20 Oct 2002
Posts
16,809
Location
In a house
Thanks for the tip! Its a fun little machine :)

Another think I have to sort is that the hi-lo light switch was internally routed on the old bars. These new ones do not have the correct holes to allow this to happen. I am toying with the idea of putting holes into them to allow the internal routing, but also looking at how I might be able to change or move the switch to allow me to leave the bars alone. I just used electrical tape to hold it in place for the test ride.

I do also have the kit to rebuild the forks with some uprated bushings to stop the flex in the fork legs that all these bikes have. I am debating wether I should do this before I eventually get the frame sprayed, the rebuild them again afterwards, or just wait till the frame is done (hopefully this winter) and only strip/rebuild them once.

In another effort to tidy up the wiring, I got some loom wrap to have a play with, when I decide if I am going ever going to get around to working out how to fit a flipping 6v battery to the loom :D
 
Transmission breaker
Don
OP
Joined
20 Oct 2002
Posts
16,809
Location
In a house
Back in bits again, awaiting some new sprockets, so dropped in the new chain whilst it was already in parts.


MonkeyGear1.jpg


New chain vs old one, little bit of extra bling never hurt anyone :D

MonkeyGear2.jpg


Rear sprocket removed. Its a 35 tooth, and I have a 24 coming (Really long!). Will give this a clean up whilst its in bits, its got a little bit dirty!

MonkeyGear3.jpg


Here is the 15 tooth front I am currently using. It replaced the 13 tooth (i think) that was original. I have 14 tooth here also, and a 17 tooth coming. Just in case the 24t rear makes the gearing too long to use the 17t front. I will run it with the 15t to start with, and see how I get on...

MonkeyGear4.jpg


I also gave the points a quick sand whilst the cover was off, and cleaned in behind the front sprocket.

I am a little worried that the 24t is going to be too small and make the gearing too long and will mean I need to pull some links out of the chain, but will see how we get on. They don't do a smaller rear, so I can always go up a size, they are only £12 each in varying sizes.
 
Last edited:
Transmission breaker
Don
OP
Joined
20 Oct 2002
Posts
16,809
Location
In a house
I did some playing around with the gearing today. I have moved up to a 17T front sprocket (it will not fit any larger without fouling!), and a 31 rear. I am now hitting 40mph on a slight descent, and 36/7 on the flat.
Happy with that for now, the gearing is a LOT longer, and 1st and 2nd are actually usable, if not perhaps a tad slow.. So will do a bit of tweaking with the carb, timing and valves to see what I can get out of it, and will likely iron out any flat bits nicely. I will leave the 24t rear in case I get a LOT more power out of it.

Some of my spare sprockets, new tank emblem bolts (Honda package each tiny part idividually!!) and front sprocket retaining bolts:
MonkeyGears3.jpg


Couple of things happened in the testing... The wiring starting playing up and it would not let the bike start. So I pulled it all off, and continuity tested the lot, and could not find any problems... Next step was to just run the Coil wire direct off the stator (effectively hotwiring it) and it jumped straight into life again.

I figured it might be the ignition switch/key that was screwed up. So I pulled it apart, and it looked VERY secondhand. With some corrosion:

MonkeyKey1.jpg


MonkeyKey2.jpg


I continuity tested everything, and it mostly made sense, and matched to the wiring diagrams I had. So I supposed it could be the corroded case wire, i removed, and re-soldered in a new one to no avail. So i think this part may have more corrosion inside and i didn't want to delay stuff more, so I got fed up and put the part on the shelf for now.

Ok, so as I could not find the issue, I decided to make a new "loom" (it's so simple once the key part is out of the equation, it should not really be called a loom!). For testing I hooked up the lights direct to a hot wire from the stator (using spade female connectors), then the coil, and switched brake light (which runs on its own line). I don't think I really need the no-lights option on the ignition, so will just have an ALL ON setting for everything. I also changed some connectors in the headlight/front loom, and re-wired it/wrapped it all to make it a little tidier in there.. See below in a state! Also note the missing tank badge ready for its new bolts/screws:

MonkeyWiring1.jpg


You can see the empty ignition/key ring under the front of the fuel tank. Plan now is to replace that with a standard (generic) ON-OFF key controlled switch which I am sourcing now.

Rear lights wiring in progress:

MonkeyWiring2.jpg


Once that was knocked up, and tested as working, I took it out for a ride, and it rode perfectly. GREAT!

So I fabric wrapped it, and hid it away where possible to make it look a lot neater. Its a bit dirty from its test run in the rain!

MonkeyPhase2-1.jpg


MonkeyPhase2-2.jpg


MonkeyPhase2-3.jpg


Next is a plan to replace all the spade connectors with waterproof modern plug connections (already arrived), and fit a 4 point plug to the new loom to fit into the original stator plug a bit more neatly than my individually crimped spade connectors.

You can also see the new bars properly now in these last pics!


I have also decided to try and fit a regulator and rectifier to the new loom, so I can run a battery for the lights. It should keep them brighter at low throttle, as the voltage varies on the hot lines from 3.7v up to about 9.5v at full thottle. The Regulator dumps any voltage over 6v to earth, and the Rectifier changes the AC to DC to keep the bulbs from blowing. Mine don't actually blow at the moment in fairness, as some bulbs are now LED and the remaining incandescent bulbs are 12v rated so should survice the 9+ volts on thr 6v line. This will also allowing it to charge the 6v battery I am planning to fit.
 
Last edited:
Transmission breaker
Don
OP
Joined
20 Oct 2002
Posts
16,809
Location
In a house
Plotted out the cabling, and cobbled it together with new wires and connectors off the stator. I then wrapped, and neatened it up. I still have 1 live to play with on the brick connector, which should allow me to do battery charging/light power without changing the main loom for now.

MonkeyWiring3.jpg


MonkeyWiring4.jpg


Overall it looks a lot neater under here. It also shows clearly the little fire damage the paint had under the tank, where the carb caught fire once! I also need to work on my fabric wrapping skills :D

MonkeyWiring5.jpg


MonkeyWiring6.jpg


I still need to find and add a key that will fit to do two things, bridge the ignition live to earth when off (acts as a kill switch) and then have 1 position (ON) for powering up the lights. I still also have to figure out how to add the regulator and rectifier when they turn up, and make it look neat, so I can add in the battery. Under the seat, or behind the engine mount look like good options when I get around to it :)

I will shrink wrap any ends when I do the final loom, just to keep it tidy, and I decided to use a rechargeable horn which arrived this morning to keep the wiring to the bars more simple!

Getting closer to pulling it all to bits, so I can get it shot blasted and re-sprayed, and rebuild the forks! Should have a new project in the garage very to help me keep occupied whilst it is away!
 
Transmission breaker
Don
OP
Joined
20 Oct 2002
Posts
16,809
Location
In a house
Ok, bit more work done.

I added a remote kill switch to the current loom so I can kill it from a flip switch on the top of the headlight whilst it has no key kill switch. Its temporary, and uses the existing high beam indicator hole, so not a final item, but it looks cool :D

MonkeyWiring10.jpg


You can also see my temp headlight for test riding at night whilst the old lights are too pants! :D

Anyway! The 2 wire regulator I had was a half wave, so was producing 3v, so I found a full wave 4 wire which claimed 6v Honda compatibility (albeit not the specific model I have).
4 wire:
MonkeyWiring9.jpg


The pink and yellow wires are AC feeds from the stator, and the red is a 6V+ out and the green goes to the battery negative (6v-)

This is then fed into a 5v-11v DC converter to provide a solid 12v, in theory. (seen here with the now redundant half wave rectifier)

MonkeyWiring8.jpg


This SHOULD allow me to run at least a full power 12v headlight (maybe an LED one if needed). I will then look to run all the other lights from the 6v+ from the battery meaning I can use LED bulbs all round, as the existing variable AC setup makes them flicker/dim too much at idle

I mocked up a temporary wiring loom from the old loom I removed previously just to test my plan:

MonkeyWiring7.jpg


The bike started. and the regulator/rectifier was producing 4.8v at idle to 7.2v at fullish throttle (was testing indoors, and didnt want to be anti-social). the DC converted was producing a SOLID 12v at any throttle position. I ran an LED bulb from it as a quick test, and it worked well.

So, my theory works (at least for now!). I just need to place the battery into the bike frame somewhere sensible, hook up the 4.8/7.2 line to the battery with a fuse of some value (not figured this out yet). I could do this without the battery in theory, and just run the lights only when the bike is on, like the original, but I might as well try to do it properly :)

Then, run the 6v lights direct from the battery on 6v, the converter off the battery to give me a 12v headlight (and maybe a USB socket).

Once this is all working, then its wrapping the loom, changing all the bullet and spade connectors to waterproof automotive connectors, and work out fitting in a key powered ignition/kill switch.
 
Transmission breaker
Don
OP
Joined
20 Oct 2002
Posts
16,809
Location
In a house
I have also ordered a set of 6v/12v indicators, so I can decide where I am going to run them from. They are a slim, chasing LED type, to keep the power consumption down. Further to this, I have also got a 22mm bar hanging switch unit with an indicator switch, horn and light on/off switch. To work with that switch and indicators, I have ordered an adjustable flasher relay, so i should be able to adjust the flashing rate on 6v and 12v to suit.

I managed to find a decent key/kill switch unit that should fit my existing mount, so that is on its way too! Oh, and a 6v horn, as the bike horns seem to pull quite a bit of current for what that are (~1.5amps) so I guess with my 12v dc converter maxing out at 4amps, I want to keep as much on the 6v live from the battery as possible to give the best headlight power available.

So, the next couple of weeks will be putting all these bits together, working out how best to make the loom work in as few a wires as possible, adding proper waterproof automotive connectors where needed, and generally tidying up.

After this is all done, its likely going to be the final strip down, to get the frame and forks sent off to the painters :)

I also happen to think my existing LED array bulbs are less than efficient, but I have found a halogen 35w BA20D bulb that should only pull 3amps, so will give that a go on the DC converter.
 
Last edited:
Soldato
Joined
18 Oct 2002
Posts
16,660
Location
Devon
3 Amps on the 12v side will be a more than 6 Amps on the 6v side, are you sure the generator is actually capable of that? Would it not possible to fit a 12v stator/rotor from one of the many more modern versions of this engine?
 
Transmission breaker
Don
OP
Joined
20 Oct 2002
Posts
16,809
Location
In a house
3 Amps on the 12v side will be a more than 6 Amps on the 6v side, are you sure the generator is actually capable of that? Would it not possible to fit a 12v stator/rotor from one of the many more modern versions of this engine?

This is a very sensible and prudent question to ask!

It's totally possible to go 12v and it's been done by many before! As per usual my projects are about learning and I find that by learning by doing is the best way for me.


Any loom I build for this 6v/12v hybrid monstrosity is easily adapted for straight 12v later if needed.
My indicators are 12v/6v, bulbs can be changed, as can the battery.

If the 12v from 6v proves a problem, I can revisit my plans :)

However the things I have learned so far mean I already understand the way a loom like this works better, and that means I am in a far better position to be able to build custom looms/adaptations/restorations in the future. If I had just bought a 12v loom/stator off the shelf I would have a working system, but be none the wiser on how it all worked:D
 
Transmission breaker
Don
OP
Joined
20 Oct 2002
Posts
16,809
Location
In a house
Started on the franken-loom.

Hooked up the battery side on the bench with all the new bits with clip connectors to test it all out, and work out what is the best way to wire it.
MonkeyWiring16.jpg


So, we have a little spot light working as the headlight off a relay (just for mock up to test the relay), Orange unit is the 12v flasher (would not run at 6v, so going to hook it up off the 12v line), then we have the 4 indicator (chasing LED type) on the right. I have a 6v horn on the middle left, just below that is the igntion/kill switch/key unit. 6v battery is at the top, with the 6v - 12v adapter below it. Then the control unit at the top right. Finally, a volt gauge to keep an eye on the converter's output.

Wiring was just done with small scraps for the mock-up, and clearly is not for real usage! But I wanted to get my head around it all before I started attaching to the bike.

Next was to mount the battery to the bike. I decided to mount it below the seat, as it would be mostly hidden, and it has room for the adapter and other components, if needed.

MonkeyWiring11.jpg


I drilled a couple of holes, tapped them for mounting the adptor, and the battery is held in with a thick zip-tie, and it can be removed and replaced easily enough. I have a sealed battery unit so as to remove mounting angle restrictions, and allow me to lay it horizontally.

Installed the controls:
MonkeyWiring12.jpg


Seat back in place, with battery and adapter hidden away. You can see the 12v lines (yellow and black) to head to the front of the bike for lighting/accessories duty and the 6v charging lines (Red and black). I have put the Halogen bulb plans on the backburner for now, and have ordered a better LED bulb for the headlight, and will run it off the 12v supply. I did this as I am also planning to run all the other lights off the adaptor for now to see how the battery/charging holds up from the new regulator/rectifier.

MonkeyWiring13.jpg


I also have started testing out waterproof automotive connectors. So, used one of those to connect the 12v line, which you can see here:

MonkeyWiring15.jpg


I also mocked up the charging circuit, and tested the output. It seems to be working fine, and I am planning to try and put it all together tonight on the bike with the temp connectors, then use the proper higher grade wires to get the correct lengths and connectors if I have time. So it should be tidy, easy to remove (for painting) and a lot safer/cleaner/reliable than before :)
 
Transmission breaker
Don
OP
Joined
20 Oct 2002
Posts
16,809
Location
In a house
I have successfully re-wired the bike, and attended the Reading Toy run in aid of Banardos as a shakedown :D

A quick video was caught of me arriving at the toy drop off point :)
it should jump to 23:17 automatically to find me.
https://www.youtube.com/watch?v=XnQhkQ7UN8U&feature=youtu.be&t=1397

I will follow up with the wiring saga later today when I get the pics all in order.
 
Transmission breaker
Don
OP
Joined
20 Oct 2002
Posts
16,809
Location
In a house
Ok, so here was the loom being mocked up to the bike with crappy connectors, and long wires to work out the routing. This was when I decided to try and mount as much as I could under the seat to try and keep it looking a little bit more tidy!

MonkeyWiring17.jpg


I also managed to get a decent 12v Led headlight with proper dual led function for high and low beam.

MonkeyWiring18.jpg


Then i found a small LED equipped fuse box. It's great! when a fuse goes, a red LED, lights up next to it, managed to hide this away under the seat, and this makes equipping the bike with most of the 12v gear easy. You can also see the black finned regulator/rectifier bolted to the front seat mouting point in this pic, and later in the completed pics.

MonkeyWiring19.jpg


I then took two of the variable AC feeds from the stator connector, and fed them into the new 6v regulator/rectifier. This is then run to the 6v sealed battery, and this in turn feeds to the 6v to 12v adaptor.

MonkeyWiring20.jpg


I set the headlight main bulb to come on only via a switch when the ignition is on (red switch on the indicator/horn controls) so it would only run off sidelight unless I specifically wanted the lights on. I have decided I now need to add LEDs on the top of the headlight housing that light up when either the indicators or main lights are on, as its hard to see during the day, and the switches are easily knocked accidentally when reaching for the horn, indicators or lights.

MonkeyWiring21.jpg


The wiring was all shortened, wrapped up, and the horn was added. Then it was ready to ride! here is the "cockpit" all lit up. I added and LED t5 bulb to the speedo to brighten it up a bit, and its a clear improvement, and works fine in the dark :)

MonkeyWiring22.jpg


Fresh back from a rainy shakedown the night before the run itself!

MonkeyWiring23.jpg


MonkeyWiring24.jpg


MonkeyWiring25.jpg


I rode about with a guy I met before from a C90 club, and also another monkey aficionado and some other riders of proper sized bikes. One chap on a massive Harley rode alongside me all the way down an NSL dual carriageway, and kept a big gap between me and the cars! He was a great help. My monkey make and I avoided the main roads all the way home!

Take aways from the ride..

1 - The bike needs to be faster at the top end.
2 - Electric start would be superb
3 - Lights didn't last a full day
4 - More brake performance would be nice
5 - Paint needs doing!

Solutions

1 - New engine and carb are in the works, just waiting on a quote for a newer engine with more capacity!
2 - As above - electric start should be a possible with this new motor
3 - 12v system would come with the new motor, allowing a straight 12v battery and 12v regulator/rectifier, with little adjustment of the custom wiring loom needed!
4 - My new c90 cub friend is helping me source a new set of forks, with a disc for the front :D
5 - The Cub was sporting a superb powdercoat job in the correct colour. So numbers have been exchanged and she will be going in soon, likely after the new motor.


Not sure when this will all happen, it depends on the availability of the new motor. Its going to be fun!!
 
Back
Top Bottom