DIY Battery/Solar installation..

Envision LiFePO4 315Ah Prismatic Cell (Grade B) over at FogStar going for £39.99 a cell.. damn, wish I delayed a month now! 15kWh battery could be built for £1240! Tempting to just make another just to have it! They must be wanting to dump some stock prior to another shipment?

 
So, with the end of the month just ticking over, a little update..

I had the battery/inverter installed, activated, and changed tariff all on the 8th of April.
The total electricity costs for April were £135!!
In March, I had paid £272.46 for electricity.

We have only done a couple of little behaviour changes, like putting dishwasher and laundry stuff on times for overnight, when we can, but not stopped using them during the day either when needed.

I was hoping to save around £100 a month to work out my payback time.. So this is good news!
I was planning to buy/install the solar next, but given the costs of the Envison cells posted above (thanks @Gammawolf ) I have ordered a second battery and cables today! Doubling my storage and maximising E.on cheap rate charging MIGHT mean I can not use any grid power during the day for a further saving. As it stand now I get through to around somehwere between 5-10pm. Randomly, yesterday I was on battery till 11:30pm, but this was not really representative.

I may well now need to get the garage supply cable upgraded sooner than I originally planned, and also get a 100Amp main fuse put into the supply for future proofing/better charging capability.

Adding the solar later will hopefully mean I am able to operate for a lot of the warmer part of year with JUST solar topping up the batteries, and little to no grid use :)
 
Last edited:
A little update! It has been a little while since I posted anything here:

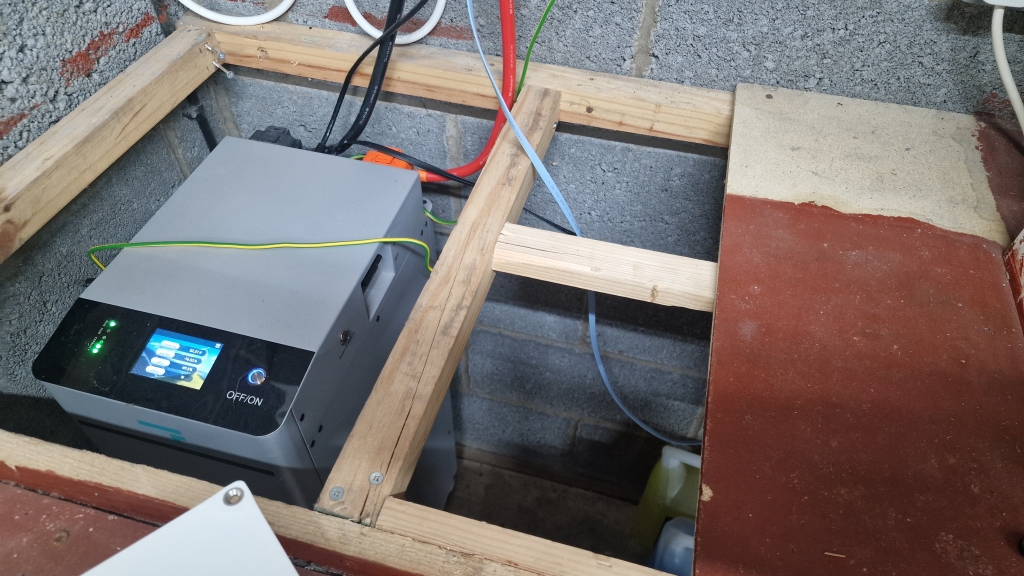
I had to do a little tidying up to clear up the area ready for the second battery, so this wood needed to come out:
Solar063.jpg


Solar091.jpg


Solar066.jpg


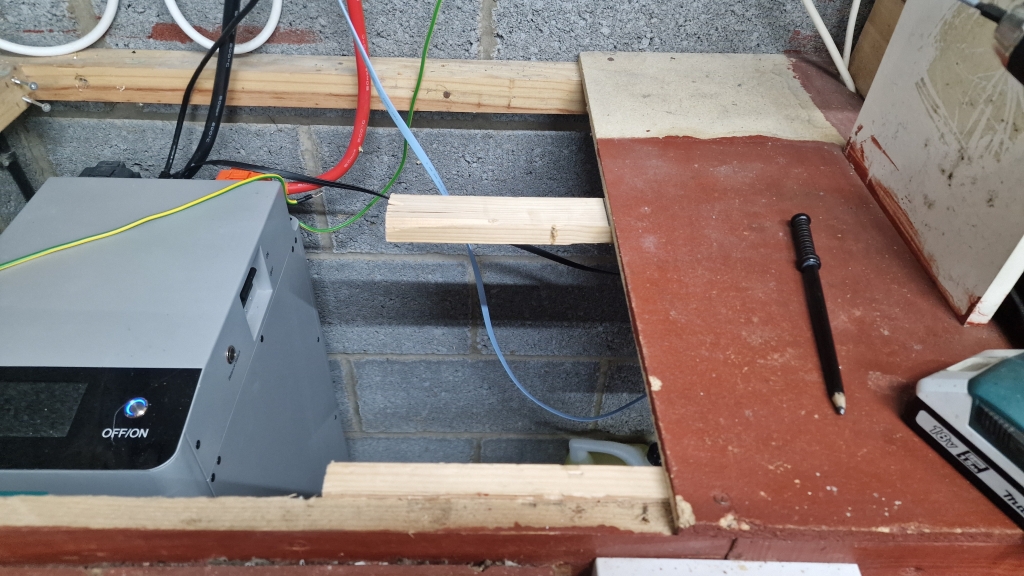
Little bit cleaner, and I wanted to make up and improve the cabling, so you can see a new earth cable, for joining the two batteries in the foreground>

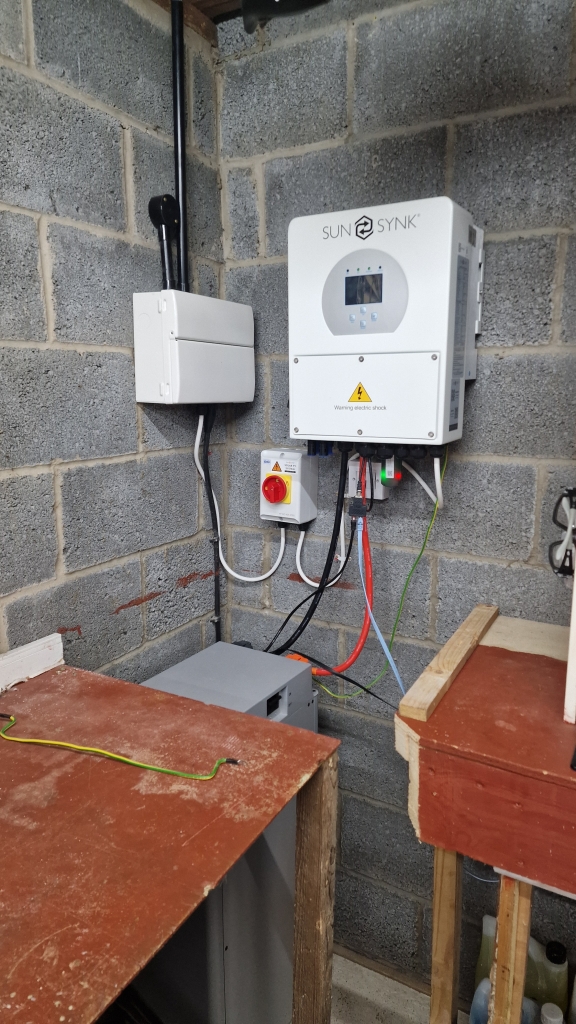
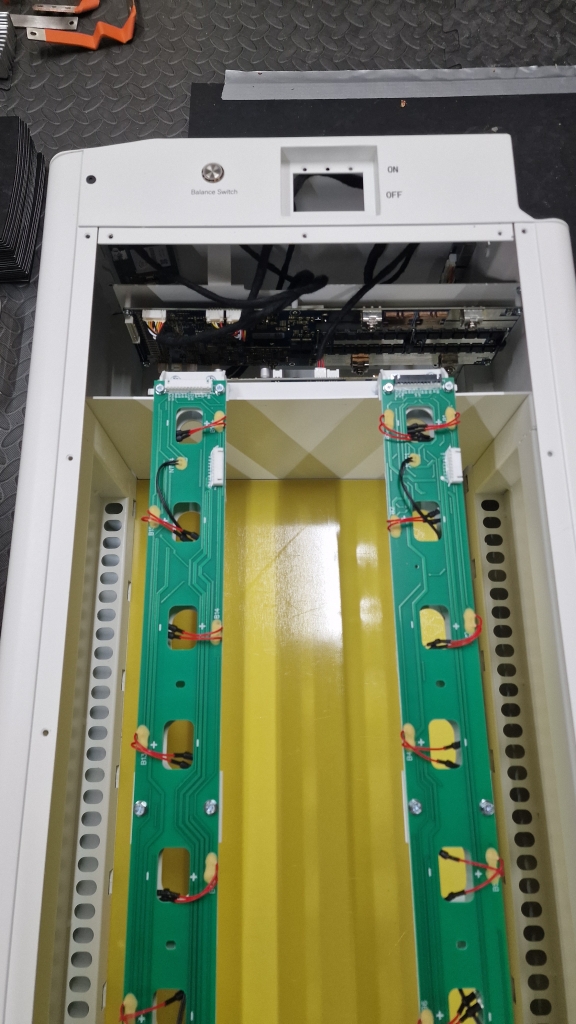
So, with the area cleared out, test fitting with the unmade kit:
Solar067.jpg


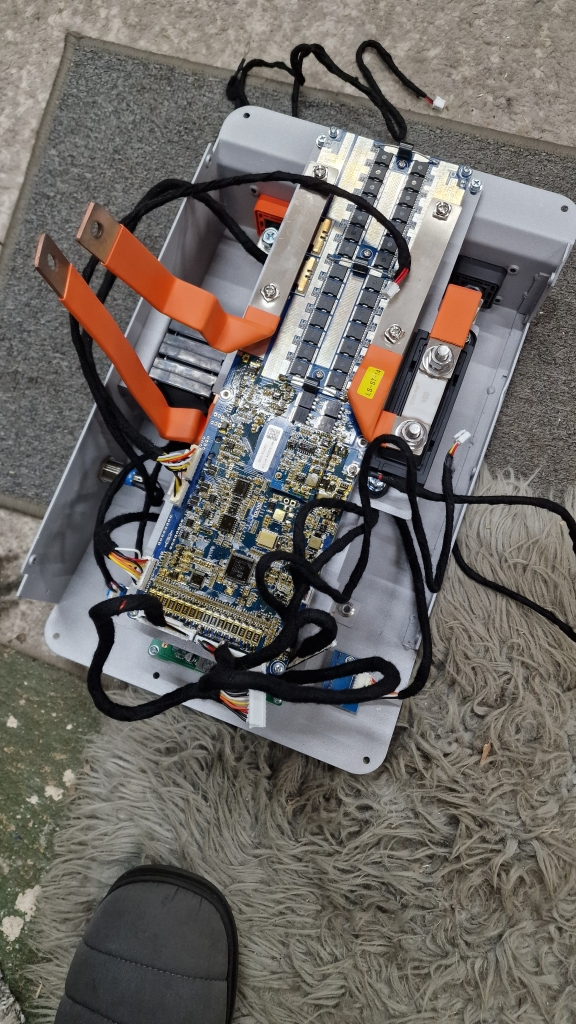
Next was to build up the battery, i got the white to help me ensure I never mix them up :D, same process as the last one, but this time I was a LOT faster!!

Solar097.jpg

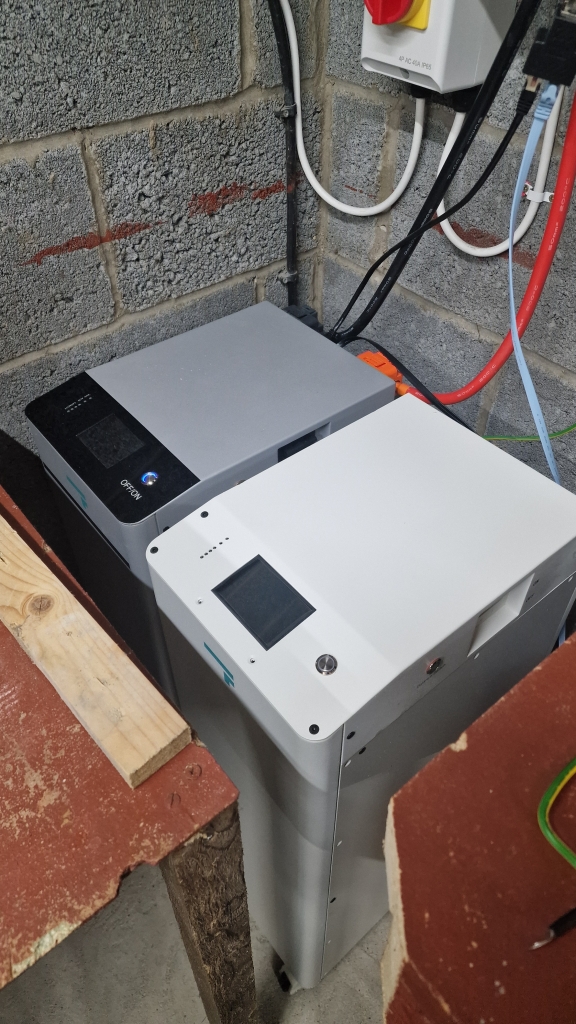
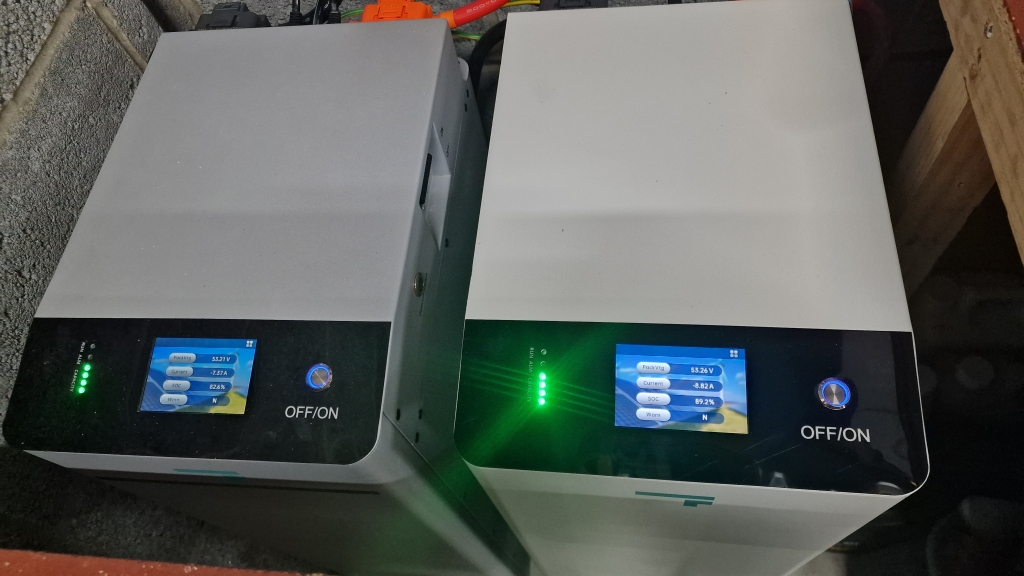
Built up, and connected:

Solar069.jpg

Solar071.jpg


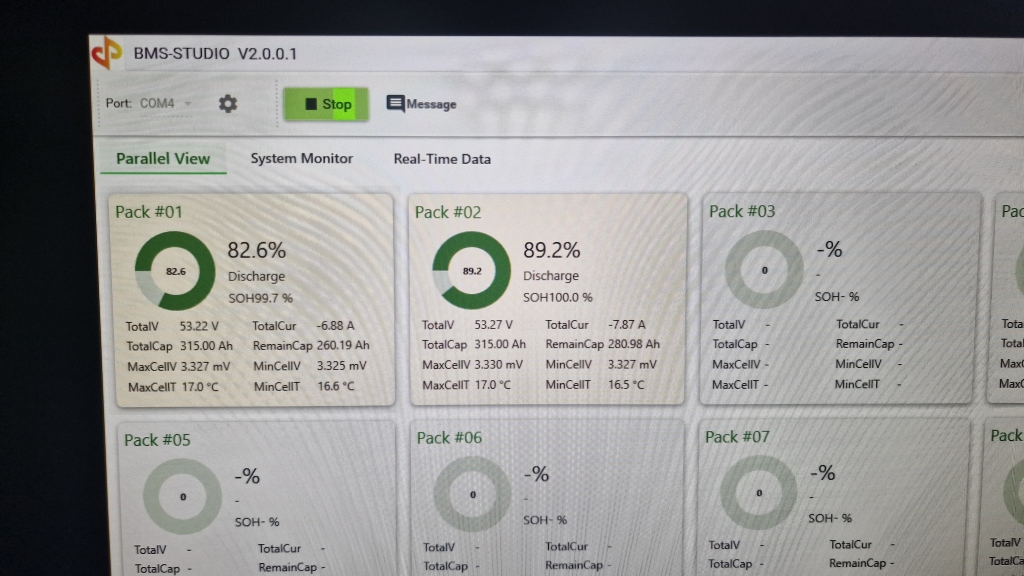
Monitoring in place:

Solar070.jpg


Solar068.jpg


Now in, and working, we have been most days working entirely from the batteries, taking them down to 25% on the worst days with an extra car top-up after the school run. I did have to change how I ran the cable, splitting the Positive and Negative between them to help ensure more even current draw :)

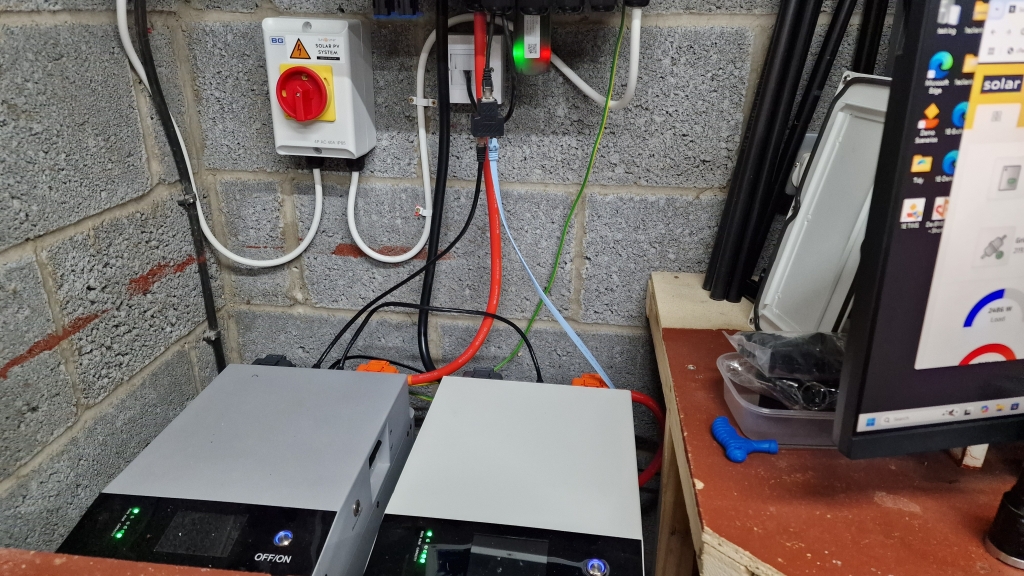
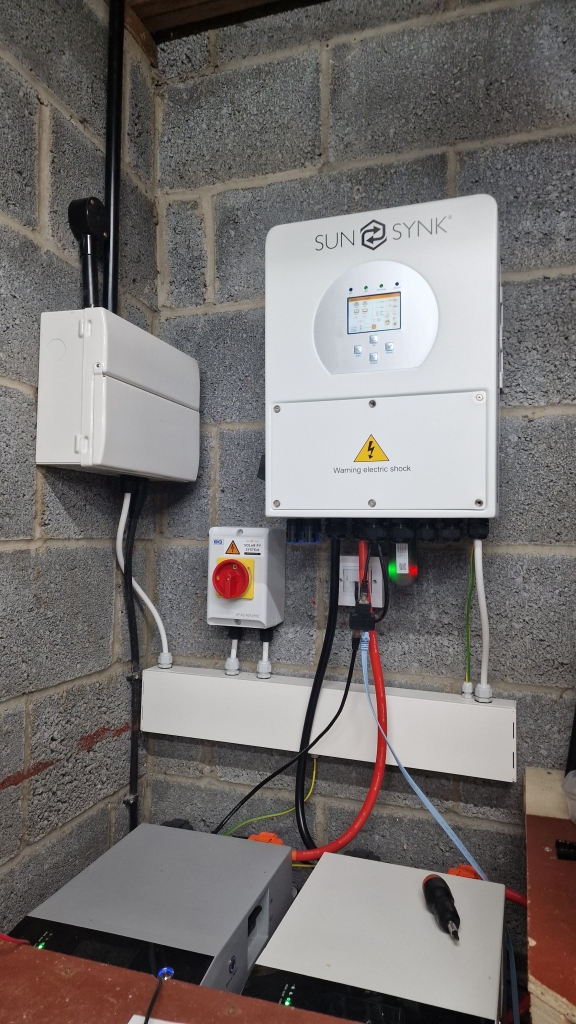
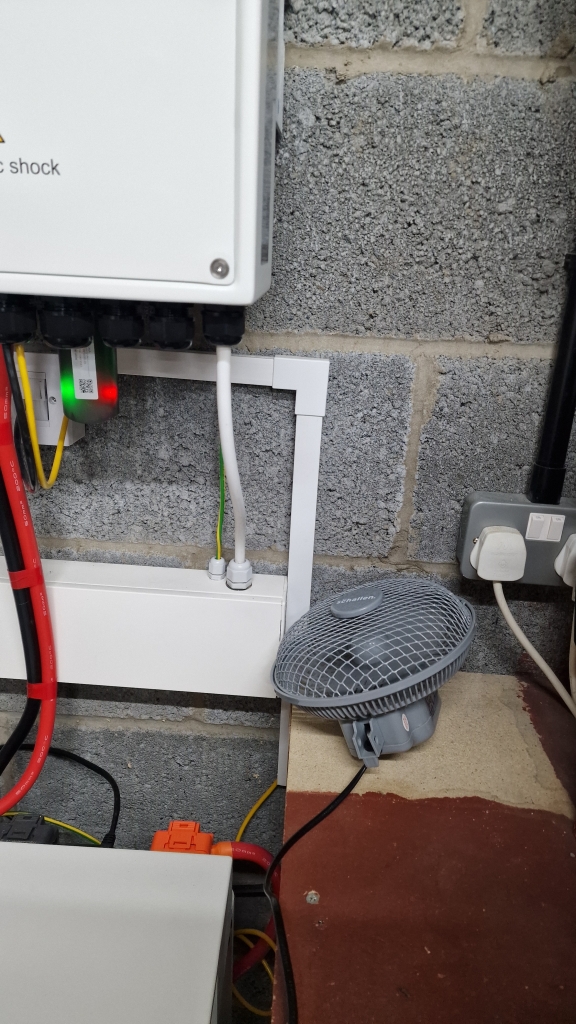
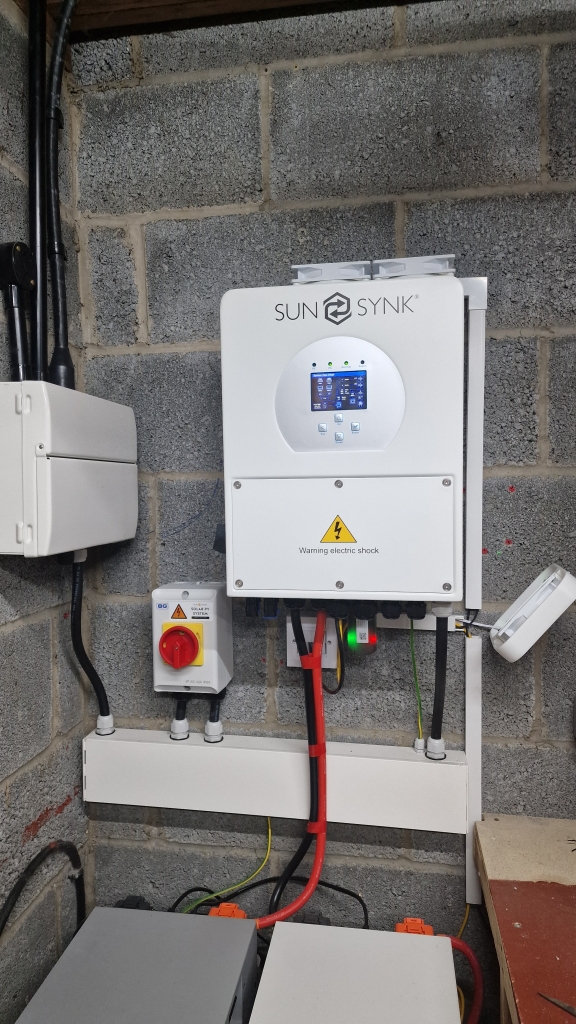
Next up was the cabling - It was too messy, as installed by the sparky, and it was not working for me... I took photos of all the connections, and undid them all, step by step, and installed some trunking with glands, and made it look a little neater:

Solar100.jpg


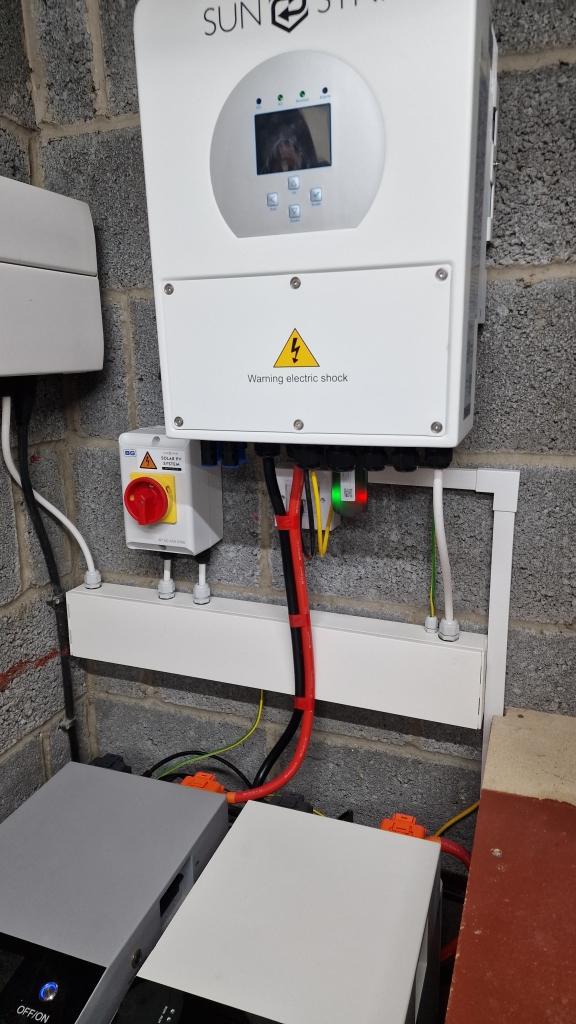
Then the monitoring cabling, and slightly re-jigged the battery cables:

Solar101.jpg


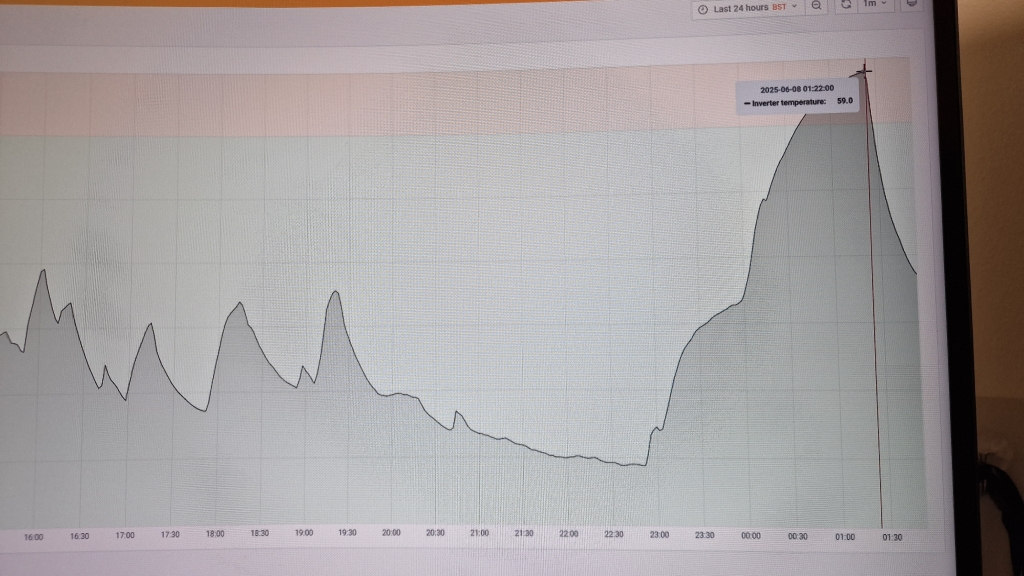
I did find the inverter was running slightly hotter during certain parts of the day, especially with the hot weather we had been having, a single small fan did a great job of bringing the temp down:

Solar079.jpg

Solar108.jpg


Given this, I decided I would use some extra cooling, and will build that out later using some PC fans on a timer/smart switch, more on that later...

Then I wanted to update the old split board in the house, and move to RCBOs, with surge protection, and modernise things a bit. I then found out that the previous sparky had given me some duff advice, notably, that the white cable (provided by the sparky) used to connect the inverter to the garage consumer unit was under-sized, the board was installed a bit wonky, and was VERY messy inside. It had been rushed, and we also noticed some errors when getting the EICR checks done, which the new sparky has corrected for me.
Additionally, I also wanted to upgrade the cable to the garage, as currently it was a 2.5mm armoured cable, which went under-ground. So updating it was not going to be simple. So, i decided to go big, and whilst having the main house CU replaced get that cable updated to a larger 16mm armoured cable!

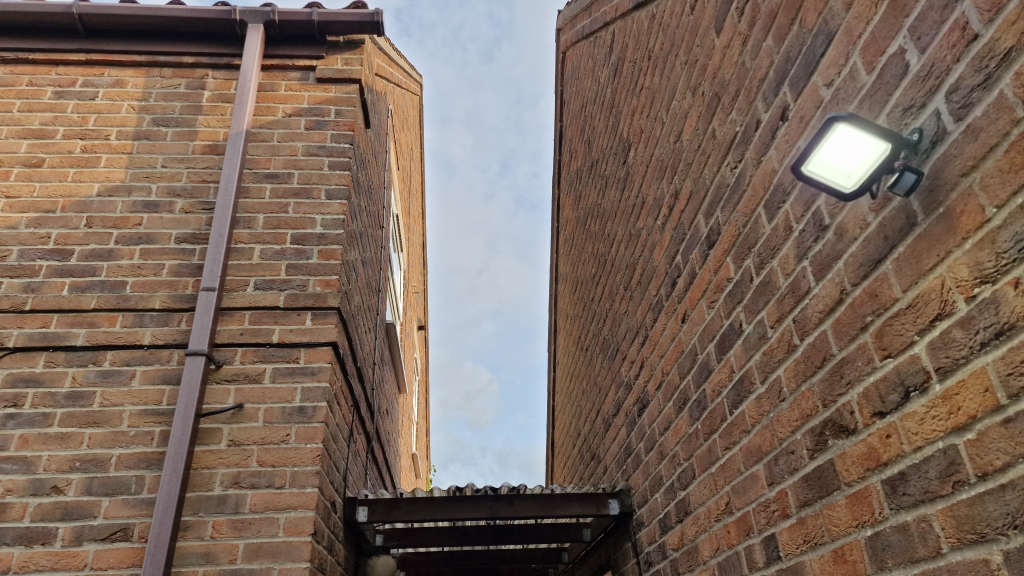
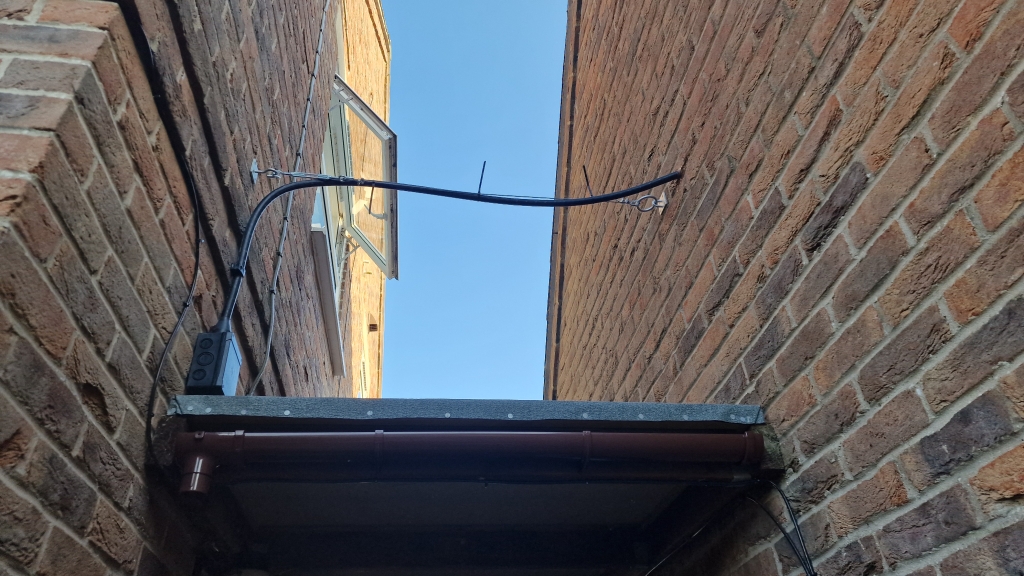
First things first, I procured, and ran the cable using a catenary wire between the buildings, here is the gap, and route I decided to take:

Solar072.jpg


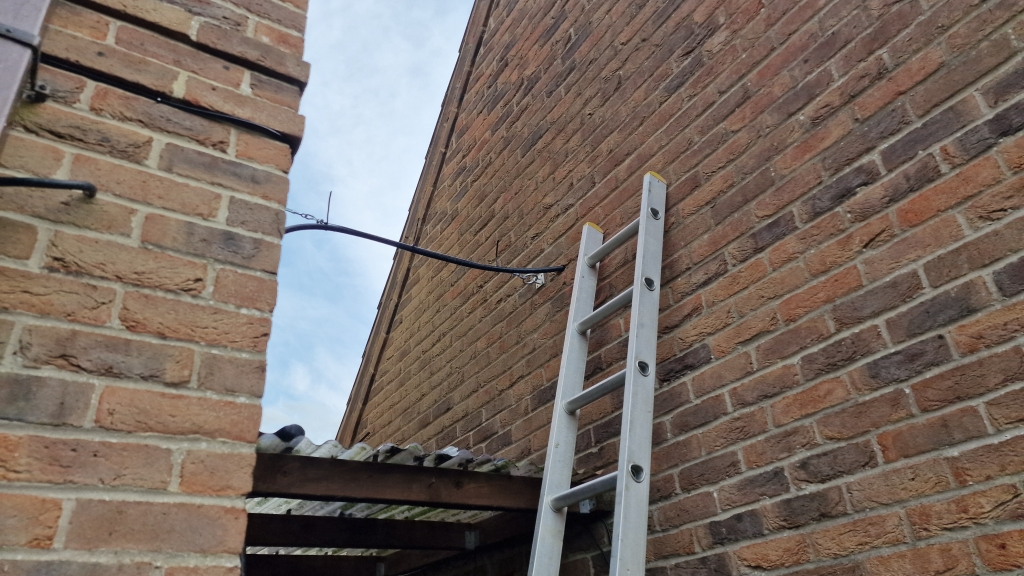
Due to the regulations, I had to run it above a set height when suspended, so I chucked in the catenary wire:

Solar075.jpg


Cable routed, holes drilled... Whilst I was up there the corrugated roof was bothering me, so that had to be upgraded later:

Solar076.jpg


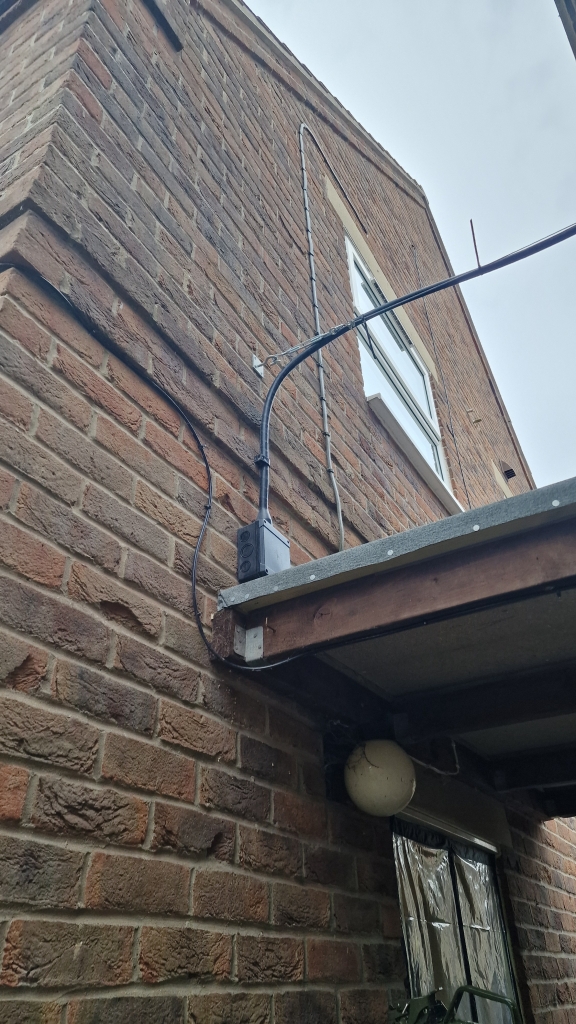
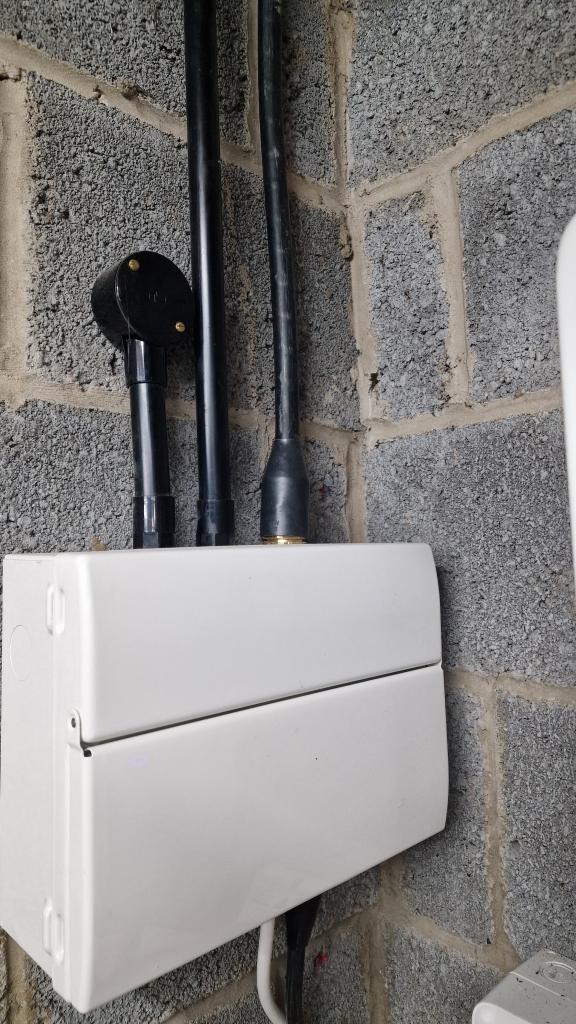
So, I remade the roof with a wooden/felt structure, and here you can see the box where the cable enters behind the consumer unit:

Solar082.jpg


I then added some guttering to tidy things up, and stop me getting dripped on when walking under! (I later joined this up to the downpipe on the house):

Solar086.jpg


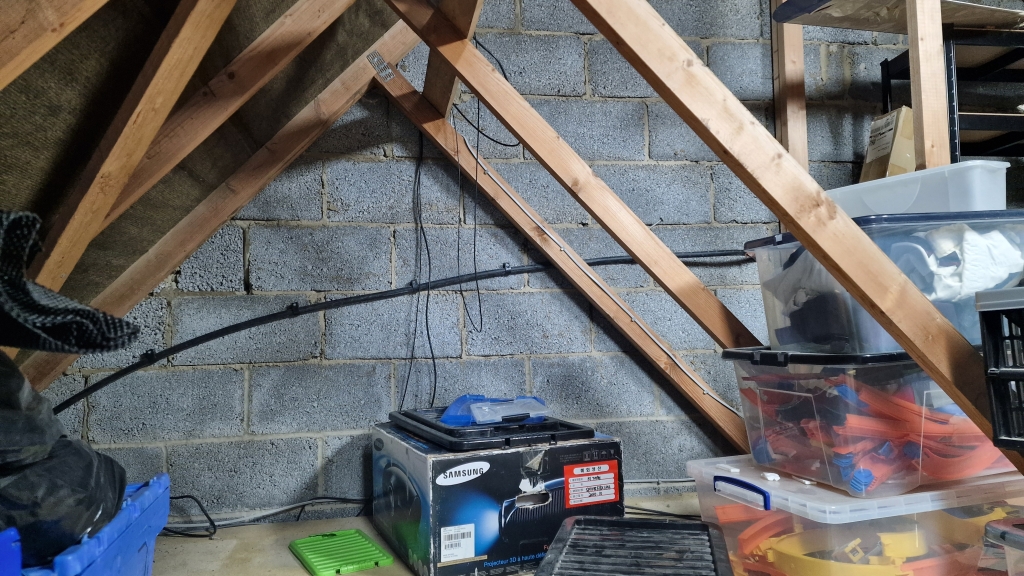
The other side of the cable, in the garage, clipped and secured on it's route to the CU:
Solar125.jpg

new cable vs the old, it is considerably thicker, and can handle a LOT more current:
Solar077.jpg


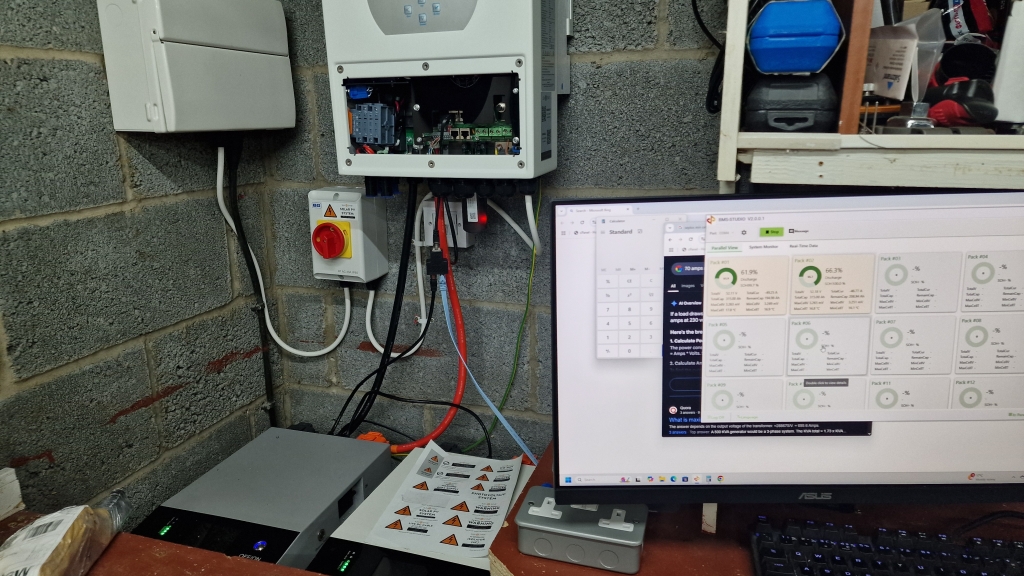
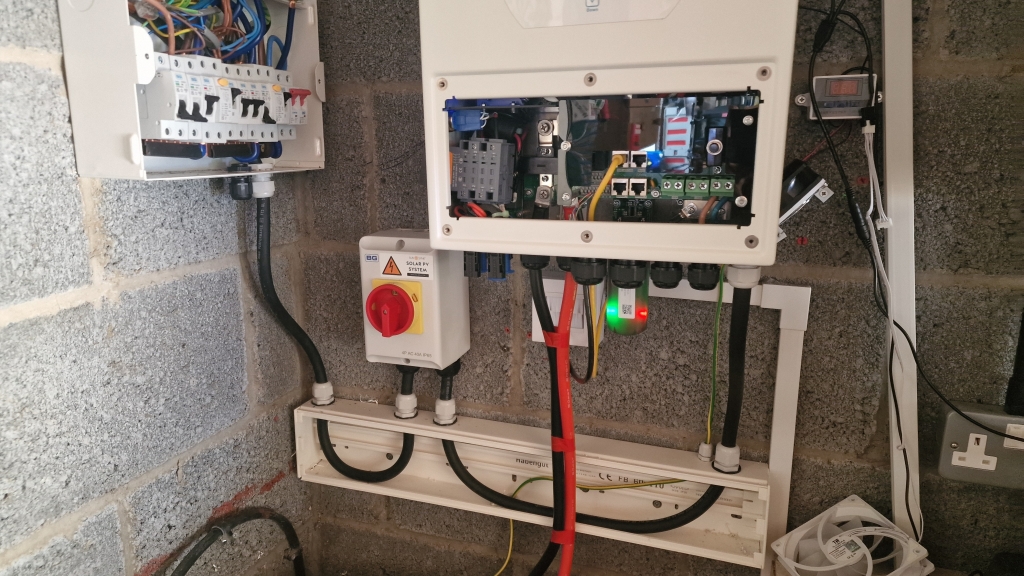
Then installed into the CU, its the one entering from the top right, bottom right is the old cable:
Solar061.jpg


Next was to replace the white flex, to a much heavier duty flex, larger glands/etc, which was correctly sized, and I removed the old SWA (bottom left, bent out of shot) and blanked it out with a gland, but I have plans for this gland later!

Solar084.jpg


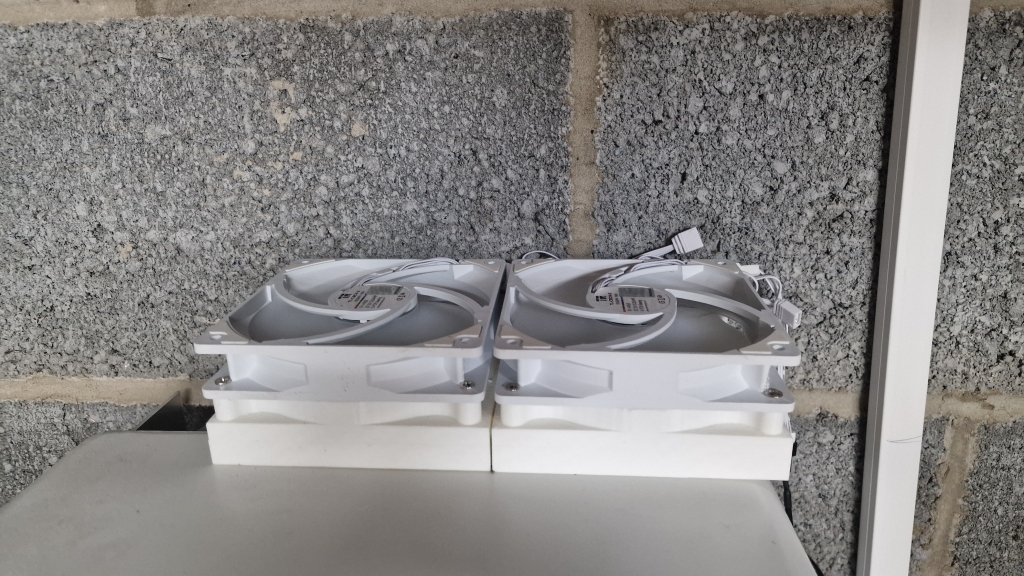
You can see I was experimenting with a temperature controlled set of fans, which I later moved away from, in favour of this self-designed 3dprinted unit, with another lower mounted fan too:

Solar109.jpg


I tried a number of different fan types, and sizes, but eventually settled on the the above, with flow/noise/cooling effects, and we end up like this:

Solar088.jpg


Just ignore the missing T-piece in the mini-trunking, I added it later!

This is mostly as things stand now.

I am down to spending under £100 a month on juice, and this is mostly off-peak usage on cheap-rate at 7p per kwh. There are a couple of blips during the day when I use more than 5.5kw, and pull a few pence from the grid, but this is minor really.

Next up will be solar, and the 7kw charger!
 
I wouldn’t have thought the wire would be needed if you secured the cable to the wooden structure as it’s permanent. You’d just need to use fire proof fixings (metal) and not plastic cleats to secure it.
 
I wouldn’t have thought the wire would be needed if you secured the cable to the wooden structure as it’s permanent. You’d just need to use fire proof fixings (metal) and not plastic cleats to secure it.
I was going to go down this path, but I found the regulations ambiguous, so took some advice from some qualified people, and they advised this route (multiple qualified people!)
 
Nice work.

I would recommend fitting a T Class fuse on each battery.

There is the possibility that if there is a short in one the other will discharge into it, best not to rely solely on the BMS or the breakers.
 
Last edited:
Thanks :)

Interesting, there is a fuse in the kit, does that not cover it in that scenario?

Its here on the right, below the negative terminal?
Solar023.jpg
 
Last edited:
What's it's breaking capacity, as in how many amps can it interrupt, it's normally stated in kA

T Class is rated at 20kA or 20,000A.

Too low and DC can just arc across the blown fuse.
 
It is, but I'd rather have something that is simple and I know it will work if it really has to.

I have MCB's, or rather moulded case breakers for each battery, I think of these as more of a switch to isolate the battery if need be, I also have one for the whole rack.

I also have a T Class on each battery, and one for the whole rack as well. These fuses are rated higher than the breakers, so in theory the breakers should trip first, but if they don't I know the fuse will blow.

For what they cost compared to everything else, why take the chance?

PS. Just looked at the spec on that fuse, its only rated for 2000A, and LifePo4 will very easily exceed that. I would change the fuse holder in the battery box and fit a T Class.
 
Last edited:
Can I not just add two 150amp class-t, one to the positive of each battery, belt and braces approach?
I am working to get clarification from Seplos (through FogStar) of the exact ratings of the fuse and breaker for clarity too :)
 
Hopefully, one last question :D
Since my batteries are connected in parallel like the pic attached (i was told this was better for sharing load on a 2 battery setup) - Might it make sense to run a 150amp between battery 1 and the inverter, or should I look to convert to a bus-bar configuration and use the two fuses, one on each battery positive...

"Sunsynk typically recommends a 150A fuse or breaker for the 5K-SG04LP1 to protect the inverter’s battery input (125% of ~130A)"
 

Attachments

  • BatteryBlank.png
    BatteryBlank.png
    14.9 KB · Views: 24
I think you'd be OK putting a fuse on each cable between the batteries, and as that forms part of the circuit to the inverter, it would protect that as well. A dead short on the inverter cables will blow both fuses.

If you're going to add more batteries, then a busbar system would make more sense though.
 
Last edited:
Looking at perhaps adding another battery in future, I have decided to go for busbars (ordered!)

I am going to add a single class T (125amp for now, may upgrade to 160amp if needed but looking at the curve of the 125amp, I doubt it will cause any nuisance blows!) between the inverter and the busbar. I have gone for "BlueSea" mounts and fuse, as these seem to be the most highly reccomended.

I am also toying with the idea of adding either:
A single MBRF 125amp fuse on each of the Positive of the batteries, as they are pretty decent, cheaper than Class T, and generally seem good for anything other than a dead-short
OR
NH00 gs rated (or similar) to the batteries between them and the bus-bar, either to replace the MBRF in future, or to add another later of protection that can handle dead-shorts.

The MBRFs are cheap, and easy to install, whereas the NH00 are more expensive, and need a specific housing, which means more wall space.

I did post on some of the DIY solar groups, and there is a real tide of opinion that class T is over-kill, and I think I can see their position, but if it's YOUR family/house, for the sake of a few hundred quid, why would you not add in extra protection??
 
Your last sentence is precisely my point, we spend thousands on these systems, and some people begrudge spending a few hundred quid on fuses for the added safety.

There is a thread on DIY solar forum where IIRC the whole house burn't down, and the general consensus was a dead short in one battery then drew power from all the others, resulting in rather hot cabling, and things catching fire. There was no way to tell definitively it was the lack of fuses, as there wasn't much left.

Mine are in my detached garage, but I still fitted T class first, around £100 for fuse and holder for each one, and i fitted three in total.
 
Last edited:
Back
Top Bottom