Component level board repair. Watch me fail here!

That would be amazing, sure if you have time.
Can I ask where in Essex you are. In a Romford boy myself.

I'm Southend area so not far at all from romford. I've found that my test board has 2 bios looking chips so will set it up now for a play.
 
well 12 min video... actually went well! uploading it now. It's taking forever though as im just uploading it from my phone, and because I don't have a camera for filming stuff my setup was a phone balanced in a mug pointing at what I was doing :D
 
Last edited:
Portrait because balancing phone in a mug! im sorry but it was the only way. I need some sort of spider phone gripper thing.

 
Last edited:
The smallest I've ever had success with is a Xbox controller wireless adapter fuse. They are tiny (less than 5mm) surface mount components, and I managed with a simple soldering iron, but it was quite a simple two pad repair, nothing like what you're attempting here. I've tried fixing card reader slots with the same technique but hot air really is required. By the looks of it you're going to have a hell of a lot of fun trying to get that to work without huge complication and multiple attempts. Youtube is king when it comes to this, but it looks like you've already got that worked out.

Good luck!
 
Portrait because balancing phone in a mug! im sorry but it was the only way. I need some sort of spider phone gripper thing.


Haha thanks for that, brilliant.
I liked the melting plastic bit :P

I dare not use a gas iron, ill get an electric one. 100%
I need to buy some of that wick stuff too, in case. Everything else I have coming, even tweezers!

I see how much easier it is with hot air. i might consider getting one as well/instead.
if i get "lucky" i guess i could even "melt" off the old one then just drop the new chip on, not using any extra solder at all, though i obviously couldn't count on that 100%
 
Haha thanks for that, brilliant.
I liked the melting plastic bit :p

I dare not use a gas iron, ill get an electric one. 100%
I need to buy some of that wick stuff too, in case. Everything else I have coming, even tweezers!

I see how much easier it is with hot air. i might consider getting one as well/instead.
if i get "lucky" i guess i could even "melt" off the old one then just drop the new chip on, not using any extra solder at all, though i obviously couldn't count on that 100%

You will need wick for sure, it's the only sure way of mopping up when like me you join all 4 pads together with a big blob of solder. Hot air really does make the process easier, hopefully you can see on the video that there are some little bits really close to the chip but with quite low air flow you can easily work around them. With an iron that might be quite a lot harder.

That hot air thing was less than 30 quid and looking at the photo you have you could probably just hot air, lift that chip off the hot air again and drop a new one in place. Just test on a random board first to get a feel for it like I just did. :D
 
Im gonna have to buy a hot air thing..... so much easier

858D so many on eBay i dunno where to start. Looks like EU plug is standard too, or kettle plug i mean.

Ah well its getting a bit pricier than it should but its an investment


How about this? its a soldering iron and a hot air in 1. Same dodgy company... kaboom
 
Last edited:
Im gonna have to buy a hot air thing..... so much easier

858D so many on eBay i dunno where to start. Looks like EU plug is standard too, or kettle plug i mean.

Ah well its getting a bit pricier than it should but its an investment


How about this? its a soldering iron and a hot air in 1. Same dodgy company... kaboom

That looks alrite to me. I mean as you say it's all from the same company and looks to be the same hot air attachment that they are using so why wouldn't it be fine? I mean it looks like you got a ton of space on that board to work with as well. I'm thinking you got this.

Also I don't see why this thread should only be for following my fails and repairs. If anyone feels like sharing some of their own repairs then feel free :)
 
Last edited:
I'm back again with more fun. I have myself an iphone and all of the tools are now here :) I don't really want to do the work this late so I think the plan is to have a bash at it tomorrow a bit earlier on in the day. Tonight just for a bit of fun I thought that I would do a quick video of what the phone does and how I know it is the audio IC this may also be the last time this phone ever works, portrait again because phone is still precariously balanced in a mug, it's only a few mins long but thought it makes sense to show you:
 
Frustrating business to be sure. I work professionally as a PCB repairer, but most of the stuff I get is random PCBs out of kit we have no information for whatsoever. Even if you find out which IC isn't working, and you replace it, and it still doesn't work, is it because you made a mistake (invisible solder bridge, broken track/pad)? Was the replacement IC faulty? Was the replacement IC a fake (we've had fake optocouplers from a normally reliable source)? Was it even that IC faulty in the first place (lack of an enable signal from somewhere else?).

I'm 50-odd but I can still replace a 144 pin FPGA with extremely tiny pins with the aid of our microscope no problem, but BGA I balk at, without doing x-rays you have no idea if the joints have taken or not.
 
If you are wondering why this all went a bit quiet it was simply because I have been a bit busy with other things, I did have a little time today though so have another shocking (no excuse for portrait this time), little video. I didn't film the whole lot but this is where I am at right now:

 
I've got an old 7870 xt that died a few weeks back.

Closer inspection revealed one or two capacitors have blown on the rear of the card if you want to try fix it. I've replaced it already so it's doing nout here.

 
I've got an old 7870 xt that died a few weeks back.

Closer inspection revealed one or two capacitors have blown on the rear of the card if you want to try fix it. I've replaced it already so it's doing nout here.


Still got it?

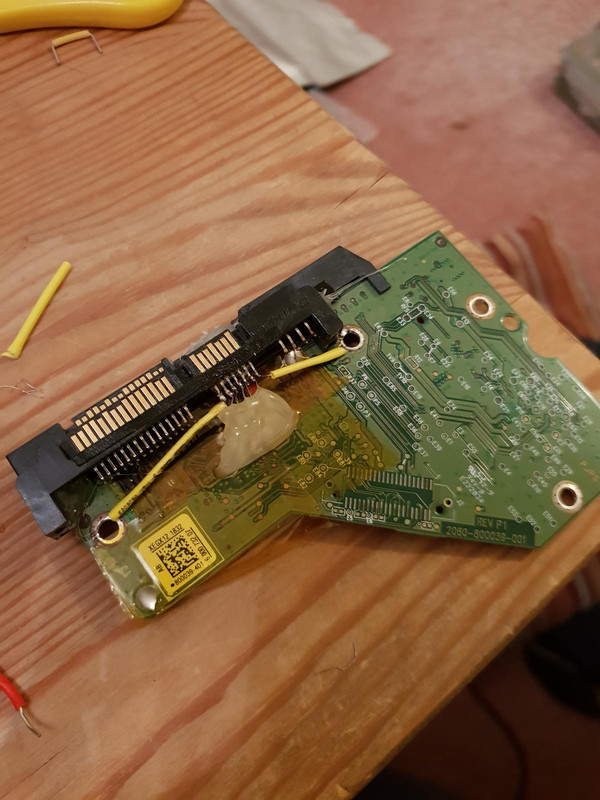
It's been a while since Ive updated this but I have fixed a few things, the phone... total fail. I fixed the audio but broke so many other things most importantly I somehow broke the home button which renders the phone pretty much usless so I chalked that one up to experience and moved along. Somebody gave me a hard disk that they couldn't afford data recovery on and were ok with me doing my best so I did this to it, sacrificing the connector off of an old drive and running new tiny wires. This was fiddly but rewarding as the drive worked but was slow transfering data onto a new hdd:


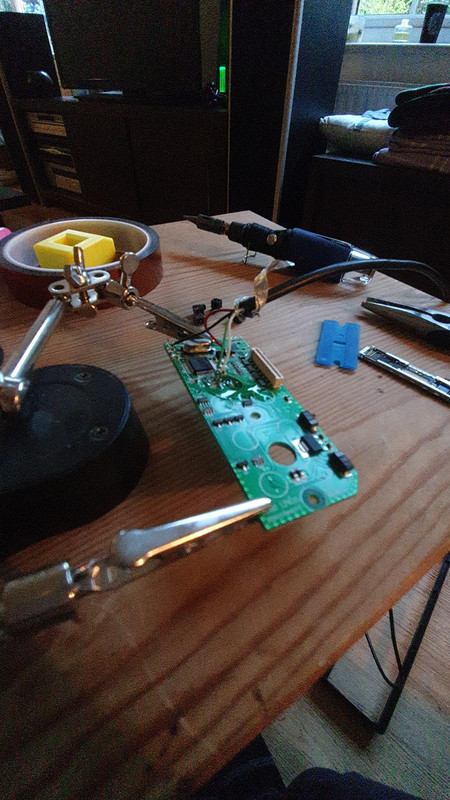
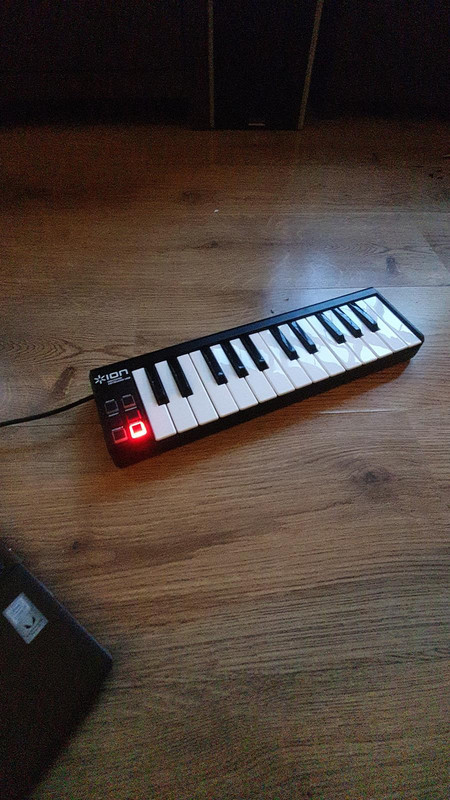
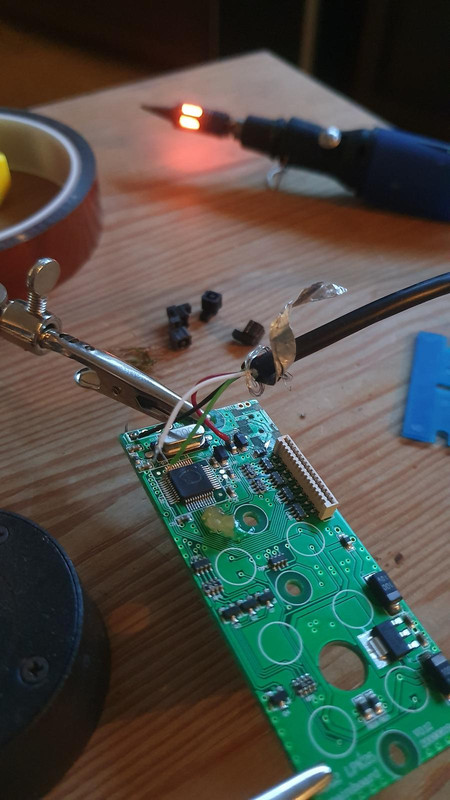
Then this week there was a keyboard that a friend managed to rip the Mini USB connector off of, then proceeded to cover the board in liquid metal and destroyed all of the traces around where the connector used to be. For this I just cut the end off of a spare usb and scratched back traces to see where stuff went:


I get these are not really proper repairs but still fun to work on and mess about with.

I have a 1050ti coming as well that I bought off of ebay, not working, so we shall see what happens with that.
 
They didn’t work before. Now they do.

These are absolutely proper repairs. Good job!

I guess you are right. Although you wouldn't expect a pro shop to give you your HDD back with an extra couple of connectors and layers built up of Kapton tape all held in place with hot glue lol :) I did recover it all to a spare HDD and gave them both that and the broken drive so all good, but you would be hard pressed convincing anybody that it was anything more than ghetto. Some pads were lifting if I used wire with any gague, it was just a nightmare. Took at least an hour or more to fix.
 
Back
Top Bottom