down sizing i7 860

Soldato
OP
Joined
1 Dec 2015
Posts
18,514
Wife ordered me to retrieve the xmas decorations from the shed last night an stumbled upon the box that had the stock LGA backplate! Thank **** for that!

Manged to rip out of the TJ07 and placed into the UMX4 for placement testing... Bad news in terms of this board having the AIO up top.


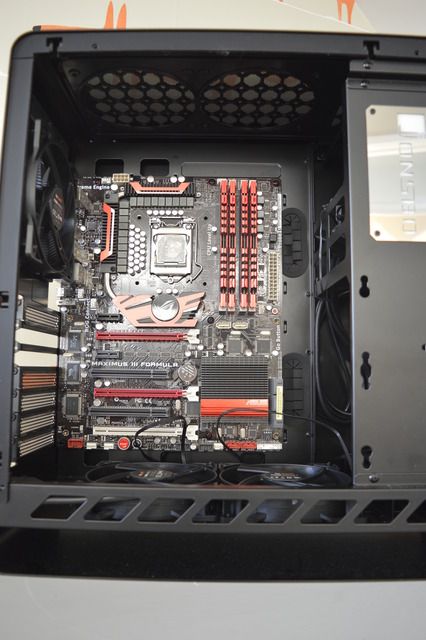
Forgot to take a snap of the distance between the intake fans at the bottom and the motherboard. mATX might be a choice for larger Rads and have clearance for motherboard cables.


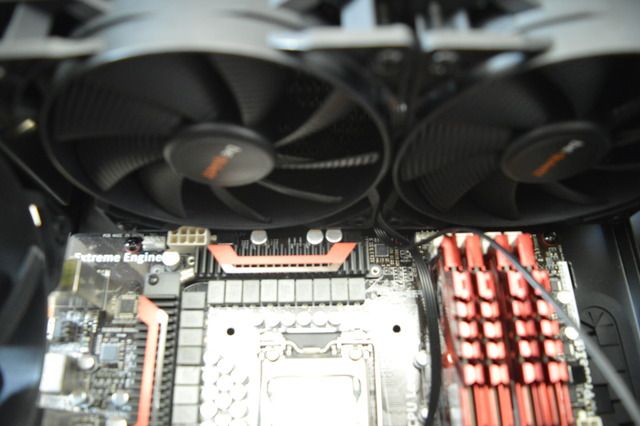
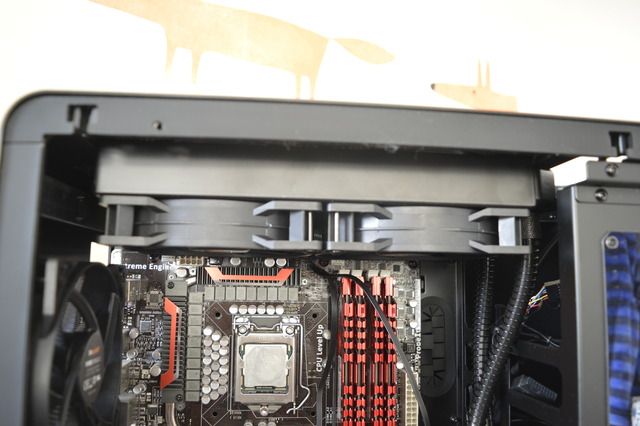
Just fits over caps! Another motherboard with the Heatsink flush with the top of the motherboard will not work with a 30mm AIO up top.
Nor with the 8 Pin flush as well.


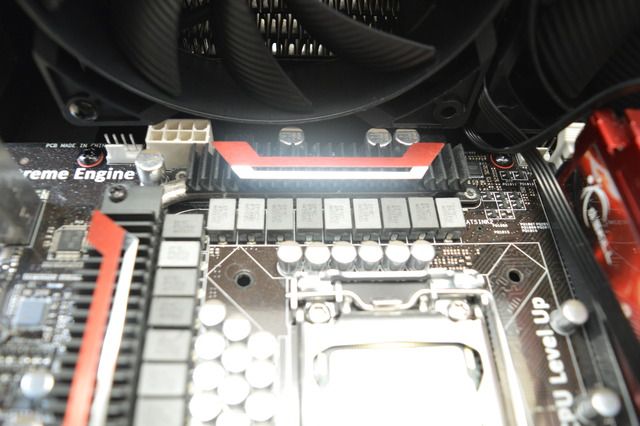
I've seen an ASUS Z170-A fit in the UMX4 housing a Corsair GT100i (30mm 240 rad), so it looks like the newer Asus boards have their 8 pin slightly lower, Heatsink is in about the same location.

I might just stick the 20mm fan provided ( came with m4 screws to correct length) and replace the fan over the 8pin. Again no Window in this case.
UMX4 rules out Gigabyte and same ASRock boards using AIO from the likes of Alphacool/beQuiet/Corsair that use 30mm + thick rads.
EK should work as a replacement and might swap around to it, would just give enough clearance of 4mm. Have to see the Fin density over the Alphacool 240 rad.

******
Just check Z170 images of a few vendors. Looks like im going to hack come of the plastic off the Bottom left brace and maybe a chip off the ring housing :D

****************
EK SE 240 ordered.... Can keep the rad for other things in the future. Really dont want to be running the AIO at the bottom and hacking fan may not work. Also hoping I can attach the temp sensor plug I had on the old loop to the fill port in the CPU unit.
 
Last edited:
Soldato
OP
Joined
1 Dec 2015
Posts
18,514
EKWB SE 240 turned up on my lunch break


Just gain access to the CPU 8 Pin but still very close. Also the orientation in the pictures are with the bards facing the right towards the PSU. the SE is a little longer then the Alphacool ST and didn't line up very well with the mounting hole.
Will have to be flipped around and may have some clearance issues with the rear 120 fan. Ordered a 90 8/11 compression fitting for the near side , so will see how that gets along.
Looks like the Z270 of ASUS boards have the 8 Pin high up top, Hoping ZEN boards have it slightly lower. If not a 120/45mm will have to be used in future builds with this case .

Will be interesting to see the temp difference between the two rads but wont to get test it this time around :(
 
Soldato
OP
Joined
1 Dec 2015
Posts
18,514
been a bit of a while since I've update due to other build and having to find a way to mount a 240 rad to the top.

Rad problem was solved b swapping out bequiets ( alphacool ST) 30mm 240 and replacing it with an EK SE 26mm 240. Had to mount in pull due to the rad hitting the PSU cage . No real difference in performance and visually, I dont have a glass/plexi panel.
Will need to get around to taking some higher quality pictures


Also finally got to try DX12 benchmark for myself, as I havent cared for any in the past as they have always been latest generation processors which would not see as much difference to older tech... well that was my thinking anyway . As i recall, Gen 5/6/7 of Intel and Nvidia favoured DX11...

DX 12 Benches


51.1 / 51.2FPS
54.9 FPS/ 95%
52.2 FPS/ 100%
46.9 FPS/100%

CPU bench


EVGA stats in DX11 Mode


To be honest, the slim 240 just handles the i7 860@ 3.66 , I tried 4.1Ghz I used before with a Quad 120 60mm rad and was hitting 80+. Could add in a 120 at the rear but looking to move to ZEN first and test before expanding the loop.

DX 11


There is a performance gain with DX12 for the old girl , almost 10 FPS in heavy benches, should have taken a snap shot of the breakdown for a bit more of a clearer images but the graphic does that nicely. Performance is more localised instead of jumping around all over the place .

Interesting to test other DX12 benches against DX11 such as Deus EX and see how she does.

Will also test the Gigabyte 1080 Turbo to really up the stakes !

**** on a side note, when I ghetto mounting the AIO with EK MX mountings due to believing I have lost the stock backplate, I actually got lower temps recorded in bios! 26c @ 4Ghz compare to 35c @ 3.66Ghz im getting now! and thats with a re-seat
indeed that was with swapped an 30mm for a 26mm , but the fin count is a lot higher and also the Silent Wing fans at 100% put out more flow and pressure then the Pure wings.
I might have to actually go back and try it, plus the mounting system from Alphacool is aweful !
 
Last edited:
Soldato
Joined
4 Jun 2007
Posts
2,619
Location
Watford, UK
Have you tried running the top rad fans in push instead? Same positioning but you should theoretically get two performance gains: push is more efficient that pull and you'll be blowing cold air from outside over the rad rather than warm air from inside. Front fan intake cools the ram, gpu, southbridge etc and rear fan can then exhaust it.

Looking good though. Colour scheme looks good and there's nothing out of place. Red and black may be a classic...but for a good reason. Plus it means you don't have to worry about hiding or modding a multitude of red LEDs or POST counters that are in red as it won't clash with your colour scheme.
 
Soldato
OP
Joined
1 Dec 2015
Posts
18,514
Have you tried running the top rad fans in push instead? Same positioning but you should theoretically get two performance gains: push is more efficient that pull and you'll be blowing cold air from outside over the rad rather than warm air from inside. Front fan intake cools the ram, gpu, southbridge etc and rear fan can then exhaust it.

Looking good though. Colour scheme looks good and there's nothing out of place. Red and black may be a classic...but for a good reason. Plus it means you don't have to worry about hiding or modding a multitude of red LEDs or POST counters that are in red as it won't clash with your colour scheme.

its a shame it doesnt have a window haha. but yeah, old classic red and black does look good :)

I might try the fans in push, again as you said getting old air. might get some recycling from the PSU- Its to the right of the CPU and pulls air from the case and out the top. but to be honest has a hybrid mode .

Will give that a try when i swap systems, I will try changing the rear in intake to exhaust to see if that has an effect but to be honest, biggest factors are is the mounting is **** as you can see the EK hard mound system is just miles better, 10c on bios screen !!! and the i7 860 being an extremely hot chip. im guessing everyone remembers those days of almost doubling your clock speed and having triple radiators just to cool one component !

*** one thing I havent factored is orientation of the CPU block, read somewhere in passing it can effect it as air gap happens at the top, with the EK mount the fill hole was upside down.... may try that on the off chance. nothing to loose
 
Soldato
OP
Joined
1 Dec 2015
Posts
18,514
Heads up for anyone looking to buy Be Quiet! Silent loop AIOs.

Install the CPU block with the writing upside down. Caught wind of this before and noticed that when I ghetto mounted it with the EK MX block, it was upside down.
BIOS recorded 26c with upside down orientation to 35c with it not upside down.

Guessing this unit it very sensitive to pressure or air gaps, any air thats in the system is now at the top in the radiator. but when filling and bleeding, an air bubbled causes the tempts to shoot to 70c+ when i was on Bios. Im guessing this is due to the reverse pump design.
So just as a heads up to anyone installing the unit with the rad at the front of the case and being lower then the CPU to mount the block upside down.
 
Soldato
OP
Joined
1 Dec 2015
Posts
18,514
so, Friday I attempted to apply Liquid metal Pads to hr 980Ti core...

https://www.overclockers.co.uk/cool...x-gpu-and-3-x-cpu-thermal-pads-th-010-cl.html

Did trust using one so doubled up.... should have trebled !
After leaving for a while at 60c via, no fans and bumping up voltage as well as core running at 1Ghz due to 1440p screen, tried quick bench mark via a game to raise it a little to make sure it melted on , went fine for a while and boom, hit past 80c before i would shut it down and believe its fried the core :(

took apart to see both sheets bonded together with half on the core and half of the heatsink =/

Can log into bios fine, also hit first windows loading screen before it comes with lines across and boots into windows Diagnostics option .

Gonna try the 1080 Turbo at lunch, but seems odd that the card displays BIOS screen and windows installation screen fine , also is a in a small boxed resolution .

anyone blown a GPU core have this issue of bios is fine but crashes booting windows?
 
Soldato
Joined
4 Jun 2007
Posts
2,619
Location
Watford, UK
That's not good news. So you put two pads between GPU and heatsink? Surely if the gap between gpu and heatsink is that big, there's something wrong? Could it be that because it's too thick, it's made everything else lose contact so nothing apart from the gpu is being cooled?
 
Soldato
OP
Joined
1 Dec 2015
Posts
18,514
*********

yep card is blown =/

1080 Turbo is in to confirm

and within 3 mins of listing on the Bay for £80 - for damaged parts, its been sold

seeing if i can pick up another one. Not to keen on 1070 pricing yet 1060 wouldn't last as long for 1440p.

Do have a Zotac 1060 water block just sitting their so may get one and plum it in
 
Last edited:
Soldato
Joined
4 Jun 2007
Posts
2,619
Location
Watford, UK
Got an Aqua Computer Dr Drop? Hard tube fitting on each end, female to female extension and stop plug on the other (or any other method of reliably closing the end - I'd suggest flatten it and fold it over but could break the bond) and you can fill it with air pressure and see if it leaks.
Dr Drop is available cheaper without the bicycle pump - provided you have a bike pump or car pump (it's a car type valve) you can save the money. You must disconnect the pump once pressurised to get a seal. The gauge is a bit delicate so don't drop it or get it wet but you could dip the joint in water and see if/where there are bubbles.
It's not a perfect system but it's better to see if the non-conducting air leaks out than if the coolant leaks all over everything! :D
 
Soldato
Joined
4 Jun 2007
Posts
2,619
Location
Watford, UK
Sorry, something odd happened so my post makes no sense. I missed your post about the card being blown completely - that sucks but glad you got something back for it.
Also, my post about the Dr Drop was meant to be on a completely different build log so please ignore...unless it's useful :D
 
Soldato
OP
Joined
1 Dec 2015
Posts
18,514
Haha, no worries dude.

Blown, but my own fault but I hope those wanting to do metal compound and think the pads are an easier solution , its not. Just go all out and be careful .

Just looked at the Xeon, that's not for the P55 chip set and ones that are, are 4 cores :(
 
Soldato
Joined
4 Jun 2007
Posts
2,619
Location
Watford, UK
I can recommend the Coollaboratories Liquid Metal Ultra for between the IHS and die of a Skylake CPU if you happen to be delidding one. Works very nicely with some non-conducting Kryonaut between the IHS and the block. I did put some clear nail varnish over the contacts on the top of the CPU board though...just in case the liquid metal shorted them out. Difficult to be accurate since I changed my loop at the same time but I think about 10°C cooler is about right.
 
Soldato
OP
Joined
1 Dec 2015
Posts
18,514
I can recommend the Coollaboratories Liquid Metal Ultra for between the IHS and die of a Skylake CPU if you happen to be delidding one. Works very nicely with some non-conducting Kryonaut between the IHS and the block. I did put some clear nail varnish over the contacts on the top of the CPU board though...just in case the liquid metal shorted them out. Difficult to be accurate since I changed my loop at the same time but I think about 10°C cooler is about right.

The pads were from Coolaboratories but yeah, will stick to tube paste form!

managed to land another Ti Strix on the bay , minus the cash made from the selling of the broken one lands it at £220 , still cheaper then the 1060 and better performance 1440p wise but now pushing 1080 territory for total sum!
Has ate way at my Zen budget :(

Harsh expensive lessons learnt .
Kryonaut has been bought!
 
Soldato
Joined
4 Jun 2007
Posts
2,619
Location
Watford, UK
Not had trouble with Kryonaut myself (other than my colleague using up my tube) but some found it difficult to spread. Warming it in a glass of water is supposed to help but I found that if you spread slowly and push down slightly it spreads fine. Spread faster and the paste sort of tears and doesn't spread.
 
Soldato
OP
Joined
1 Dec 2015
Posts
18,514
Not had trouble with Kryonaut myself (other than my colleague using up my tube) but some found it difficult to spread. Warming it in a glass of water is supposed to help but I found that if you spread slowly and push down slightly it spreads fine. Spread faster and the paste sort of tears and doesn't spread.

sorry, i lied, was Hydronaut I bought, due to having to re-paste the incoming Strix Ti, the i7 860 and hopefully bring it down slightly and the 1080 Turbo for testing.

interesting with application, normally I used the pea shape in the middle but im guessing this stuff need to be applied differently?
also got the cleaning kit :D
 
Soldato
Joined
23 Apr 2010
Posts
11,896
Location
West Sussex
If it makes you feel any better I've done it too. I bought pads for an 8800 Ultra years ago that were too thick. When I tightened it up with my gorilla like grip I heard some cracking noises. Then I realised the pads were far too thick and I had literally curved the card by doing up the screws too tight and broken all of the BGA balls.

It did bake, but died a week later.
 
Soldato
Joined
4 Jun 2007
Posts
2,619
Location
Watford, UK
sorry, i lied, was Hydronaut I bought, due to having to re-paste the incoming Strix Ti, the i7 860 and hopefully bring it down slightly and the 1080 Turbo for testing.

interesting with application, normally I used the pea shape in the middle but im guessing this stuff need to be applied differently?
also got the cleaning kit :D

I'm assuming that Hydronaut is the same when I say this. They provide a rubber nozzle that screws on the end of the syringe. This lets you dispense and spread together. Aim is a thin, even layer covering the die.
 
Soldato
OP
Joined
1 Dec 2015
Posts
18,514
I'm assuming that Hydronaut is the same when I say this. They provide a rubber nozzle that screws on the end of the syringe. This lets you dispense and spread together. Aim is a thin, even layer covering the die.

read the thread on here... will stick with the pea method i think :D old skool system, old skool ways
 
Back
Top Bottom