Hand made Infill plane (woodwork)

Cheers Mark

Is that so you can adjust the front mouth?

No, the plane will have a fixed sole so no adjustment. What set Mitre planes apart from other planes was the incredibly small mouth opening.
The mouth on a recent Stanley or Record plane might be 5-6mm wide if not more, the mouth on a mitre plane is only 1-2mm. Typically mitre planes where used to take very fine final shavings or plane end grain.

To get a mouth this tight by hand you can really only achieve it by making the sole in two pieces. Traditionally there was a tongue and groove joint to align the two pieces but I thought a V joint would be easier, I was wrong :)

Engineering is appealing to me too, I'm a furniture maker but like to try my hand at different things, I just enjoy making things I guess.

Can't go wrong with a well looked after "older" Stanley plane.
Like you say the new stuff is probably made in china and not any where near as good quality.

I'd take a good condition second hand plane over a brand new one any day, Unless it's a premium maker like Clifton, Veritas, Lie Nielsen etc.

After that you're moving into bespoke planes like Lazarus, Holtey, Sauer & Steiner, Oliver sparks, etc
But you need very deep pockets for one of those!
 
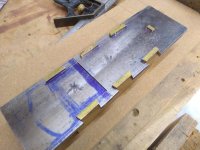
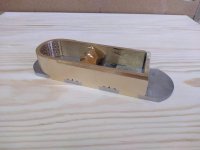
Finally the sole dovetails are "nearly" done. I could at last do a test fit of the sole onto the body.
Getting the two pieces of the sole to align and make the dovetails a tight fit has been a pain staking task.
It was a case of fine adjustments to each dovetail with a file then test fitting after each try.
All I need to do now is fine adjust the depth of the dovetails to get the sole to seat flat, again lots of test fits until it's right.

N9H1nEW.jpg

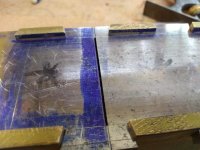
The split dovetail with the mouth opening had to be a perfect fit. Too tight and it will distort the body, too loose would cause gaps in the V joint and play in the mouth.

o5DqU3n.jpg

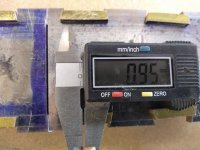
Amazingly it's come out really well with a mouth opening of just under 1mm.
I may have to open this up a little yet but I'd like to keep it under 1.5mm if possible, the finer the mouth the finer a shaving it should produce but too small and the plane won't take a cut at all.

ymT5qx1.jpg

I've still to shape the sole and a few other things but after that is the dreadful task of peening it all together, Wish me luck.
 
Are you referring to the bent "Y lever" arm on the left of the brass thumb screw?

Indeed I'd be cautious on bending it cold if its a 1940's plane.

If it's functional I'd be inclined to leave it.

If not I'd remove the pivot pin with a small punch to release the Y lever from the frog then heat it with a torch and apply very gentle pressure to try and bend it back.

If it does break you can buy a replacement but it will probably require some fettling to get it to fit nicely.

https://www.flinn-garlick-saws.co.uk/acatalog/Y-Lever-for-Stanley-Record-Bench-Planes-502.html

People often fit thicker blades to their planes and in doing so the Y lever is not long enough to reach through the blade and fit into the notch in the cap iron, so longer Y levers are available to get over this problem
 
You can often find them on ebay if your search for hand plane spares.

Brass seems to be a popular choice if you where to make a new one, would be a good project too.
 
Thanks Merlin, funnily enough I did try to electro etch the logo into a piece of brass that I was then going to inlet into the side of the box but unfortunately it didn't work on brass, guessing brass isn't conductive enough?

I then asked my friend with the laser cutter to laser me a tag I could inlay in the same way but he never got round to it.
I'd like to get it done so might get onto him again, it would add a nice finishing touch to the box.
 
I've taken some short video clips of the progress so far and started to put them into a video.

It's nothing fancy, just sped up clips and a few short descriptions of what I've been doing along the way.
Might be interesting to some of you.

 
Glad you got it sorted Mark, it could be cast steel. Often seen them broken on newer planes as they are probably made from pot metal.

I'm working on video 2 at the moment so should be up soon.

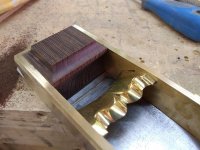
I've just started making the wooden infills for the plane. I've gone with Millettia laurentii "wenge" as I had a spare piece from another job, its very hard and dense so should make perfect infills.
It's really hard on tools mind, blunts saws and chisels in no time.


U7mOgT0.jpg
 
Finished the second video which I've just uploaded now.

The plane is coming along, both infills are made and I'm just working on the wedge now.

Got to wait a week for so for the tool steel to arrive then I can start making the blade.

 
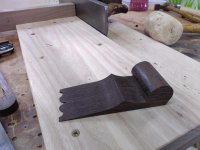
Got the wedge finished this evening just got to sand it up. Worked a cupids bow into the bottom of it too which complements the bow in the bridge nicely.
Wenge dust leaves a really nasty taste in my mouth so masks on when sanding, not as bad as Iroko though the dust of which feels like inhaling razor blades!


5WvaBt2.jpg
 
Nice! I like the pyramid detail and is that mother of pearl I spot on the round parts? no idea what they are called.

I've a love hate relationship with wenge, it's dense but the open grain can make it frustrating to work and the splinters are dreadful! if you don't get them out immediately they can quickly fester.
 
Wow, fantastic skills. Just seen this thread and read it all the way through, seriously impressive - well done sir and thanks for sharing !

Thank you :)

@Mark A
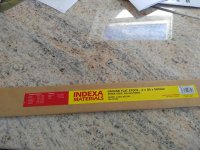
I went with 01 tool steel again. I believe it's slightly easier to harden correctly with a DIY approach than other steels, it's also readily available and cheaper than A-2, D-2 steel.

I got this piece from Zoro tools uk, I've also used JKGmetalsupplies on E-bay, GWR fasterns, Conventry Grinders and sdnonferrous.co.uk for brass and gauge plate.
 
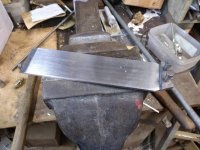
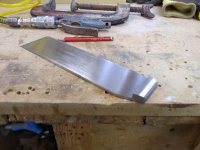
I've made a start on the blade. It's tedious work, endless hours of flattening and sanding.

Just to make life even harder for me I've made it a snecked blade, this just means it has a "tang" on the heel end to aid in adjustment once fitted to the plane.

s11Gycg.jpg

Still a lot more filing and sanding to do.

bZMrrLZ.jpg
 
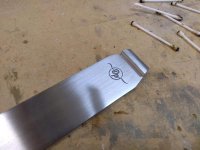
Managed to get the etching done on the blade today.
This blade is narrower than the last so I asked my friend if he could laser me some new stencils which he kindly did.

I wasn't sure how well it would turn out as the stencil was half the size of the last one but thankfully it came out really well again so I'm pleased with that.

k4dyyVJ.jpg

And again for any one interested part 4 has just gone up.
 
Last edited:
Cheers mark.

You wouldn't get a traditional mitre plane new now from any of the major brands. Lie nielsen and Veritas make their own modernised versions of them as well as Quangsheng

If you want a "new" traditional mitre plane you would need to go to a bespoke maker and like you say the cost is high.

You can pick up old mitre planes second hand but most of them have been abused, normally with the mouths being widened and the wedges/blades replaced.

Good condition ones go for hundreds and some into the thousands. I recall seeing a rare Norris mitre plane on sale for £20,000 recently.

Mitre planes are a bit obsolete now, block planes have taken their place and where they would have been used with a shooting board, jack planes and chop saws have taken over.
There's nothing like a well tuned plane and shooting board combo for fine mitre work though.

I'm toying with the idea of making one more and putting it up for sale but I doubt I'd see a worth while return for the work involved.
 
The plane is starting to take shape now. I've been busy with my daughter over the last few weeks, she's finally learnt how to crawl so is keeping me busy!

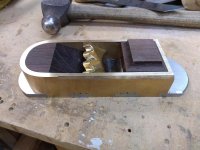
The body of the plane is pretty much complete other than a final bit of finishing, I've added a bevel to the top edge to make it a little more comfortable to hold.

Kdy1uLK.jpg

And both infills are made and dry fitted, I won't be fixing them permanently until near the end of the build.

HKfX6Xw.jpg

And part 5 has just gone up

 
Back
Top Bottom