Just dropped a deposit on some M Power - Trackday Project Car

According to youtube :-

Step 1: Hold the left knob down
Step 2: Turn the key into position one while still holding the knob down
Step 3: Keep holding until it the word "Reset" pops up
Step 4: Let go of the knob and hold down on it again until the "Reset" starts flashing
Step 5: When flashing let go and press the knob once more time and now your inspection should set back to 25,000km


Cheers!


All parts here now for tomorrows service and changing driveshaft over:


IMG_2493.jpg


All ready for RR day, hopefully diff will go in end of month or early May, just leaving cage to sort. Then hopefully lots of fun on track. :)
 
Hi there


Propshaft, CV joint, centre bearing changed and the noise is gone. :)
Also fitted fuel filter, did oil change/filter and fitted some rear clips to the rear bumper to stop sagging and they actually work, not bad buy at £2.50

Also fitted a new bonnet badge as mine was looking worse for wear, that was not such great value at £33 for a plastic BMW badge. :eek:

Some photos of the car on the ramp:


IMG_2496.jpg


IMG_2497.jpg


Car drives great and all noises are gone so was definitely propshaft failing. :)
 
well you can't quibble with that, no doubt it was tons cheaper too :D

I remember you also mentioned running a square setup for your CSL (reps also right) wheels, what sizes were they again? Thinking about changing the MV2's on my 330ci as they make the car look quite dated.

They are not CSL reps, they are Apex EC7 wheels which weigh only 6.5kg each and are extremely strong. :)

CSL reps/genuine are 19" these are 18" and a square setup shod in 265/35/18 all round. :)
 
Assuming you're on 18x9 or 9.5 then they seem to be 9,5kg? I thought 6.5 seemed ludicrous given my 17x9 Advan Racing RS are 7.4kg.

Anyway, looking nice, did you get the CSL ECU sorted?

Yeah ECU is all sorted and running great, though the tuning company in the USA just sent me a new tune based on some datalogs I sent them, will try that out in a bit. :)
 
Last edited:
June 20th/21st I'm going to the 'ring as long as the forecast is good. Don't know if there's a Spa track day that coincides but I'd be up for it if there was.

I'll be in Taiwan no doubt then, this year is a bit unknown for me as doing a bit of travelling and got a lot of stuff to sort, sell 911, fit cage in M3, buy Mustang and hopefully sort a holiday as well. :)
 
Been a quiet few months on this front! Managed to get out on track at all? I'm starting to look into E46s more now as either an initial road car turning to track or an already modified track car. Would be good to pick your brains at some point if you're not mega busy.

Not really.
Differential is ready go in, but no track days planned at present just holidays. :)
 
Got mine finally done now. done a few events. what track days have you done gibbo. And what times are you doing???

What have you finally done? You have a thread somewhere?

In mine I have done Donnington many times, Anglesey and Oulton Park. But have not done any events for quite some time, simply due to family loss, women and holidays. :D

Best time at Donnington on road tyres was 1:21.60 in the dry. Should be good for sub 1:20 now with me driving, new differential, less weight and more power. :)
 
Hi there


Really time for an update:

For those who did not know, I converted to full CSL ECU running specification, map sensor etc. Drivability a vast improvement, basically just like a CSL, no hesitation or lack of power down low like Alpha-N can have, though mine was not so bad to be frank, but the CSL map is night and day better. I went with TTFS tune to the specifics of my car and did some data logging to improve it, in the end was a great running car which felt insanely fast on the road.

At the last dyno day I organised at OcUK the tuner did some live tuning on the dyno (via remote login) and fixed some over-fuelling issues and recommended we increase rpm to 8500rpm, stating it is perfectly safe. Got the fuelling spot on and car was running better than ever. Unfortunately 50-100 miles after the dyno the engine developed knocking, so I got RAC recovery.

So in short with the help of Andy (Powerstation) we diagnosed the engine had most likely spun a bearing but still had oil pressure so damage could be minimal. This was simply due to 8500rpm!! So keep your rev limiters stock guys! ;)

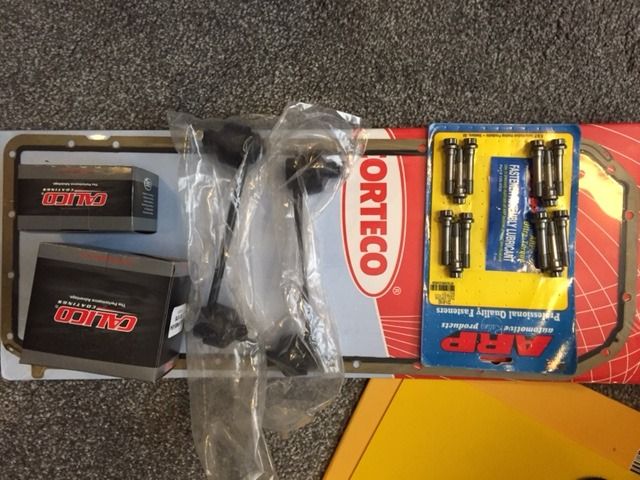
So I decided to undertake an engine rebuild by myself in my driveway:

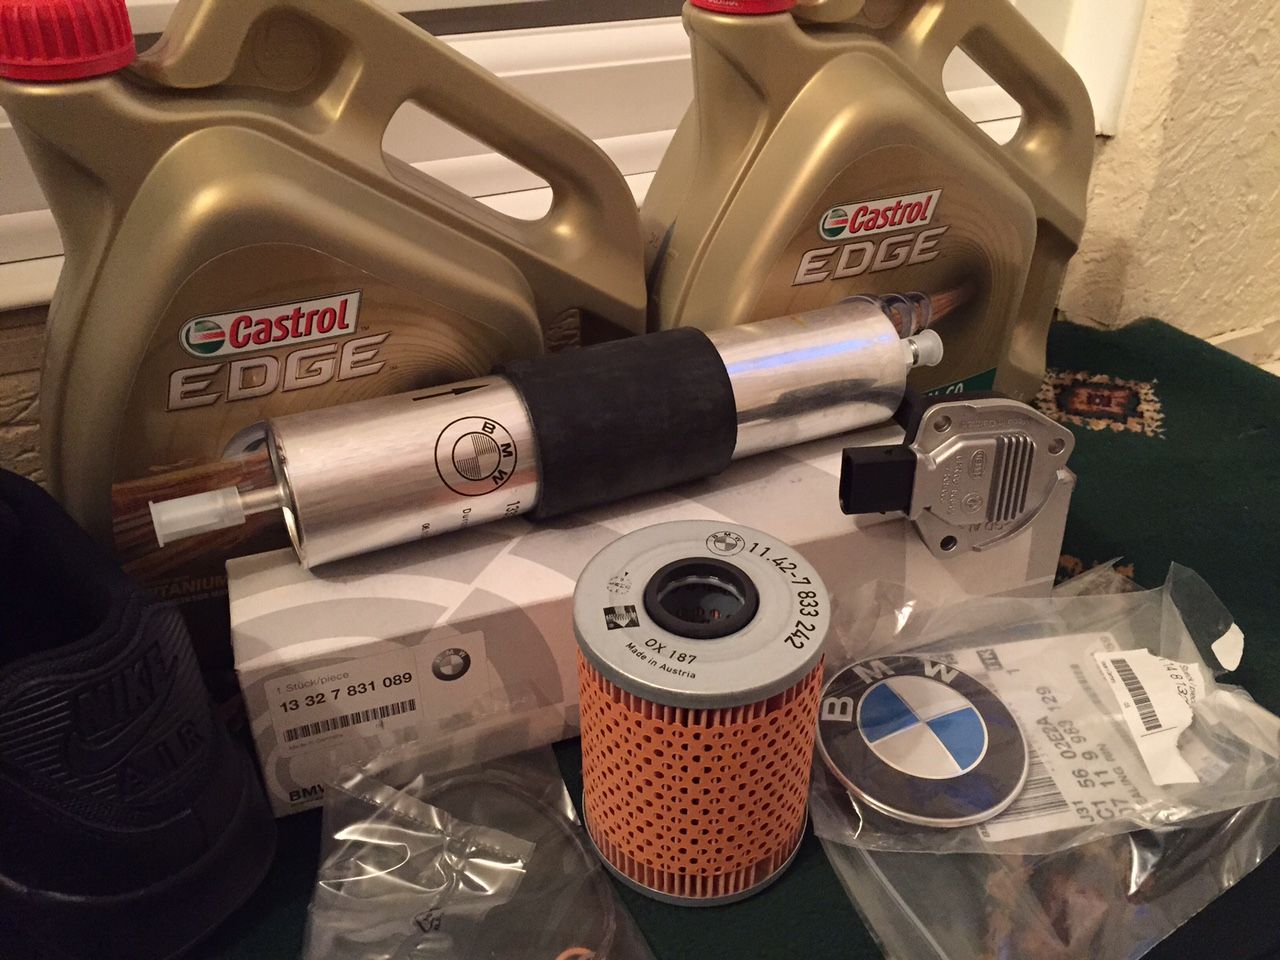
New parts arrived finally, took customs nearly two weeks:

IMG_2627.jpg


Sump gasket
Rod bearings
ARP Bolts
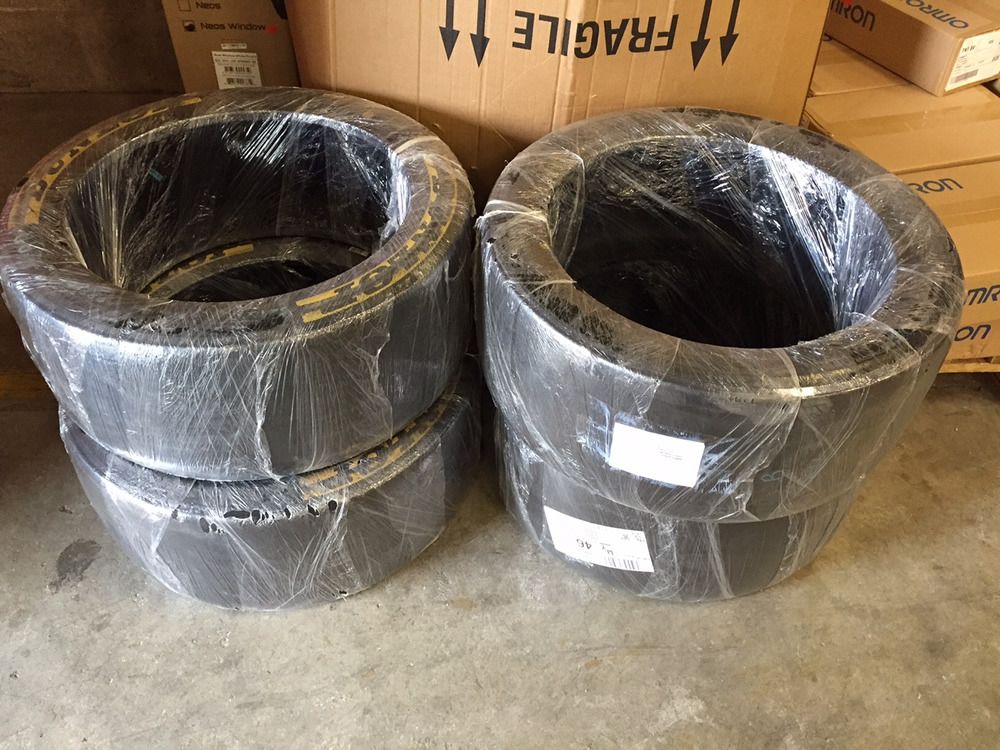
KW front drop links (old ones had to much play)

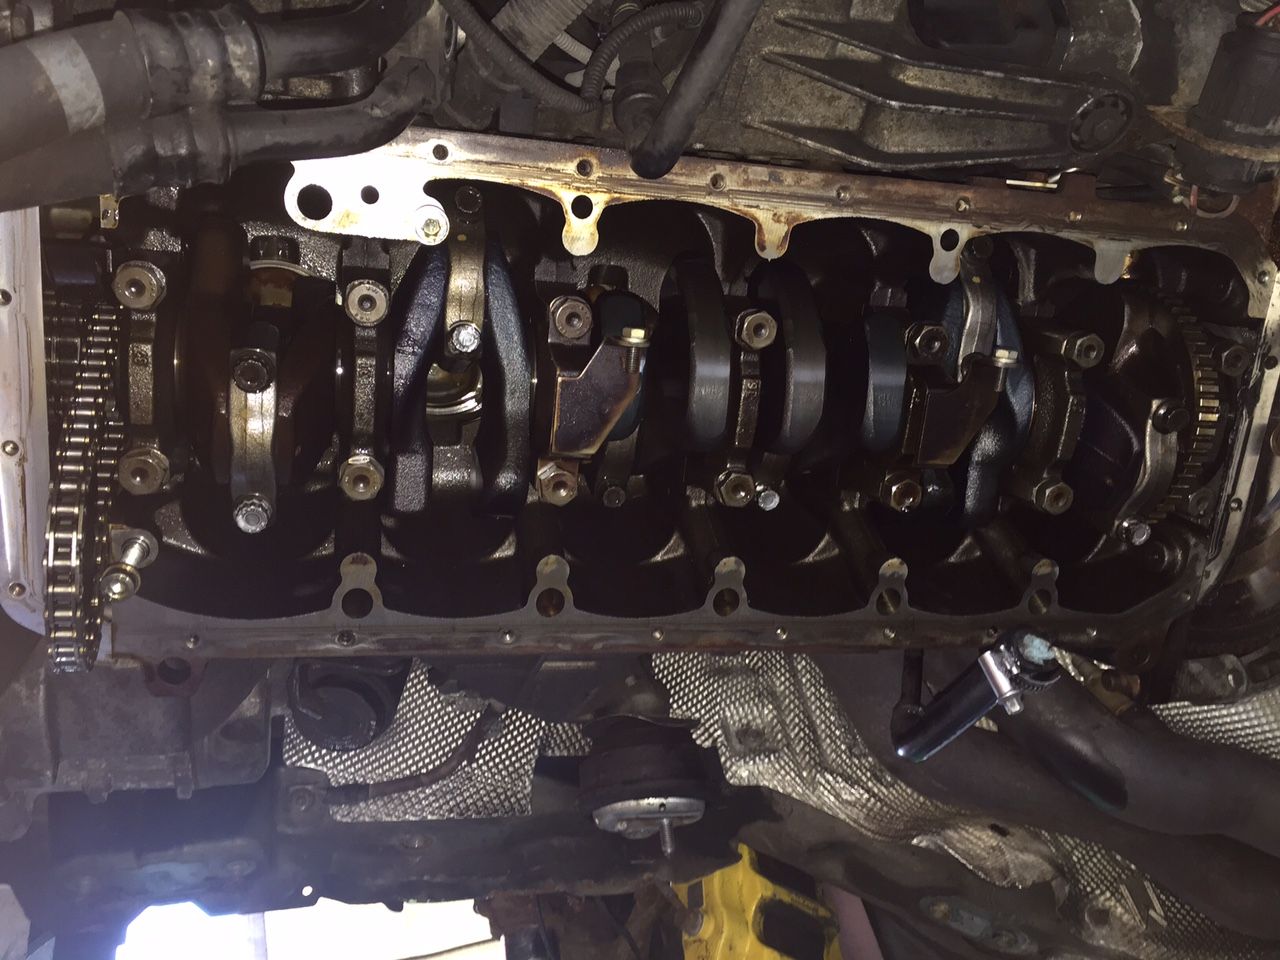
Got the oil pump removed, used a cable tie to pull the chain together and then pushed the plastic tensioner out the way, it is reversed threaded but then the nut came off easily, also got myself some HEX sockets as the oil pump hex bolts are super tight. Oil pump and all return lines out the way:

IMG_2639.jpg


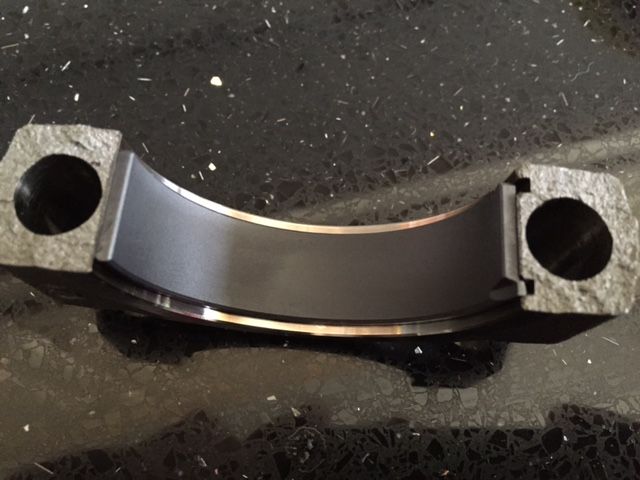
The new bearings are coated and clearly packaged as lower and upper, a picture of a new bearing in end cap, you can clearly see the coating:

IMG_2628.jpg


Now the fun started, first of all the upper bearings are so fiddly, not much room to get your hands up there, so takes a few attempts, luckily both the bearings and crank survived as I made sure to not touch them.

Plus Andy gave me an excellent idea of when end-cap is removed to then crank the engine until the piston is at the top and to then crank other direction bringing crank back down but leaving the piston dangling in the air, this worked very well.


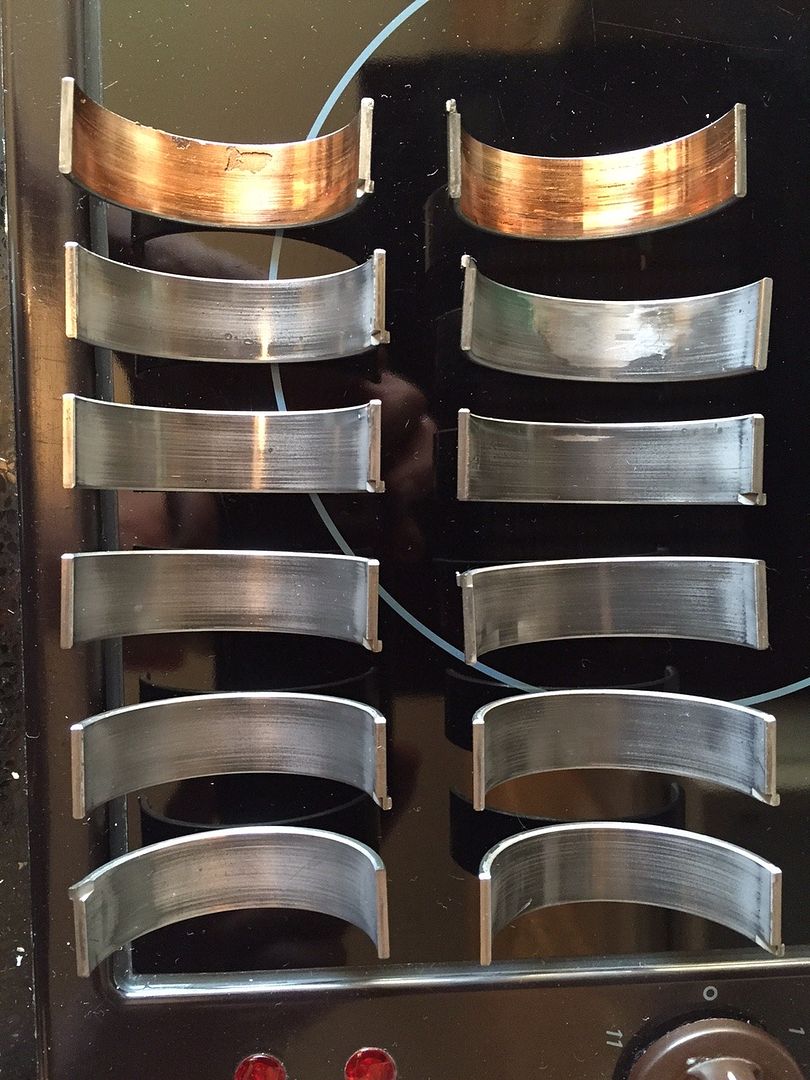
OLD Bearings VS NEW!


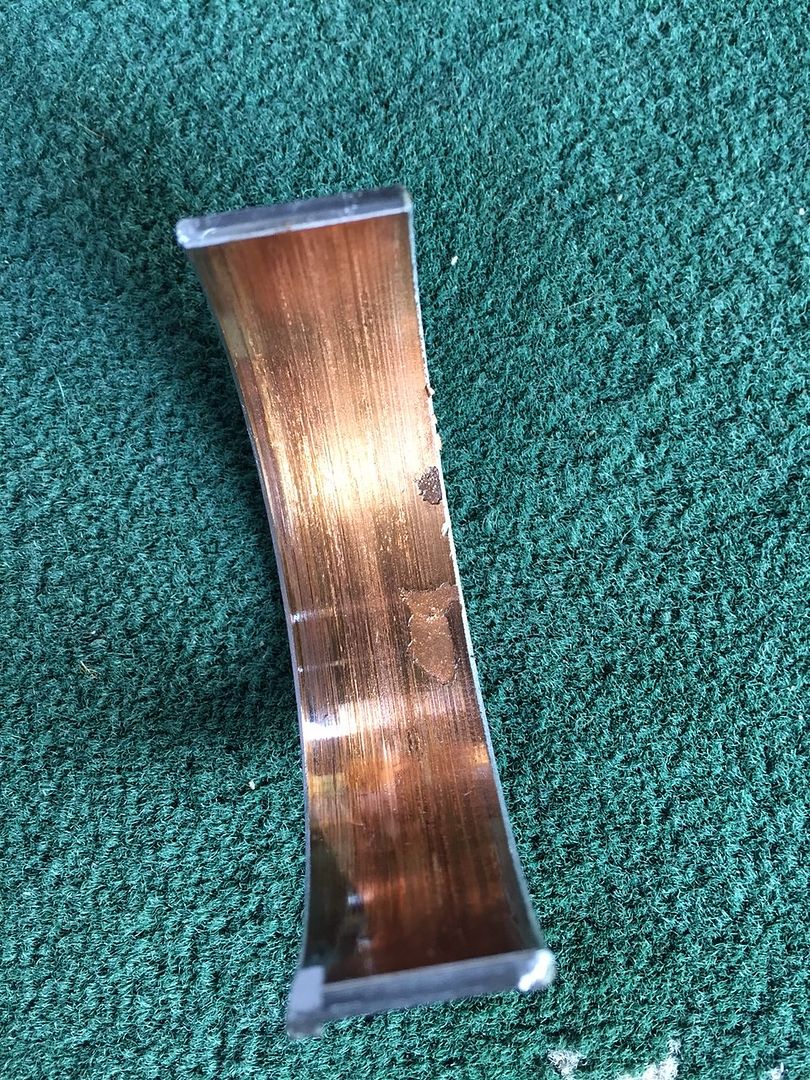
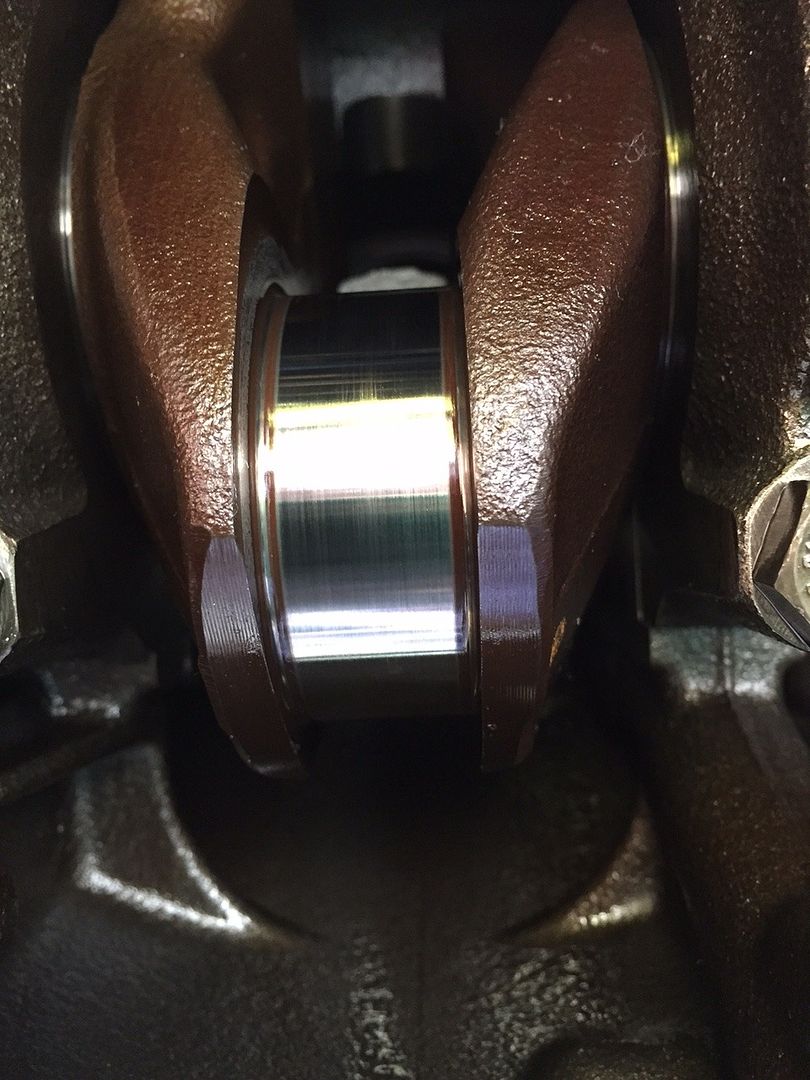
Anyway all the bearings were coming out and were all looking fine, I was beginning to worry that maybe I had another issue. But the last cylinder I did was number ONE.

As soon as I took the end cap of I noticed an issue, which was the end cap was quite a bit hard to get off and when it did come off the shell remained on the crank as did the rod side as well. :(

At this stage I thought none of the others did this and feared they were maybe welded to the crank but I touched them and they did move they just seem hydrolocked to the crank with oil, yes oil another good sign.

I got them off and well they tell a story:

IMG_2636.jpg


IMG_2637.jpg


This was close, very close!!!! :eek:


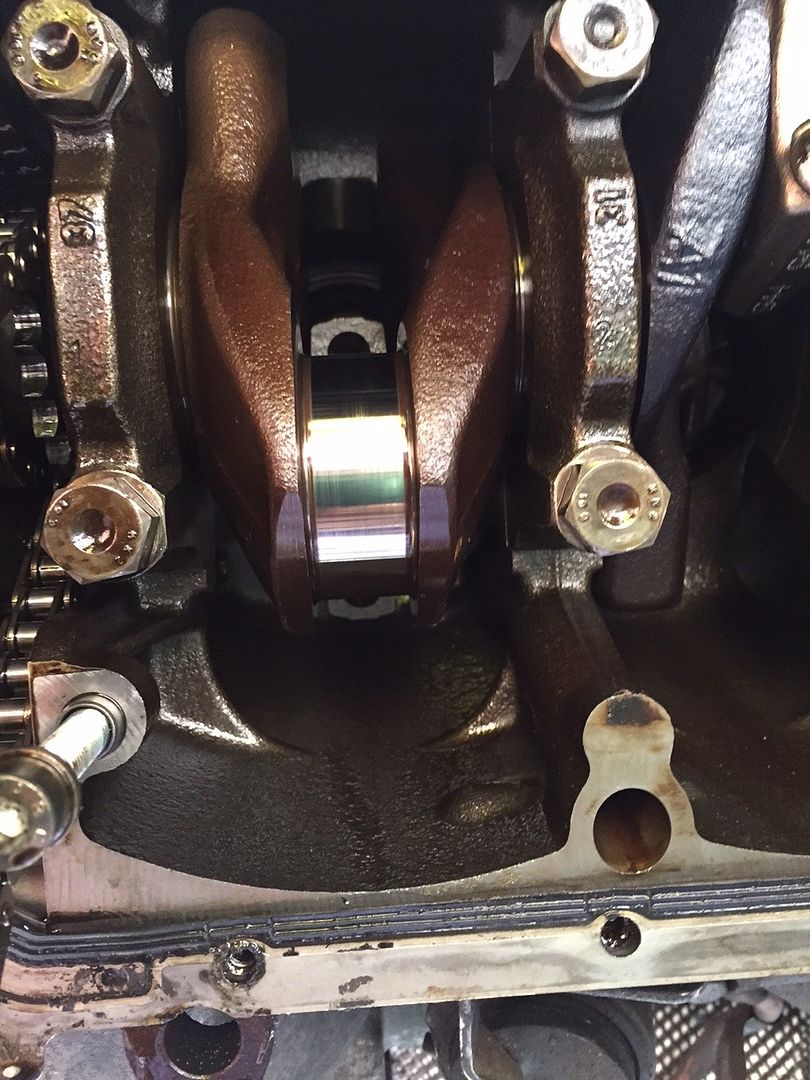
I inspected the crank and much to my relief it looked identical to how the crank looked at all the other cylinders, nice and shiny with no marks, scratches or pitting:

IMG_2635.jpg


IMG_2634.jpg


That's a relief!! :)

Car all back together with ARP bolts very easy tightening process of just tighten by hand and then torque to 70lb/ft. :)

Now to put it all back together. :o

Refit oil pump and chain
Refit oil pickup lines
Clean up sump and gasket area.
RTV sump, add gasket and more RTV.
Refit oil pan, making sure dip stick is partially inserted, this was a royal pain in the ass and a lot of swearing happened.
Tighten up sump starting from centre working outwards including all awkward bolts.
Refit power steering pump
Refit power steering pulley
Refit drive belt
Refit oil pipe and power steering brackets
Refit subframe, but do not tighten up much, say one turn.
Refit wishbones
Refit steering rack, very tight hence reason for not tightening up subframe.
Now tighten up subframe bolts, steering rack bolts, steering guilbo, ensure wheels and steering wheel are centre before tightening.
Refit and tighten PS lines, make sure there is a washer either side
Refill power steering fluid, dextron 2/3 ATF/PS fluid for M3.
Tighten wishbones and track rod ends, use a pumpkin jack to prevent nut from just spinning.
Check oil return lines, oil level sensor, headlight sensor/levelling and any other plugs are all connected and re-check all bolts.
Fill with 7l 5W-30 running in oil.
Leave plugs and coils out, crank the engine 5-6 times for 5-8s to build oil pressure and check oil level.
Install plugs and coils.
Start the engine, oil pressure light should go out within 5s, turn steering wheel left to right to flush air out of PS system and leave to idle until warm (80c) oil temp and then give some gentle revs. Once 30 mins passes shut off and drain oil and remove filter for inspection.
If all OK refill with correct Castrol 10W-60
Refit chassis brace, all undertrays, air box, pollen housing, rocker cover, strut brace etc. and check oil level.
Test drive. :D

Probably missed loads.

The noise myself and others heard in the car park has gone, even after an hours drive so oil upto around 90c, did not get over 100c as keeping revs under 5500rpm but car sounds healthy and is driving fine.

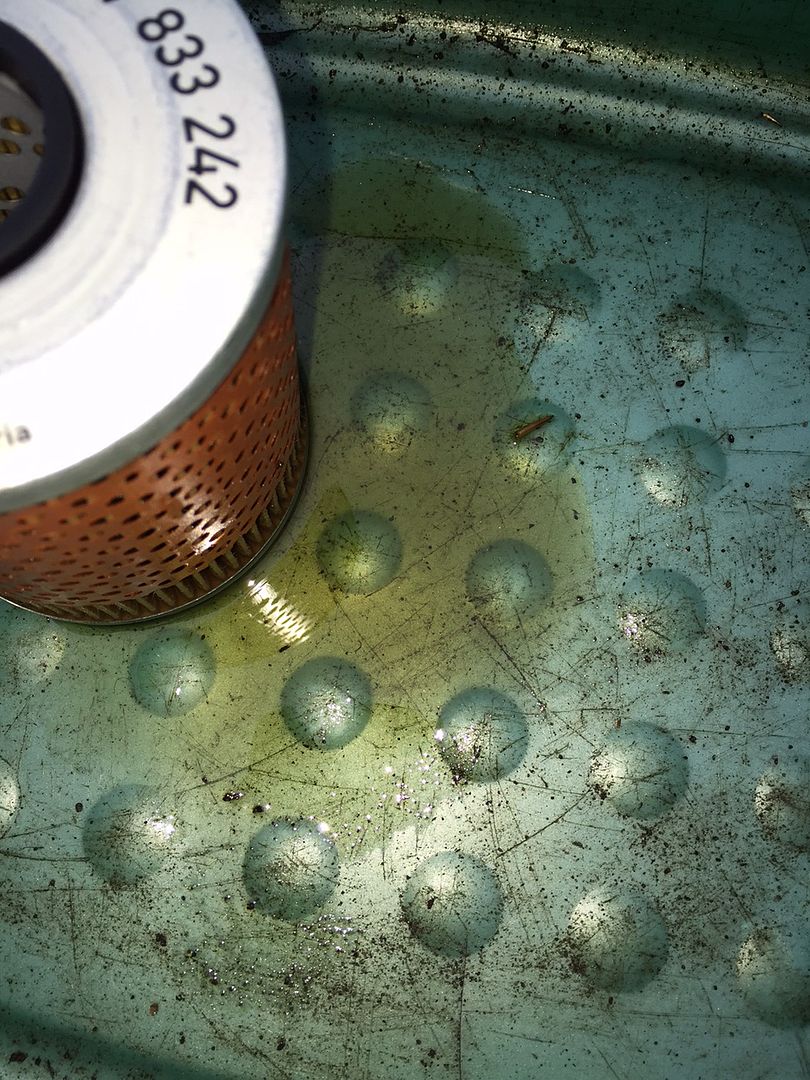
The oil from the filter from running in did seems to have a little debris but very hard to tell whereas before it was very clear, but this I suspect is what was left in the system, couple of picture:

81c41e19790ac2bb7634982a658d6d34.jpg


4ae0ff34f71b55a0396b91ef88f5638a.jpg


Hopefully that is the last of it, but shall check the current filter in a couple of days to see if anything is in that one, fingers crossed.

It's good to have the car up and running again, drives superb, sounds great with no knocks, but only driven for an hour so far.

I've always being quite willing to work on my own cars, but not done anything major like this since I super charged the Mustang. I've learned a lot completely dissembling the front end of the car and opening up the engine. Quite enjoyed it but hope I don't have to do it again. ;)

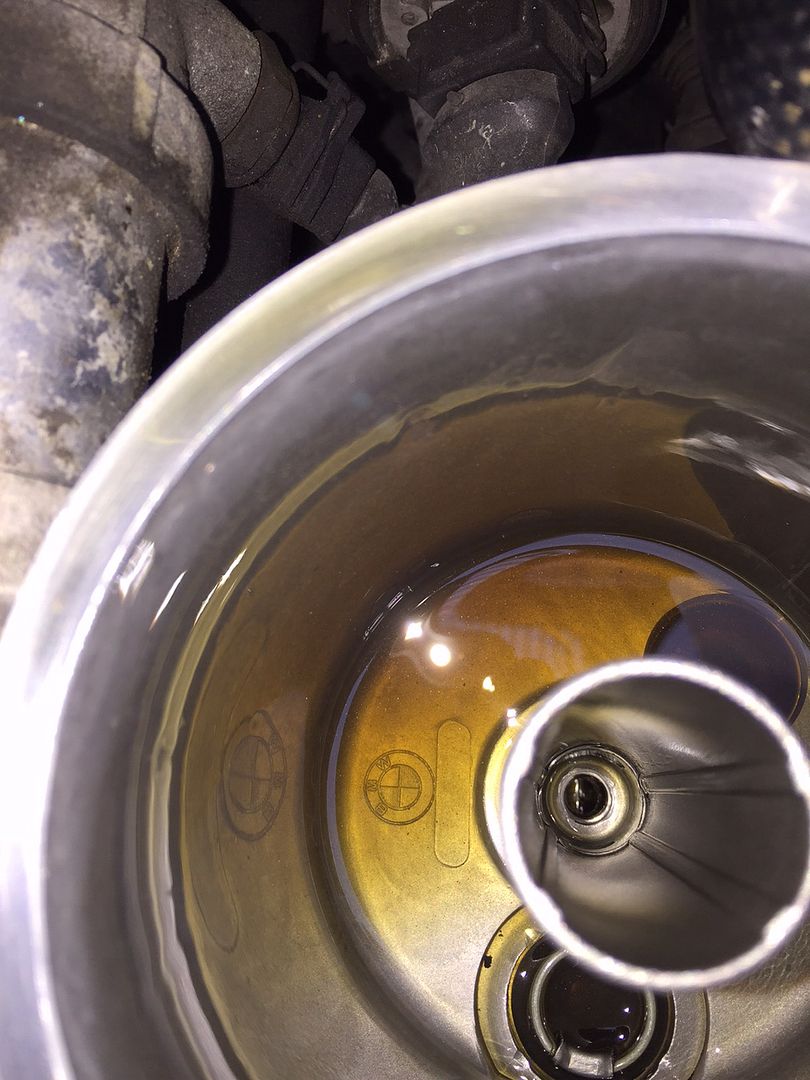
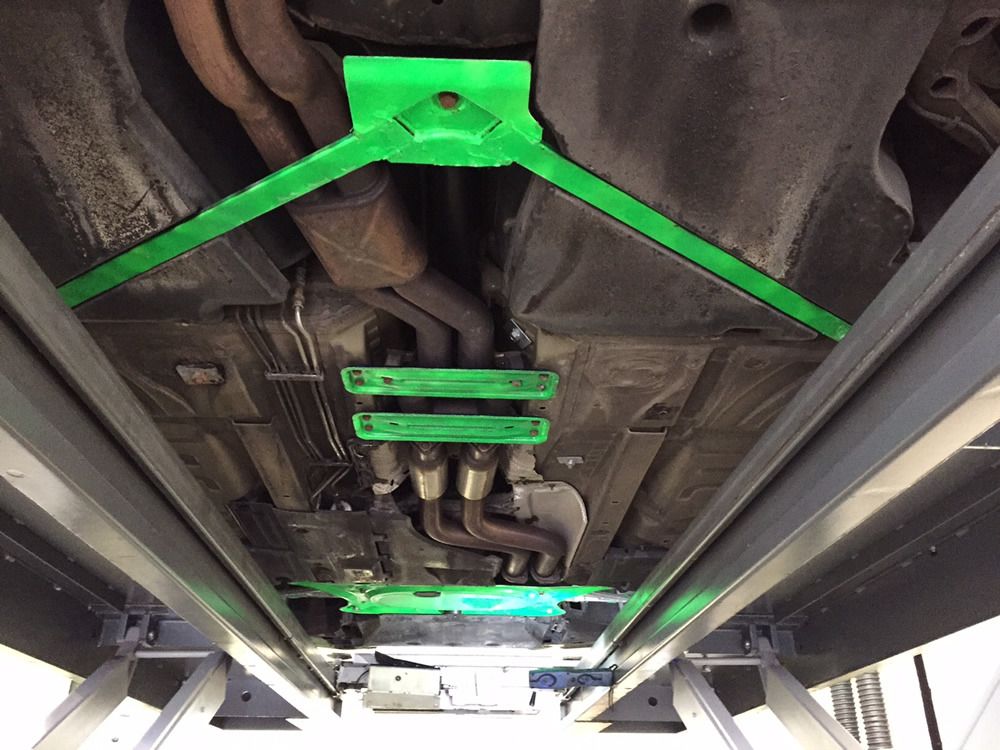
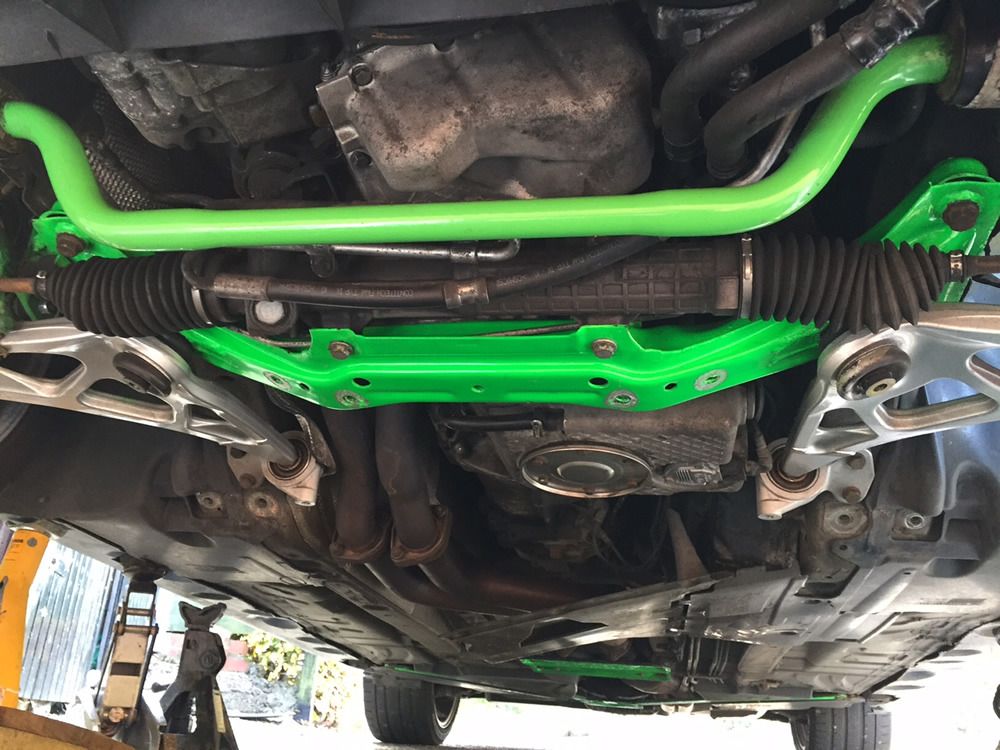
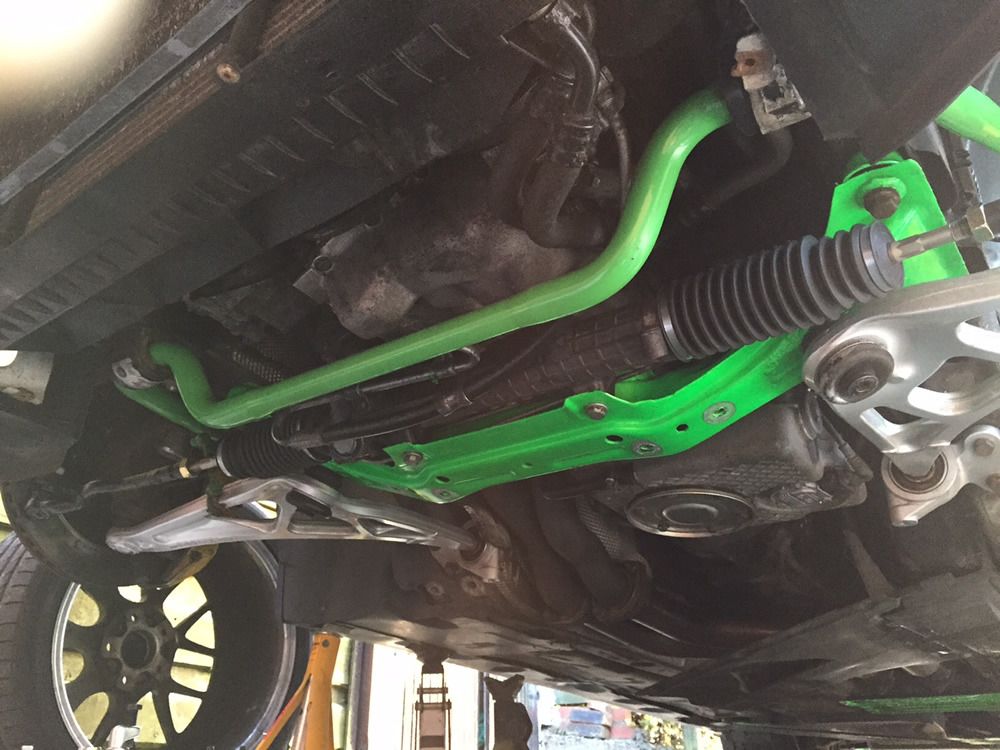
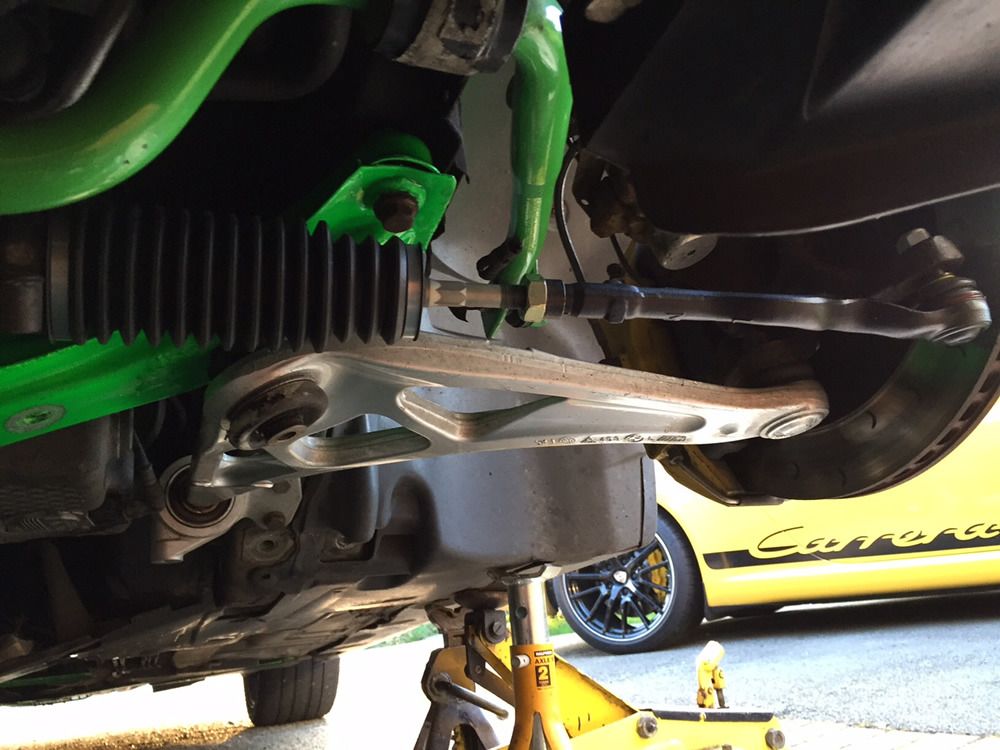
Finally a picture of some green from when it was all back together:

dac2cca50ffcf2e19bd20d436301b0a5.jpg


After 500 miles running in


500 miles running in done so far, so last night I dropped the oil, absolutely zero particles in the oil and the oil was still clean and no odd smells of fuel or burn. :)

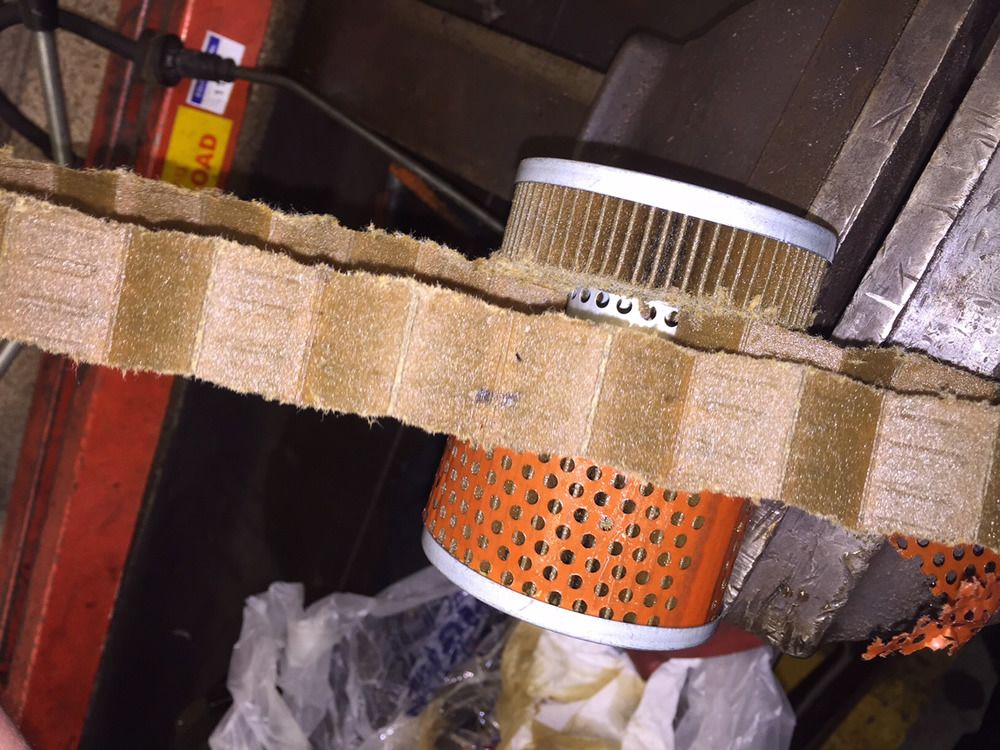
Opened up the filter and to me it looked fine far far less copper in it than the initial 40 minute engine run-in I did, infact practically zero copper particles in the filter and only the odd carbon deposit. Took it to local engine builders and both same comment, looks absolute spot on, nothing to worry about. :)

IMG_2928.jpg


The photo is near on useless and it makes it look like it is full of shiny particles but its just the filter material, so pretty pointless in posting, but hey ho posted it anyway.

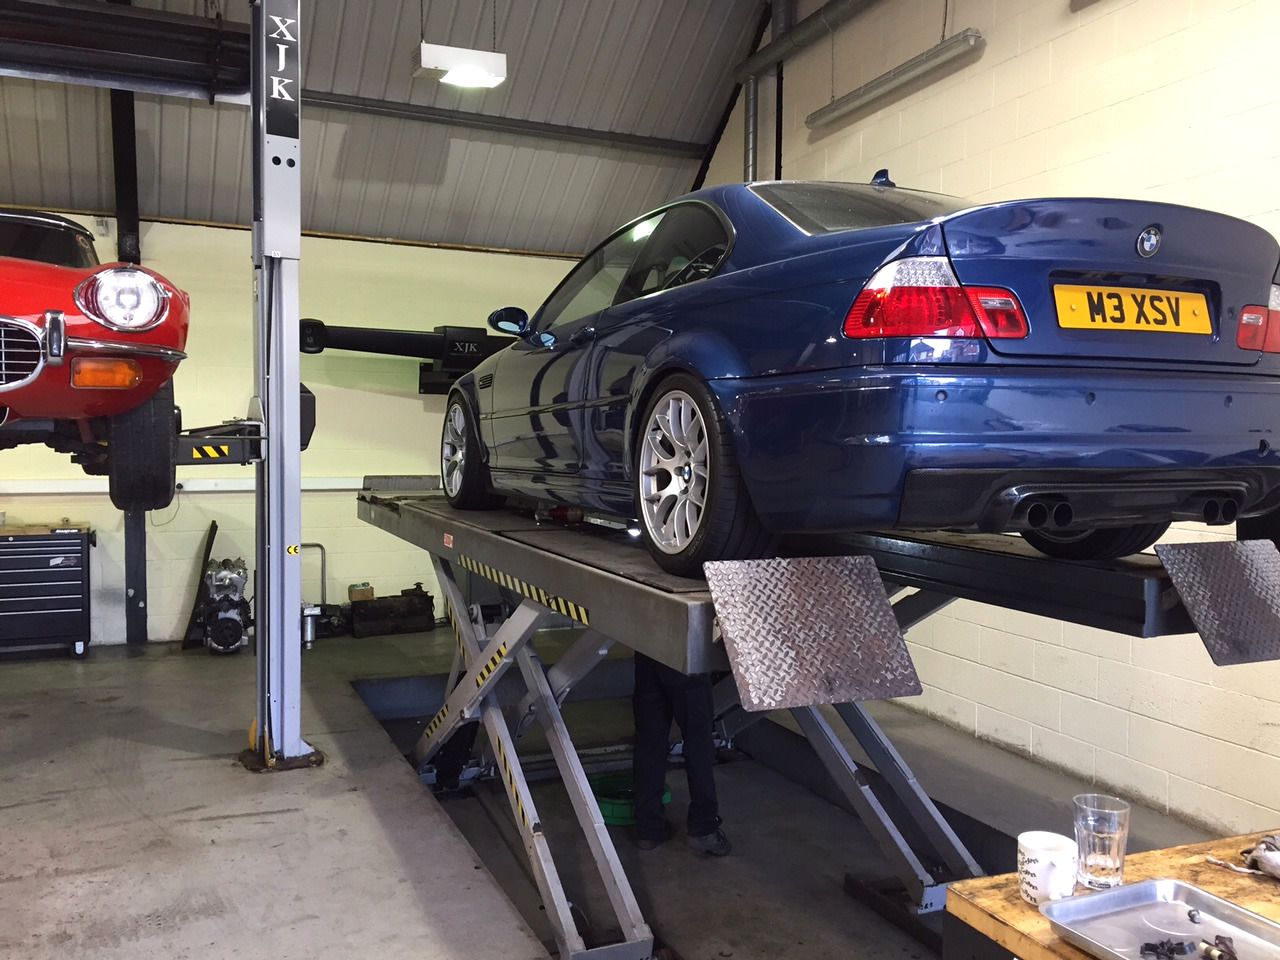
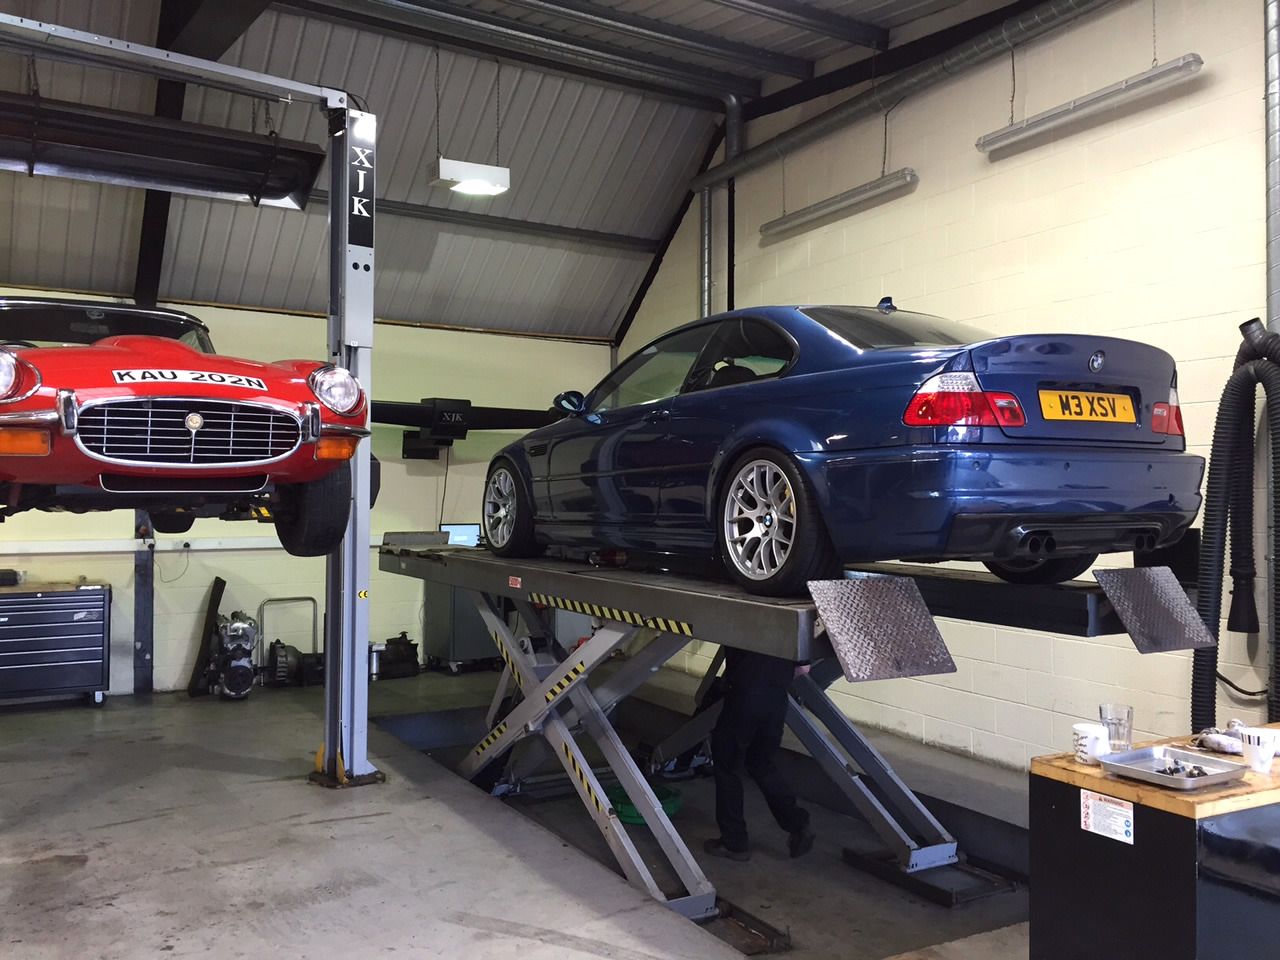
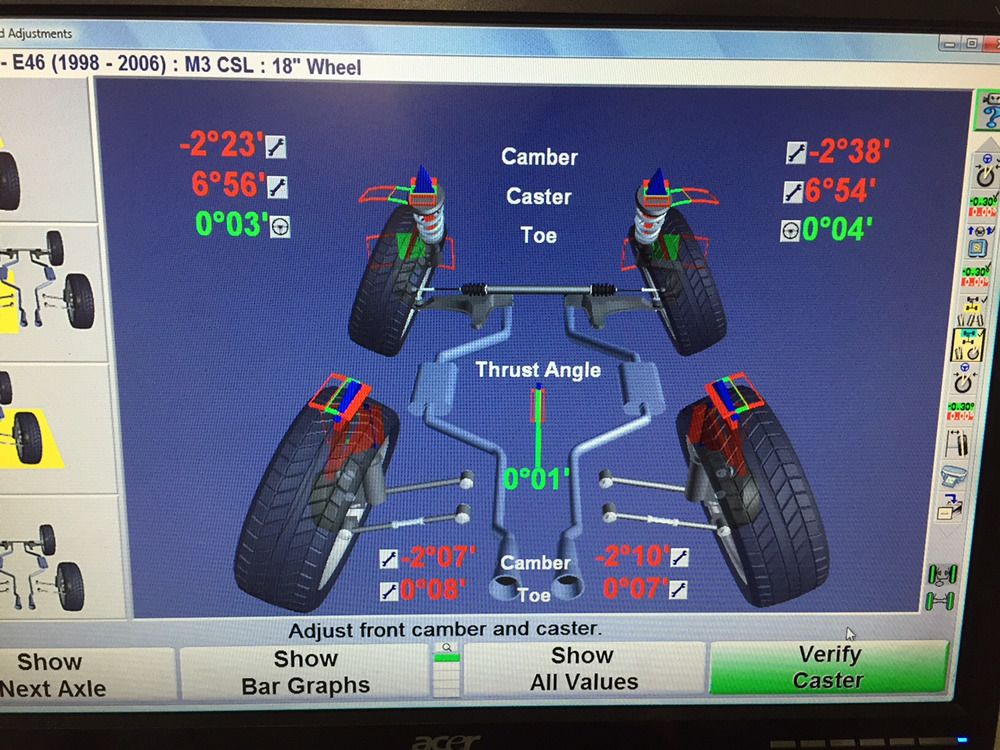
Had the alignment checked and all bolts re-checked, alignment was spot on, had not gone out whatsoever so I got it absolute 100% correct the way I dismantled the car, very happy. :)

IMG_2930.jpg


Finally some green! :D :D :D :D

IMG_2931.jpg


All the above I actually did months ago, the car has done well over 2000 miles now, it feels the strongest it has ever being. Apart from this I have not really done much at all with the car though apart from just drive it. So seems I successfully rebuit my engine and did a good job, still running fine and zero oil leaks.
Actually since June things have being pretty crazy, my father passed away and well I've simply being enjoying life and having great fun overseas. I am off overseas again next week for a few weeks again. :D

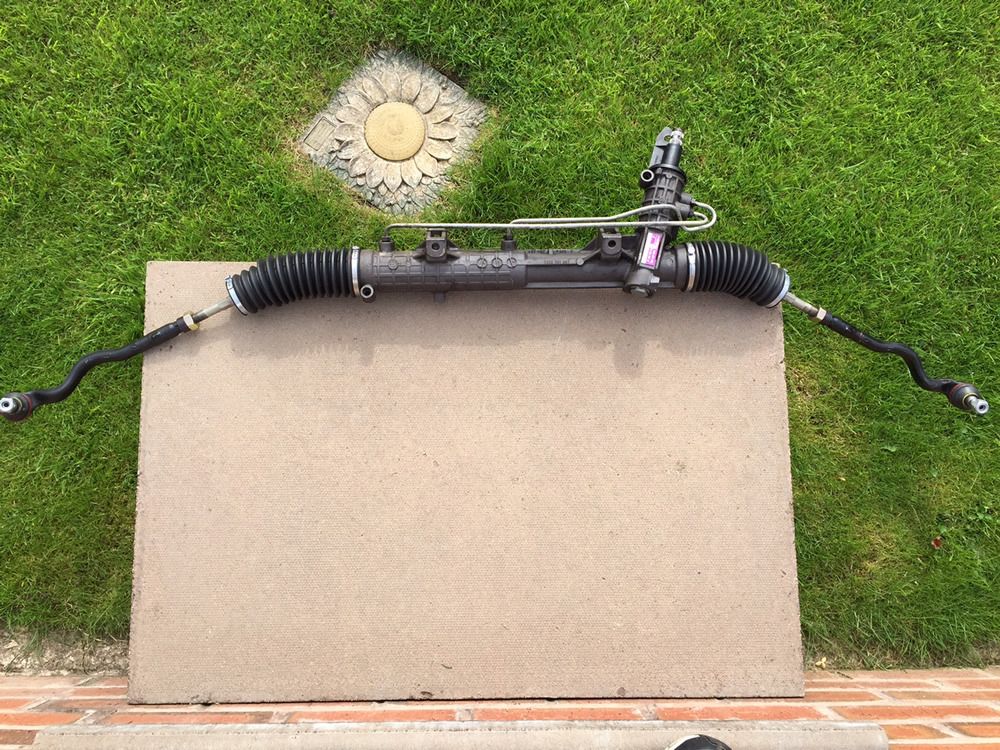
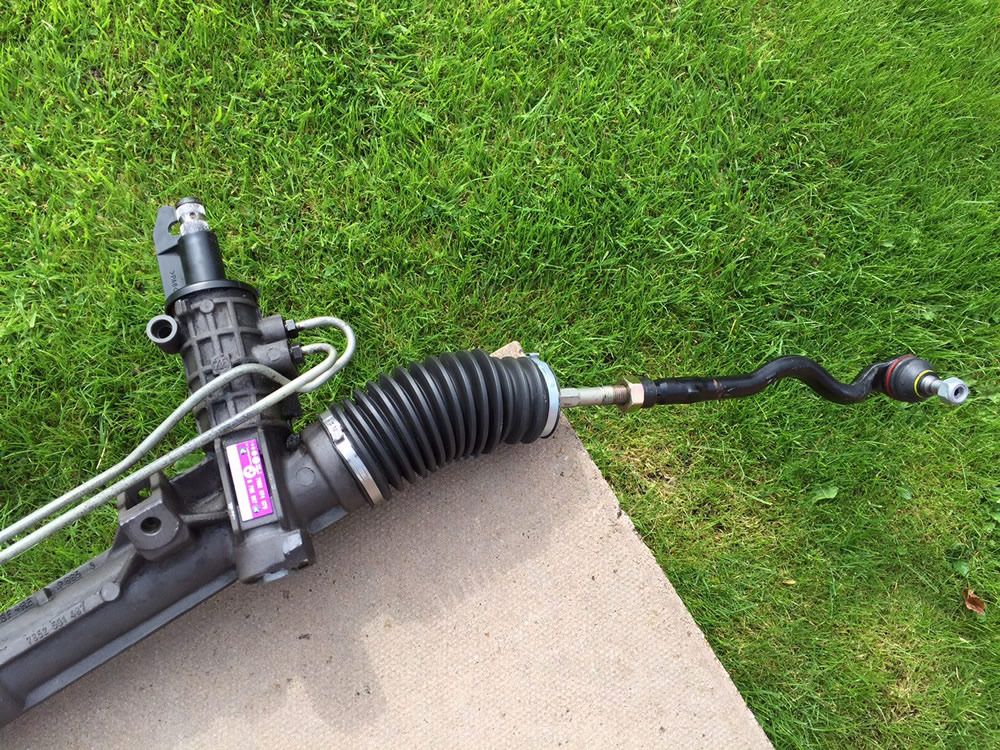
But tomorrow I shall be doing some work on the M3, namely a purple rack (AKA CSL ratio steering rack) and changing the oil to check on it. So will make an update hopefully, but not really planning any track work now this year, like I say am spending way to much time overseas enjoying myself so car has kind of taken a sidestep and just being used as a daily and weekend toy. :D
 
Last edited:
Sorry to hear about your loss buddy, glad things are putting a smile on your face and the M3 has all turned out well :)

Thanks buddy!
You done anything to yours? When are you going to add more power so you can keep up with my S54 motor..... ;)

Doing some work on the M3 today, shall post up some pictures later hopefully. :)


In the meantime an incredible video of an E46 M3 at the ring, 7:30 lap time with speed limits in place! :eek:

 
Last edited:
Loving what you've done so far Gibbo. If you get it sounding anything like that video you just uploaded, you won't ever want to give this car up, sounds incredible..

To be honest if anything mine sounds nicer due to carbon csl intake, only reason mine is not as loud on the interior is because I've still got carpets, dash and sound deadening still in the front, but I've got it sounding just how I like.

In fact when I had the milltek exhaust on the car it was actually louder that this, hence why it got removed, as was simply too loud for my ears inside the car.
 
Hi there


Those who know BMW's will know the M3 CSL and CS had quicker steering racks, so this weekend I fitted an even faster rack, nicknamed the purple rack as is a popular modification amongst those tracking and drifting their BMW's. Steering rack ratio information as follows:
E46 M3 = 15.4
E46 M3 CS / CSL = 14.5
Purple Rack = 13.7

In short lock to lock on regular M3 rack is around 3.5 full rotations, with the purple rack its 3. :)


As I had removed the front subframe and steering rack for engine rebuild, doing this job was nothing new and very easy for me.


Picture of purple rack

IMG_4354.jpg


IMG_4355.jpg


Lets get started!


IMG_4356.jpg


Still looking nice and clean underneath since engine rebuild and no fluid leaks at all, a job done well. :)

Also the view from underneath the M3 is pretty damn awesome to be honest. :D

IMG_4358.jpg


New rack installed


IMG_4361.jpg


IMG_4360.jpg


Then just a simple case of put everything back together. A couple of tips, remove your old track rod ends from your old rack and count how many spins they are to take off, so then when you install the new rack make sure the new track rod ends are spun on the same amount of times, this should prevent your alignment toe settings being miles out. Also before starting up, make sure you remove air intake tubing so you can access the PS reservoir and make sure you brim it. Start the engine and turn the steering lock to lock, it might sound a bit nasty at first, then turn off and top up the reservoir again. Remember to use ATF Dextron III and expect to use 0.5-1.0l for this. Put back together, make sure everything is tight and wheels torqued up, go for a drive.


Slicks delivered


IMG_4230.jpg


IMG_4231.jpg


A set of Dunlop medium slicks £130 delivered for all 4 and should last 2-3 track days on the basis my alignment is suitable for them. These being the latest and same dunlops which the BTCC boys use and other M3 guys using them state huge grip but also very progressive. Once the cage is installed and I've got a spare set of wheels these shall be getting tested out, no doubt next Summer. :)


Conclusion


So with the new rack installed the initial impressions are good, on centre feel is greatly improved and the car is far more keen to turn. General feedback/feel and weighting also seem improved. I did also install brand new inner and outer trackrod ends onto my purple rack, so in essence it is all brand new, total cost of parts including rack £300 and fitted by myself so no labour.

So yes I love it, the car feels more connected, more go-kart like and even more adjustable on throttle and steering with great feedback. :)

The only downside is DSC, it will intervene much earlier with this rack, I checked my alignment and at first it was a little out, 5 minutes toe in on one side and 1 minute toe in the other side. Set both sides to just 2 minutes toe in which was what the car was previously set at which helped, but DSC intervenes earlier for sure and on the front brakes. For those who drive with DSC off is not an issue, but those who enjoy driving fast with DSC on for safety net then I am afraid this modification is not for you as the DSC will drive you crazy. I have even tried resetting the steering angle sensor but has made no improvement.
It makes sense though because the car is seeing less steering angle but in reality is steering more meaning you have more angle but the car is thinking the car is sliding due to lack of steering angle and as such intervening to early.

I have heard it is possible to re-calibrate the DSC to the new faster rack, but am not sure how to do this or if it is possible on the older MK20 DSC?

But as I am happy to drive without DSC for me it is a great modification. :)
 
Hi there


Manage to sort my DSC kicking in too early on front axle since purple rack fitment.

Used NCS Expert to pull the file from my DSC module, loaded it into NCS Dummy to see what options were available and set all DSC options to lowest available numerical number to reduce DSC interaction.

My DSC code is below:


So I have flashed my DSC with the following settings:
BREMSLICHTSCHALTER
aktiv
REIFENTOL_ABGLEICH_ASC
aktiv
REIFENTOLERANZABGLEICH
aktiv
PRE_VLABS
aktiv
EBV_LAMPE
aktiv
LOGIK_HA_SPERRE
aktiv
MOTOR_ART_ASC
wert_01
DV_OFFSET
line0
EINSPURMODELLPARAMETER
typ_6
DRUCKMODELLPARAMETER
typ_4
DRUCKMODELL_HINTERACHSE
typ_1
DRUCKMODELL_VORDERACHSE
typ_2
REIFENDRUCKWARNSYSTEM
aktiv
SEQ_M_GETRIEBE
aktiv
UEBERSTEUERN_MUE_0
wert_05
UEBERSTEUERN_MUE_1
wert_04
UNTERSTEUERN_MUE_0
wert_02
UNTERSTEUERN_MUE_1
wert_02
GRADIENT_MM_ZUGABE
wert_03 (STD is 04)
DELTA_PSI_BETA_LIMIT_KORR
wert_01
UNTERSTEUERSCHWELLE
wert_01 (STD is 03)
GETRIEBE
handschaltung


For those with older MK20 DSC, using these settings has reduced DSC interaction on the front axle for sure, resulting in my quicker rack now not triggering the ABS on the front axle. :)

So if anyone is find there MK20 DSC too sensitive especially on the front axle try the above settings, they seem to work quite well.


So this has worked a treat and made the DSC not so nannying, quite a nice mod I would recommend it for those with MK20 who find DSC to interfering but like the safety net it offers. :)
 
Hi there


This has to be one of the cheapest and best modifications I have made to the car:

IMG_4920.jpg


For those wondering what it is, well it is a solid metal bush which replaces the rubber bush in the steering coupler. Do not worry about the bolts they are just randomly inserted to make sure they were not lost.

I have had the part fitted for a couple of days now and all I have witnessed is positives, the part brings no negatives!

Positives are:
- Improved on centre feel, with purple rack my car now has zero dead zone.
- I can really feel the road surface, but not to a point where it is annoying, it is in fact spot on, I can feel the surface, grip available.
- Steering feels slightly heavier, no doubt because it is in fact not but the solid bush tightens things up giving the impression of heavier steering.
- Of course the steering is more direct, the solid coupler combined with faster purple rack really gives the car much faster/direct responsiveness.
- The best possible praise I can give is now with the new rack and solid coupler the M3's steering is now close to my 911's for feel/weight, this is real praise as anyone who has driven or owned a 911 will know they are the ultimate in steering feel/feedback/weighting.


A truly great modification that cost less than £50, the steering is a major part of any car, especially a drivers car such as the M3. All I can say this solid bush and purple rack are truly a great combination and those who enjoy driving their M3's should be making these modifications. :)
 
Hi there


The M3 is now being used everyday since I sold the 911, I still need to fit the differential and get a cage made up.

My wings are suffering from the usual M3 rot and I had planned to buy new BMW wings next year which cost around £550 for the pair. But when a pair of genuine excellent fitting carbon fiber wings came on offer, I could not say no.

Here is just one of them:
IMG_5313.jpg


They look incredible and feel like they weigh less than a kilo, incredibly light but strong, will save about 10kg from the front of the car.

Also might have come across a carbon fiber roof as well that might be getting installed this week. ;)
 
Hi there


A carbon roof has always being high on the light, but the £1000 options some say the quality is poor or they quickly become tatty and the better options such as Evolve roof are close to £1500-£2000 mark fitted and a genuine CSL roof more unless you can get one second hand.

So I've gone with the next best option, a 4D carbon gloss wrap, mainly also because I wanted to see the quality of a wrap on a panel as well. Unfortunately dull day, dirty car so the photos are nothing special at the moment, of course once the car is all cleaned up and the sun is out I shall get better photos taken:


R6_1.jpg


R5.jpg


R4.jpg


R3.jpg


R2.jpg


I personally felt the blue strips for the roof box looked out of place so I painted them today in gloss black:

R1.jpg


Anyone who knows CSL's will know CSL roof is 1x1 weave, this is more like the Evolve carbon roof and is 2x2 weave. :)

In sunlight it looks awesome and the gloss comes into its own. The quality of the wrap in general is superb and at £150 it cost far less than the real roof, admittedly in my opinion it does not look as good and you do not get the weight saving but I like the overall image and if need be in the future it is easily reversible or changeable, for instance to gloss black roof. :)

Also as I've got carbon wings to fit, which would need painting and then rest of car painting to blend and then a polish/mop/detail of the whole car were talking £500-£600. So I am considering doing a full wrap, question is what colour. :D
 
Back
Top Bottom