Project: Angel

Liking the pace of this build now dude, coming on rather nicely! :D

Cheers m8. It's a case of doing a little bit when I can grab the time. Hopefully I'll have a fair bit of time to finish this build in the next couple of weeks. I have a couple of weeks holiday owed but with the kids being off too it'll be tricky. Plan is to wipe them out during the day then send off to bed early so I can crack on with it
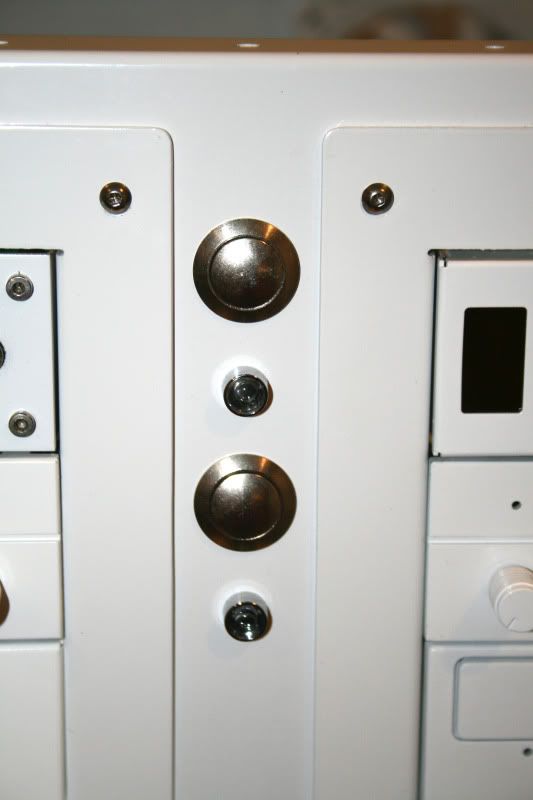
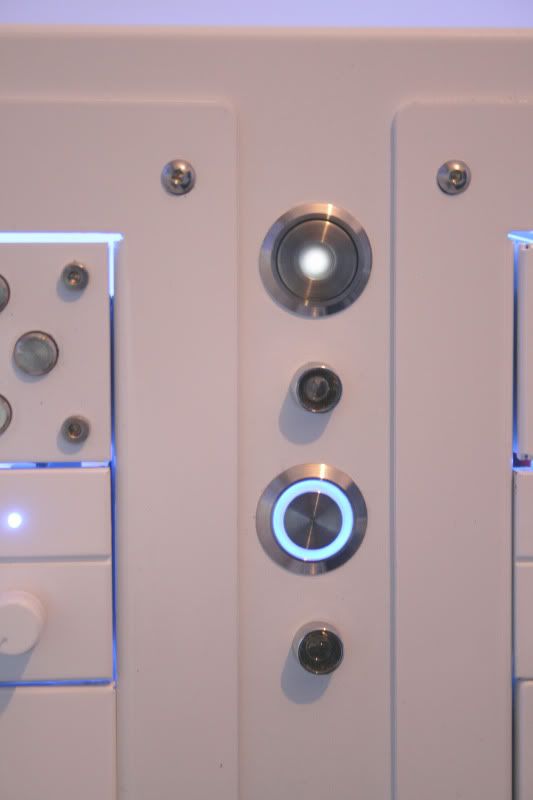
 :D.

Sweet so it's turned it into a nice feature being able to keep the fans, pumps running, good that your back on track with this :). True about the reset switch, I don't even know why I bothered putting 1 on mine, I never use it & now with the led's in the front fans I could just consider that as the power light & change the switch light to function as hdd activity, next time :).

It's not ideal but it has worked out rather nice. I just need to remember to turn the pumps on before turning the PC on. The good thing is the pc won't work without the other kit running so nothing will get burnt out, save for the pump psu dying abruptly! I'll be having the thermal monitor running in the BIOS which will save my setup should the main PSU die so it's all good.

Everything seems to be falling into place now, I might fix another switch to the front of the PC for BIOS reset or perhaps to turn the lighting on and off. I'm unsure of that one as yet, it's just an addition I was thinking of.;)
 
dude seriously, it seems u have been working on this damn project for about 18 months!!! how are the sponsors not ready to shoot you? By the time this thing is done, it will be 2 years out of date????!!!

wtf :(

Originally Posted by Muel View Post
Liking the pace of this build now dude, coming on rather nicely!

how are you liking this pace. It would be like watching a disabled ant with no legs trying to do the london marathon.
 
dude seriously, it seems u have been working on this damn project for about 18 months!!! how are the sponsors not ready to shoot you? By the time this thing is done, it will be 2 years out of date????!!!

wtf :(


how are you liking this pace. It would be like watching a disabled ant with no legs trying to do the london marathon.

agreed! i definitely built my computer faster than this!!
 
how are you liking this pace. It would be like watching a disabled ant with no legs trying to do the london marathon.

I said I like the pace NOW. He's posted before about the project being on hold due to RL stuff.

He's now back on it, and things are moving along rather quickly....
 
Yeah some times **it happens & you need to prioritise :(, Muel's right & I wouldn't say it's outdated neither :), much newer than the parts in my rig & it's still keeping up with anything I throw at it very well so I have no doubt it will still be a great system :cool:.
 
dude seriously, it seems u have been working on this damn project for about 18 months!!! how are the sponsors not ready to shoot you? By the time this thing is done, it will be 2 years out of date????!!!

wtf :(


how are you liking this pace. It would be like watching a disabled ant with no legs trying to do the london marathon.

Have you even read the thread? I have appologised for the lack of updates but building a PC comes a very long second to what has happened in my private life. Sponsors understand what has happened, they understand I have other commitments and are happy with the way things are now progressing.

As for being 2 years out of date you clearly don't have a clue what you are talking about. An i7 running at 4.2ghz (which is what I expect from a machine like this), 128GB SSD, 2TB raid setup, X58 chipset cooled by twin loops with four pa 120.3's? I'm pretty sure that could still hold its own against most pc's here! Sure the GTX280's have been superceded by newer hardware but gtx280's in SLI are hardly a slouch and will play ANY game currently on the market with ease at high res with AA.

I appreciate all comments positive and negative as long as they are founded. On this occassion yours do not appear so.

agreed! i definitely built my computer faster than this!!

I could build a computer by knocking together a few parts - its not difficult is it. Please post a log of your own showing the lengths you have gone to building your pc so we can all revel in your greatness ;)

/sarcasm

I said I like the pace NOW. He's posted before about the project being on hold due to RL stuff.

He's now back on it, and things are moving along rather quickly....

Yeah some times **it happens & you need to prioritise :(, Muel's right & I wouldn't say it's outdated neither :), much newer than the parts in my rig & it's still keeping up with anything I throw at it very well so I have no doubt it will still be a great system :cool:.

No need to justify your comments gents. I understand peoples frustration when viewing logs. I hate it when people don't finish what they started but I also have the sense to sympathise when there are legitimate reasons for doing so. As always, thanks for the support and understanding to all who have followed this 'marathon' build log, albeit of a disabled, paraplegic ant of a build lmao!;)
 
thanks for the support and understanding to all who have followed this 'marathon' build log, albeit of a disabled, paraplegic ant of a build lmao!;)

Dude, I think the build is worth the wait

as a complete WC n00b I never understood the sheer amount of time and effort to be invested, taken me 5 months to accomplish a basic build so for

Moar AWESOME .. we need Moar Time !

and you do realise you HAVE to rename the project now !?!

[project] Paraplegic Ant !

it's full of win ! :D
 
take your time w3bbo

im not in any rush :cool:

besides. good things come to those who wait [or constantly upgrade their hardware]
 
Dude, I think the build is worth the wait

as a complete WC n00b I never understood the sheer amount of time and effort to be invested, taken me 5 months to accomplish a basic build so for

Moar AWESOME .. we need Moar Time !

and you do realise you HAVE to rename the project now !?!

[project] Paraplegic Ant !

it's full of win ! :D

Hahahaha! The thought crossed my mind :D Might have to stick an ant with no legs in there tbh as a comprimise.

take your time w3bbo

im not in any rush :cool:

besides. good things come to those who wait [or constantly upgrade their hardware]

Yeah lol. As we know, pc projects are never truly finished ;)
 
The world is full of people who never read w3bbo. Such is life sadly. They will never truly appreciate that quality takes time :p

Looking very nice now this is.
 
^ Lmao :D.

Just checked out your Tiger Style build, nice :cool:.

Aye, that was perhaps my fave build before this.

The world is full of people who never read w3bbo. Such is life sadly. They will never truly appreciate that quality takes time :p

Looking very nice now this is.

Cheers m8.

Back to the log:

Here's how the front of the case looks:

IMG_5644.jpg


While the buttons look 'ok' they are not bling enough so I got hold of a couple of switches:

IMG_5645.jpg


As ealrlier mentioned, the fact I am now forced to use two psu's one is a latch switch which by definition locks into place (push on - latched/ release off unlatched). This is the one on the left and will control everything bar the motherboard. It's a single white led but thanks to the opaque cover it's not too bright.

The one on the right is a momentary switch (blue ring) and will control the motherboard. The ring will be attached to the HD led header.

I tend to get quite a few emails asking how these are wired up, particulary the momentary switches which are best used fo a 'normal' pc. So here's a quick 'how-to'....
 
Heres a shot of the latch (left) and momentary right. I'll do a quick guide on the momentary as they are the most common used:

IMG_5646.jpg


These are the 'spade' type and in all honesty the screw type are much easier to install so if you can get those do so, especially if like me you are not good with a soldering iron!

You could use spade connectors for the ones I have tbh and it would be easier but I didn't have any spare at the time so I decided to solder mine.

First sort your wires out. Twisting the ends makes for a neat and tidy job:

IMG_5651.jpg


Then connect the LED wires to the + and - connectors (middle):

IMG_5647-1.jpg


If your LEDs dont work then switch the motherboard headers around. Don't worry, you wont do damage if they are the wrong way around. Also note that the leds are rated for 3.4v but motherboard headers give out 3.3v. This is within the threshold so no bad things will happen :D. The led's will be very slightly dimmer thats all. I wouldn't advise wiring up the leds to anything other than the rated spec though as you will most likely burn out the LED.

Then connect your motherboard header (in this case power + and - but the same goes for a reset switch) to tabs 3 & 4.

Heres a diagram:

switchdiagramfull.gif


Here they are wired:

IMG_5648-1.jpg


Then all that is left is to solder the wires to neaten things up and to prevent a short:

IMG_5649.jpg


Then braid the cables to complete the job:

IMG_5652.jpg


I left the blades exposed as I 'may' wish to solder other wires to the swiches to control other sections (lights etc) so not quite finished with those yet ;).

Hope this helps somewhat.
 
Last edited:
nice work w3bbo

you could say its fANTastic

Sorry.

seriously though the little switch tutorial is just the sort of thing i was thinking of when i floated the idea of the tutorials section. having spent quite a bit of time online myself trying to work out how to wire a vandal (no instructions at all in mine)
 
Yeah, the instructions I got were geared more to an electrician (open and closed circuits etc). The above is a little more straightforward for the average user. I only wish I would have found something like that when I did switches for the first time as it was a case of trial and error to find out what worked!
 
UPDATE

After a little jiggery pokery (sliced my thumb, note to self - scalpels are dangerous!), I fitted the switches I wired up earlier. Here's how they look:

IMG_5682.jpg


The Aquero is gonna take some configuring with this setup but it's a handy device which will hopefully keep an eye on things for me :).

IMG_5686.jpg


Along with the aquero I got a Matrix Orbital GX Typhoon:

IMG_5689.jpg


The typhoons screen colour can be configured to display the same colour as the aquero but thats something I'll have to sort out once the OS and software is installed. Look forward to playing with those two goodies :cool:.
 
Well I've finally come to the part I was dreading - cable tidy!

To give you an idea of what I am up against here's a basic list of cables I have to tidy:

2xPSU's (4 molex cables, 2 SATA cables, 2x 24pin ATX, 2x 8pin CPU, 4xPCIe 8pin, 4xPCIe 6pin).

5x SATA data cables

2x Pumps (+2x sensor cables + 2x LED cables)

16x fans

Fan controllers x2

GX Typhoon + aquero + sensor cables

Motherboard headers

4x Cold Cathodes

...all to be hidden in a case with 3 windows and not a lot to hide them behind!

So i did a quick mock up and found that no matter what I did, in whatever orientation, the thing looked liked a rats nest! My last hope was to use the thick motherboard tray support bracket.
I made a few extension cables so most of the wires can be hidden behind the bracket as well as cutting down the amount of excess wiring inside the case. Here's a shot of the zalman fan controller and above it the aquero with barely anything attached!!!

IMG_5670.jpg


One problem that I found with braiding the SATA cables was that it made them much stiffer and more difficult to bend/route in a neat manner due to the decrease in flexibility. However, I persevered and managed to get the HD rack (2x1TB raid 0, 1x2tb, 1xSSD, 1xDVD) looking reasonable:

IMG_5672.jpg


Fitting the bracket while everything was in place was an absolute PITA. I had to drain the loops, remove all cabling then adjust it slightly from it's correct mounting position as I wanted the bracket to cover the modular fittings of the PSUs to make the whole thing look as neat and tidy as possible:

IMG_5673.jpg


It's getting there now! Still a bit more tidying to do (the above shot is the 'messy' end but certainly starting to take shape :).
 
Last edited:
Wow. That is a LOT of cables to tidy mate. I don't envy that job :p But I'm sure it will look ace once it's all tidied up :) Looks a LOT better than my case does currently, I can tell you that ;)
 
The reason why I didn't originally want to fit the brack was because of the window engraving as it tends to 'bleach' it out being opaque on white:

IMG_5654.jpg


So my next task was to make the Angel engraving stand out a little more without making it look like some cheap sticker. I opted for placing an LED under the edge of the perspex which would hopefully refract the blught light on the engraving. The LED was not directional so I blanked out the side of the led with some good old insulation tape as I just wanted the beam to point upwards toward the perspex of the side panel:

IMG_5658.jpg


With the side panel on (white cathodes off):

IMG_5660.jpg


With the side panel on (white cathodes on):

IMG_5661.jpg


Worked out quite well. It's a shame the photos really don't capture the full glowing effect of the Angel.
 
Wow. That is a LOT of cables to tidy mate. I don't envy that job :p But I'm sure it will look ace once it's all tidied up :) Looks a LOT better than my case does currently, I can tell you that ;)

I hate cable tidying at the best of times but I've NEVER had such a hard time as I've had with this build. Tis the one drawback of having so much kit crammed in I guess.
 
Last edited:
Back
Top Bottom