You are using an out of date browser. It may not display this or other websites correctly.
You should upgrade or use an alternative browser.
You should upgrade or use an alternative browser.
Project Dianoga
- Thread starter ALXAndy
- Start date
More options
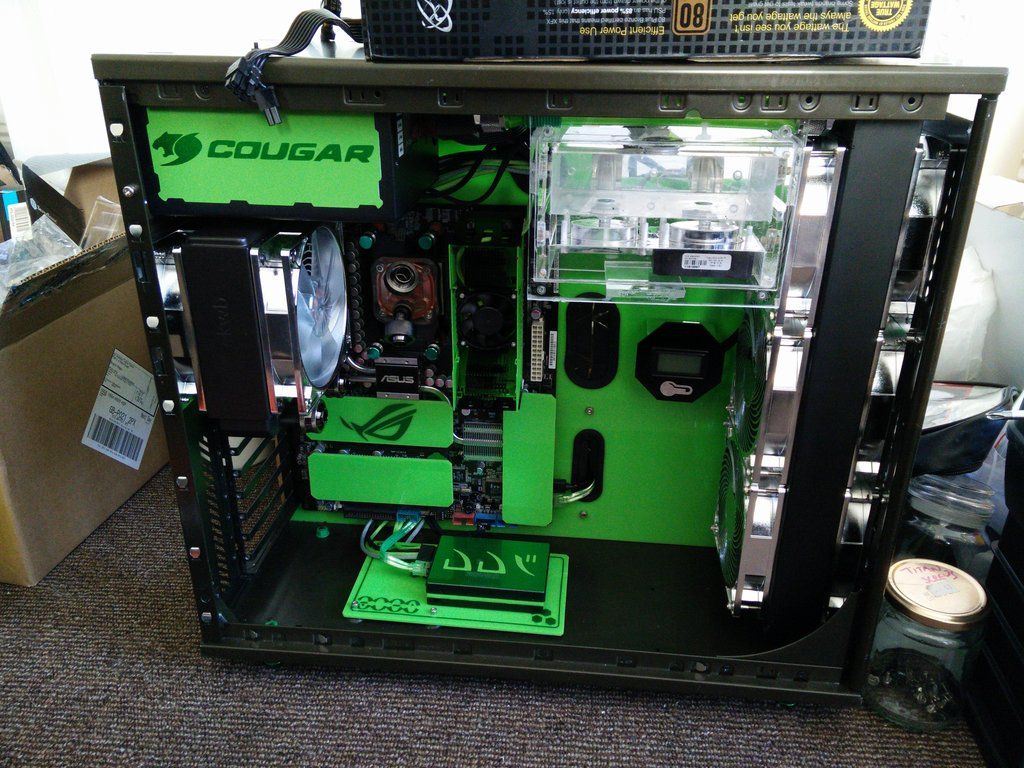
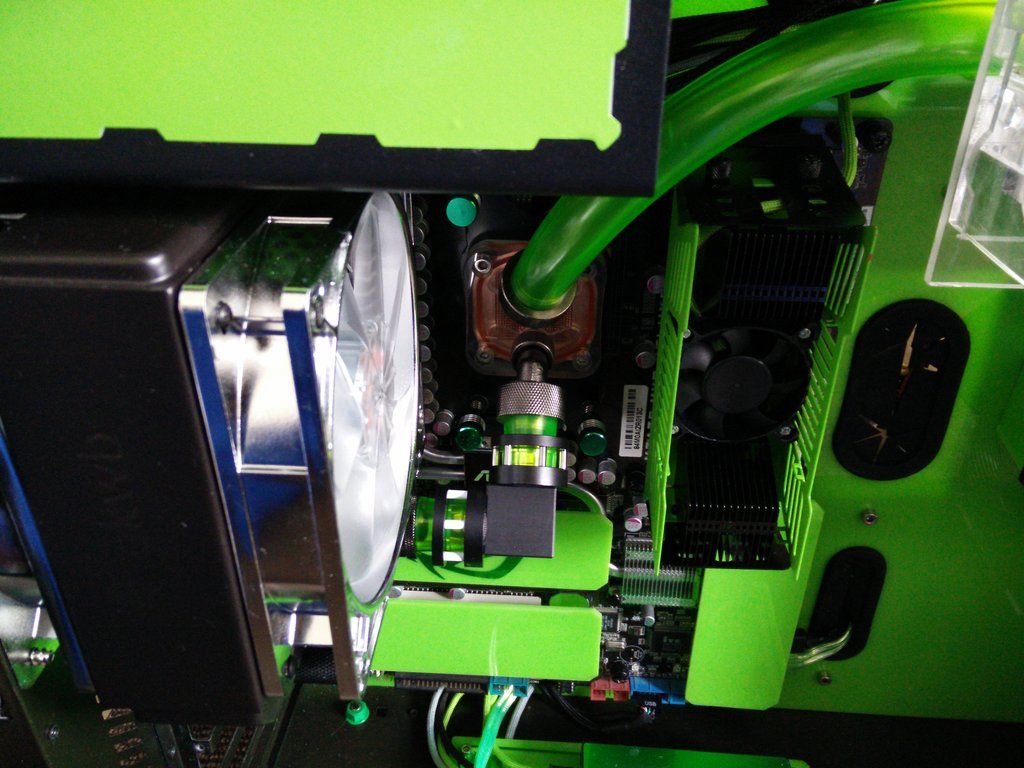
Thread starter's postsWell despite living in the sunniest town in the UK (statistically proven apparently, never knew until I put the name of it into Wikipedia !) it seems the sun does not want to play ball today so the pics are kinda dark. Last night I fitted (and leak/pressure tested) the CPU block though. The pump outlet feeds out into the block, then I had to turn 90' in order to make it into the rad. This means a slight rethink of the fitting situation but I will get there 
I actually don't mind the chain guns being white and chrome at all really. At the end of the day for everything this rig cost around £200 to mod. And at some point I want that to be known, that I didn't spend that on nothing but fittings. Also once the green lights go on you will be hard pushed to realise, and the insert parts are chrome so it's only really the pole things.
And a shot of where I am at.
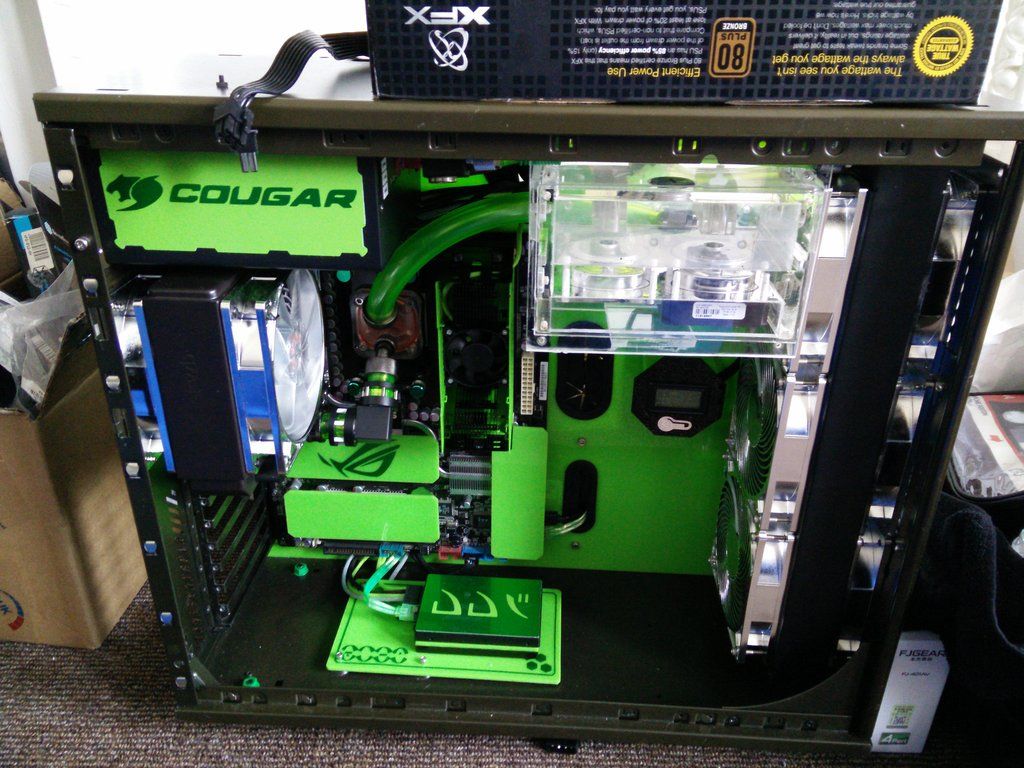
Now because I have added more wiring I need to flip it around and do some more cable management work. I won't be doing any more plumbing for a few days, because last night the skin on my left pointer finger decided it was going to detach from my finger leaving me with some huge blisters. I actually felt it separate too, strange feeling. I've tried using rags, but I just can't seem to get the same level of grip.


I actually don't mind the chain guns being white and chrome at all really. At the end of the day for everything this rig cost around £200 to mod. And at some point I want that to be known, that I didn't spend that on nothing but fittings. Also once the green lights go on you will be hard pushed to realise, and the insert parts are chrome so it's only really the pole things.
And a shot of where I am at.

Now because I have added more wiring I need to flip it around and do some more cable management work. I won't be doing any more plumbing for a few days, because last night the skin on my left pointer finger decided it was going to detach from my finger leaving me with some huge blisters. I actually felt it separate too, strange feeling. I've tried using rags, but I just can't seem to get the same level of grip.
When I picked the name for the rig (I usually think long and hard so that they have multiple meanings)* I never knew it was going to look like the subject matter. This is a Dianoga in full.

Now every time you work on it from the nice side you create problems on the other. Every time you shove through a wire, plug, SATA cable etc you then need to go around to the other side and make sure it is as flat as it can be. When Alienware designed the Predator 2.0 and its more expensive brethren the 2.1 they only designed to carry a Firewire, front audio header cable, USB cable and some flat ribbon wiring for the LEDs. They never meant for any one to run anything else through that channel, and spare wires like extra 6 pin PCIE for example went through a small hole and were stored in the roof.
Look at this.
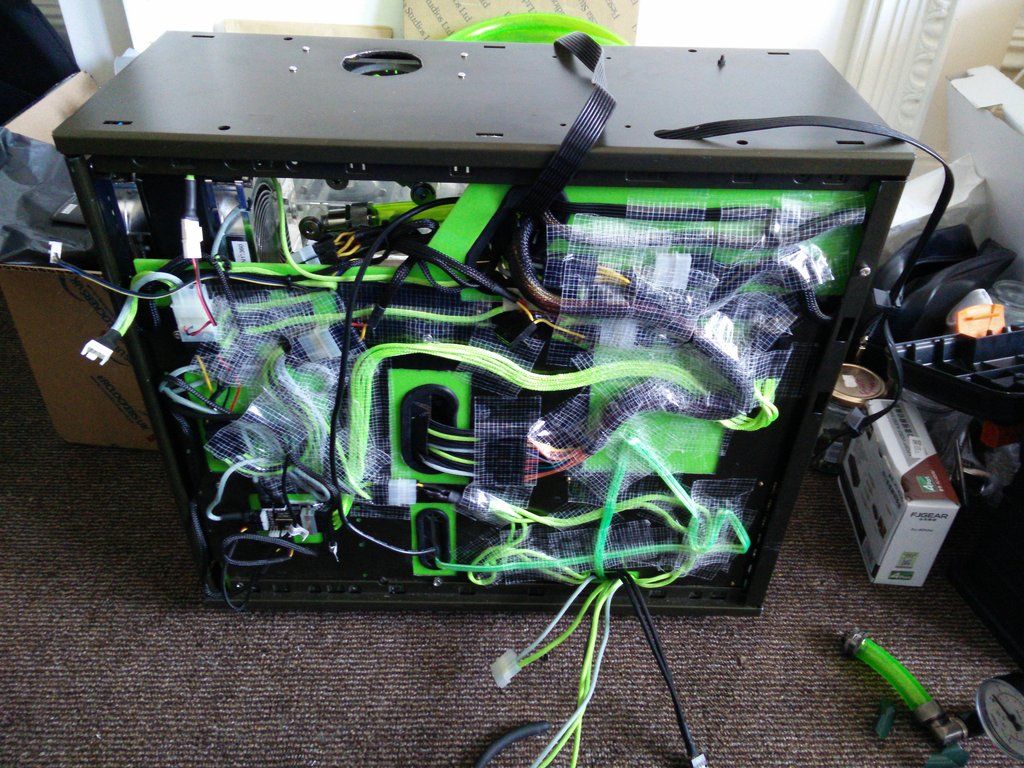
It actually looks like a Dianoga. It's been fiercely difficult managing the cables on this rig. In the past I have done it similarly but at the end I would lie the rig down on its left side and then literally kneel on the outer panel to make it fit. However, that was when the case was all alu and there was no acrylic to crack by using such force. So I have had to literally stick everything down so that it does not exceed the size of the gap. IIRC it's about 1cm, just enough to hold the cables for the 24 pin for example.
It's so tight that if you leave the catches on the 24 pin, 8 pin ETC they are too big and the side won't shut, it's that tight. So they've all come off.
And....
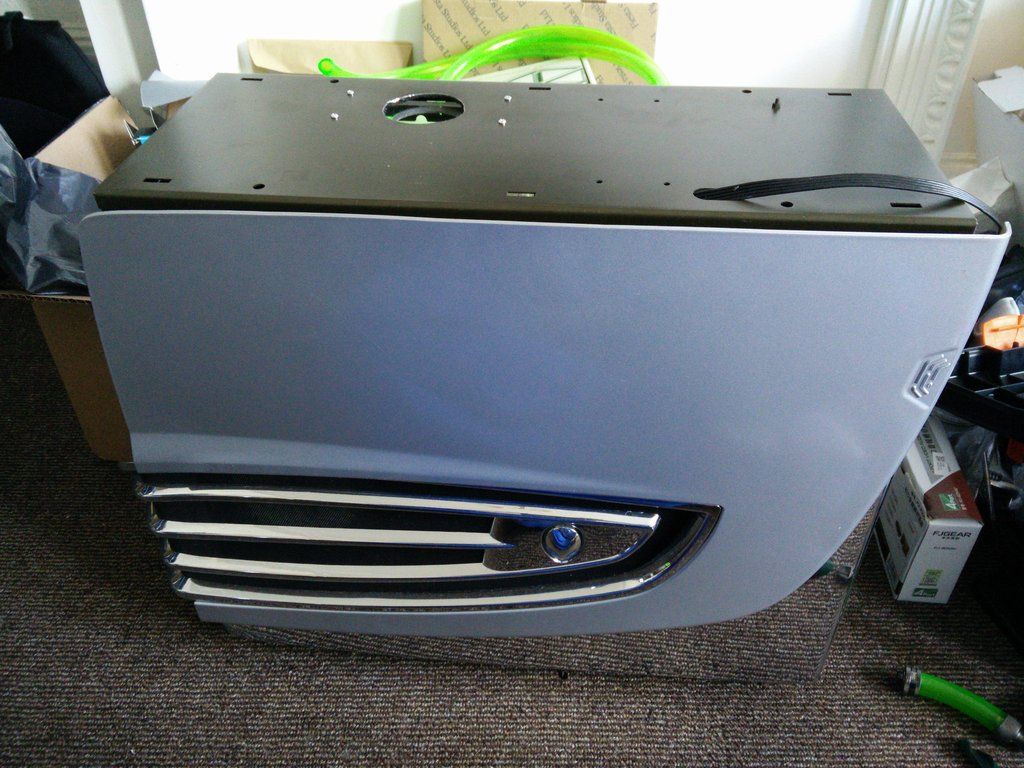
Thankfully all I have left to do now is the 6 pin PCIE (that ironically is a ribbon flat cable, wish they'd done that to the 24 pin and 8 pin !) and three Molex (maybe four, or five..) but I have left room for those thank goodness.
* I usually like to have more than one meaning for a rig name. Rise of the Triad was called that because Alienware call it the triad, plus it was an old video game.

Now every time you work on it from the nice side you create problems on the other. Every time you shove through a wire, plug, SATA cable etc you then need to go around to the other side and make sure it is as flat as it can be. When Alienware designed the Predator 2.0 and its more expensive brethren the 2.1 they only designed to carry a Firewire, front audio header cable, USB cable and some flat ribbon wiring for the LEDs. They never meant for any one to run anything else through that channel, and spare wires like extra 6 pin PCIE for example went through a small hole and were stored in the roof.
Look at this.

It actually looks like a Dianoga. It's been fiercely difficult managing the cables on this rig. In the past I have done it similarly but at the end I would lie the rig down on its left side and then literally kneel on the outer panel to make it fit. However, that was when the case was all alu and there was no acrylic to crack by using such force. So I have had to literally stick everything down so that it does not exceed the size of the gap. IIRC it's about 1cm, just enough to hold the cables for the 24 pin for example.
It's so tight that if you leave the catches on the 24 pin, 8 pin ETC they are too big and the side won't shut, it's that tight. So they've all come off.
And....

Thankfully all I have left to do now is the 6 pin PCIE (that ironically is a ribbon flat cable, wish they'd done that to the 24 pin and 8 pin !) and three Molex (maybe four, or five..) but I have left room for those thank goodness.
* I usually like to have more than one meaning for a rig name. Rise of the Triad was called that because Alienware call it the triad, plus it was an old video game.
Once the door's on it's all good  It's what I call the OoSOoM methodology: Out of Sight, Out of Mind!
Plumbing's looking pretty neat too. Just a return from the small rad to big rad left to do? -difficult to see the pipework from the front rad but looks like it's connected to the res return
 It's what I call the OoSOoM methodology: Out of Sight, Out of Mind!
Plumbing's looking pretty neat too. Just a return from the small rad to big rad left to do? -difficult to see the pipework from the front rad but looks like it's connected to the res return
Once the door's on it's all goodIt's what I call the OoSOoM methodology: Out of Sight, Out of Mind!
Plumbing's looking pretty neat too. Just a return from the small rad to big rad left to do? -difficult to see the pipework from the front rad but looks like it's connected to the res return
Rad to 90' fitting then into the GPU. GPU out sideways, to the ball valve, 90' straight up into the 90' waiting for it. So about another session really (IE as much as my hands can manage). Obviously this all takes far longer than I guess it normally would because I have chosen to heat the tubes straight etc.
Forgot to say dude. That Dr Drop is funny once you have loads of gear to test
 you pump it up and then letting it down sounds like a tyre lol.
Last edited:
I would show you the cable management in the back of my case if it would make you feel better, but doubt I'd ever get the side panel back on 
Nice work though mate, mad you can build something that tidy and watercool it for such little cash

Nice work though mate, mad you can build something that tidy and watercool it for such little cash

haha you guys are bringing back some cool memories 
I lusted after Alienwares from 2000-2008. In '09 I finally managed to order one. It cost me around £280 fully built with an E4500 and 8600 GT in. I immediately added 4gb more ram to the 2gb, stuck in a 9800GT and overclocked it to 3.2ghz. Then one day I was hovering around it and saw a lever on the right side panel. I thought "hey, I wonder what this does" so I pulled it... The side panel fell off and it took me about two hours to get it back on lmao. It wasn't even particularly full of wires but the catches are a PITA.
It remained on for about another year, with me being terrified to take it off
Dianoga is a tribute to the bogey, hence the green theme and candy apple green metallic stuff. Here she is the day I got her.
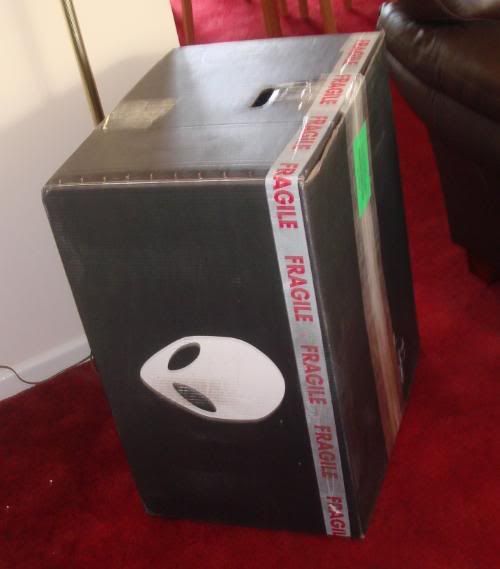
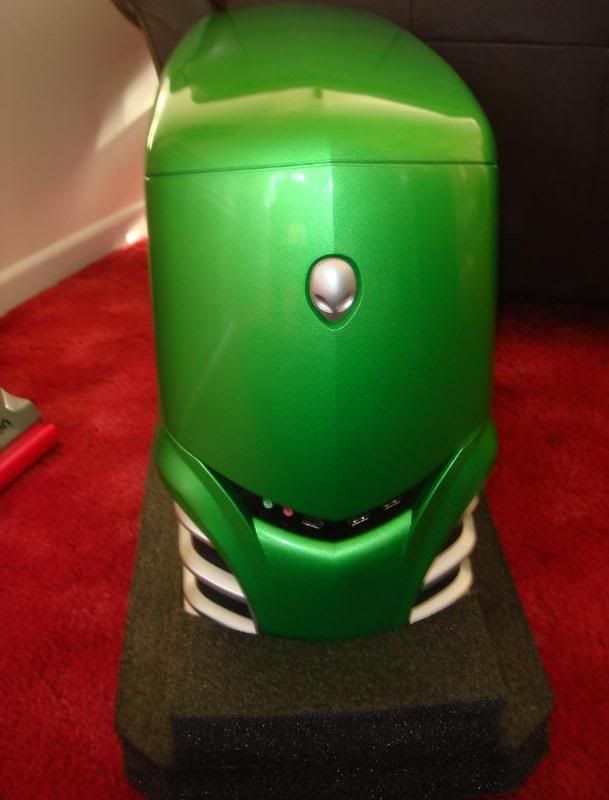
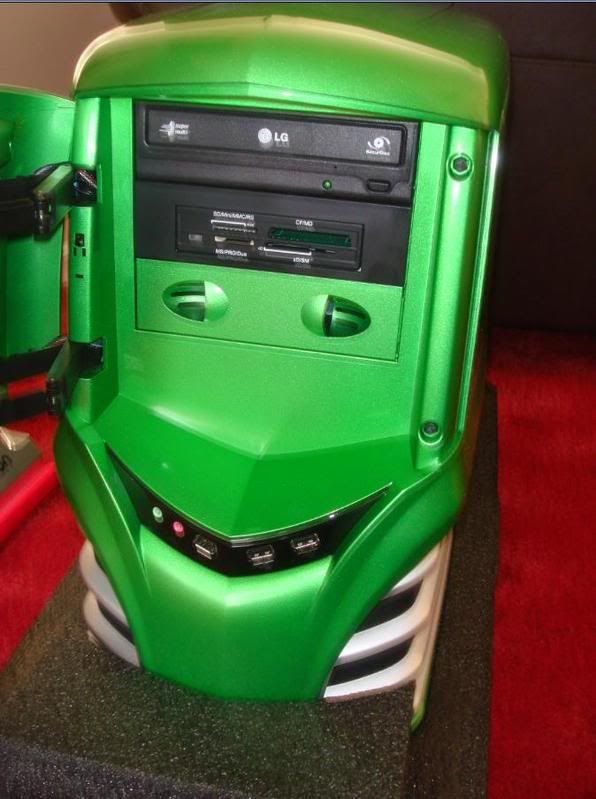
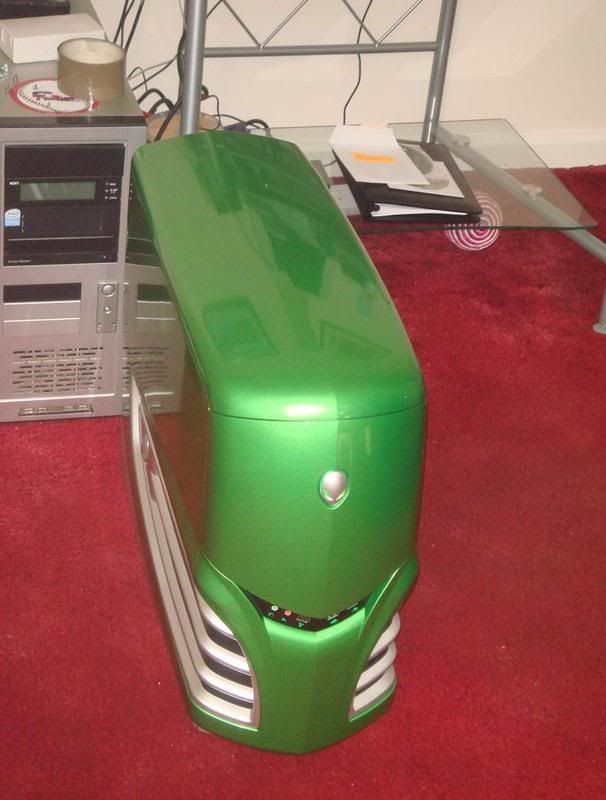
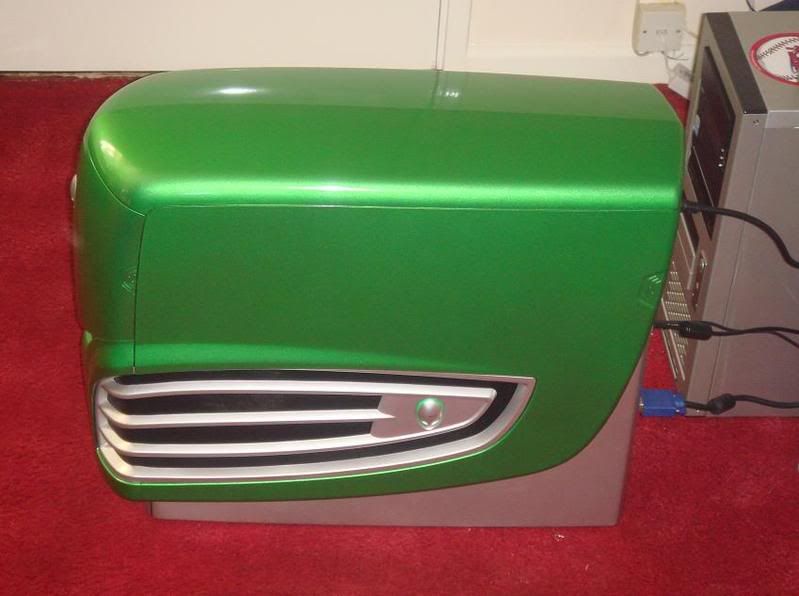
Before.
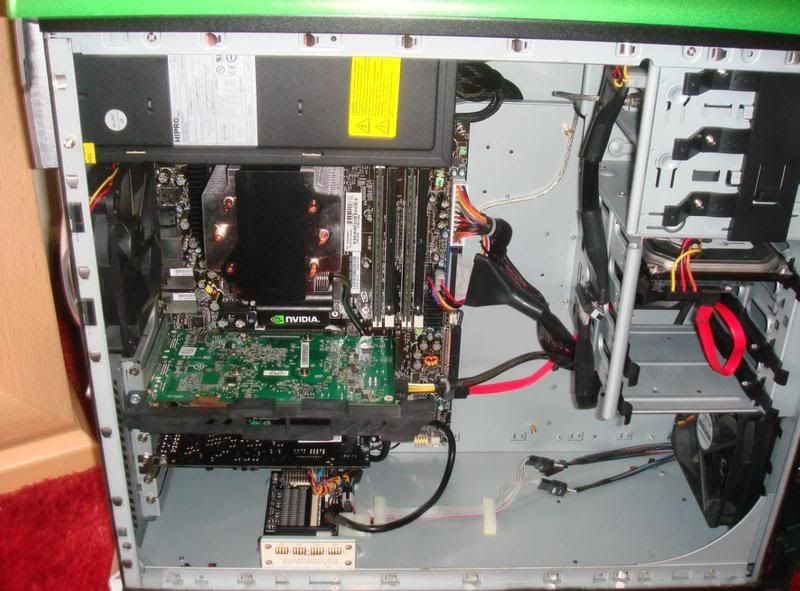
After.
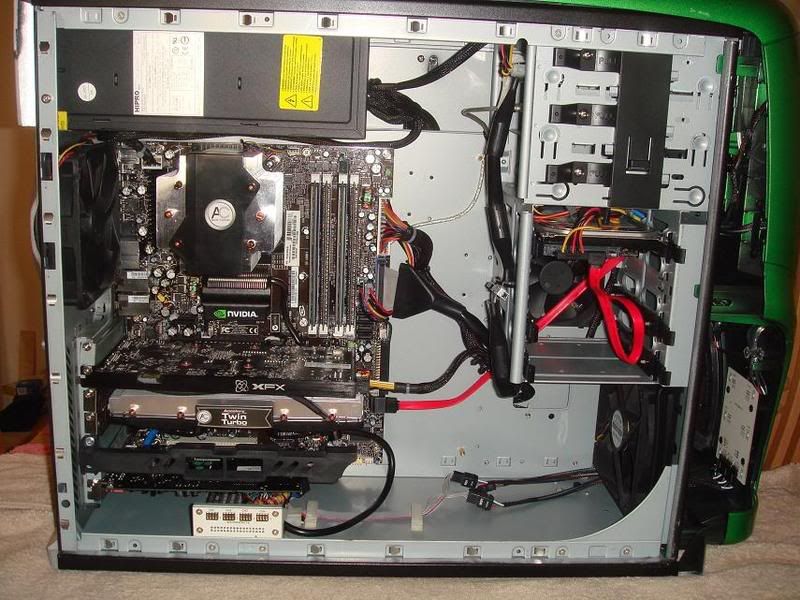
Now you can see where I get my user name from (ALXAndy). The case I am using now is the ALX version. Dark green interior, alu instead of steel, chrome instead of flat silver etc.
In a way I wish I'd have kept the green panels and put them onto the ALX shell and chrome.

I lusted after Alienwares from 2000-2008. In '09 I finally managed to order one. It cost me around £280 fully built with an E4500 and 8600 GT in. I immediately added 4gb more ram to the 2gb, stuck in a 9800GT and overclocked it to 3.2ghz. Then one day I was hovering around it and saw a lever on the right side panel. I thought "hey, I wonder what this does" so I pulled it... The side panel fell off and it took me about two hours to get it back on lmao. It wasn't even particularly full of wires but the catches are a PITA.
It remained on for about another year, with me being terrified to take it off

Dianoga is a tribute to the bogey, hence the green theme and candy apple green metallic stuff. Here she is the day I got her.


Before.

After.

Now you can see where I get my user name from (ALXAndy). The case I am using now is the ALX version. Dark green interior, alu instead of steel, chrome instead of flat silver etc.
In a way I wish I'd have kept the green panels and put them onto the ALX shell and chrome.
So how long do you think it'll be before we get updates featuring you with a metallic green rattle-can?
haha never mate
 If I had a gun and a compressor? maybe. Sadly I don't, so I am only really comfortable with flat finishes. I want perfect is the problem and rattle cans and gloss are very difficult to achieve that with.
I tell you what I may do, though. It will cost an arm and a leg though (around £200 I would think). I spotted this the other day.
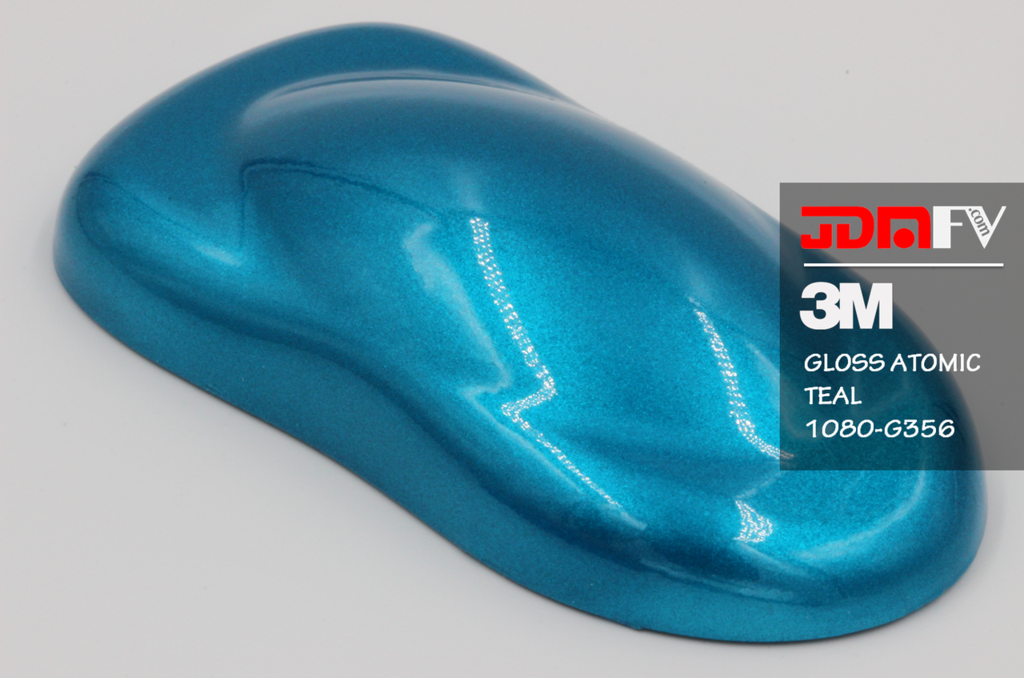
And it made me rather moist. Though as I say, it's expensive, very expensive. I have a thing for teal though and duck egg. I had a limited edition Blackberry in teal once and loved it

OK guys so here is what I've been up to today  Firstly this.
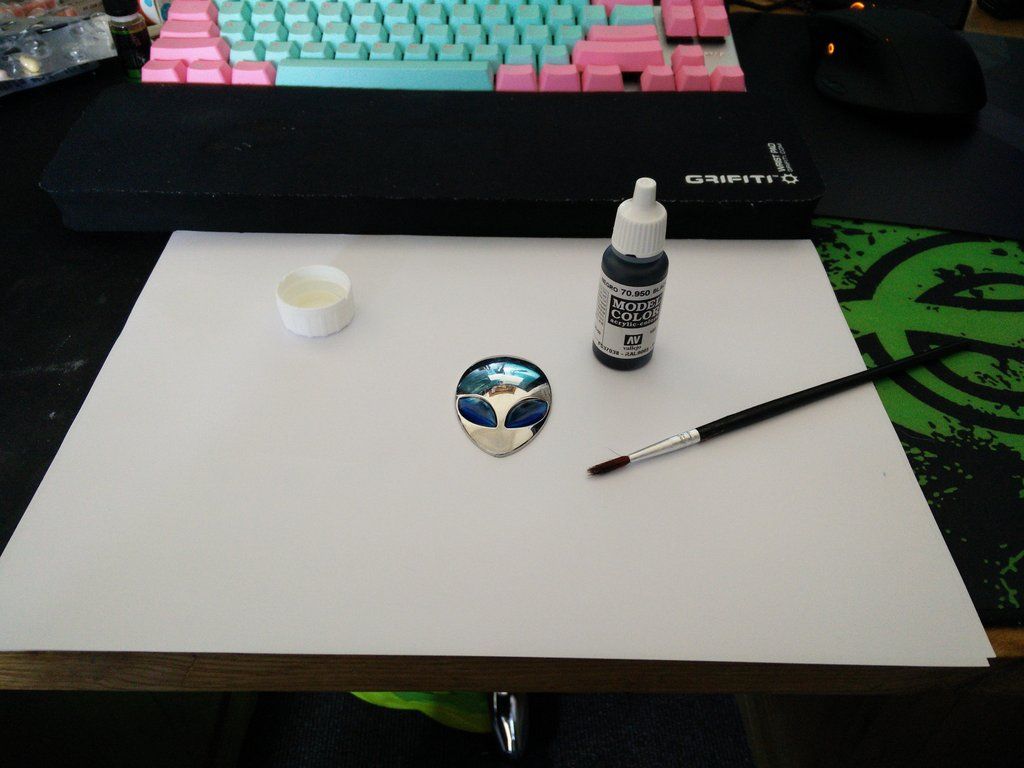
As you can see, my brushes arrived
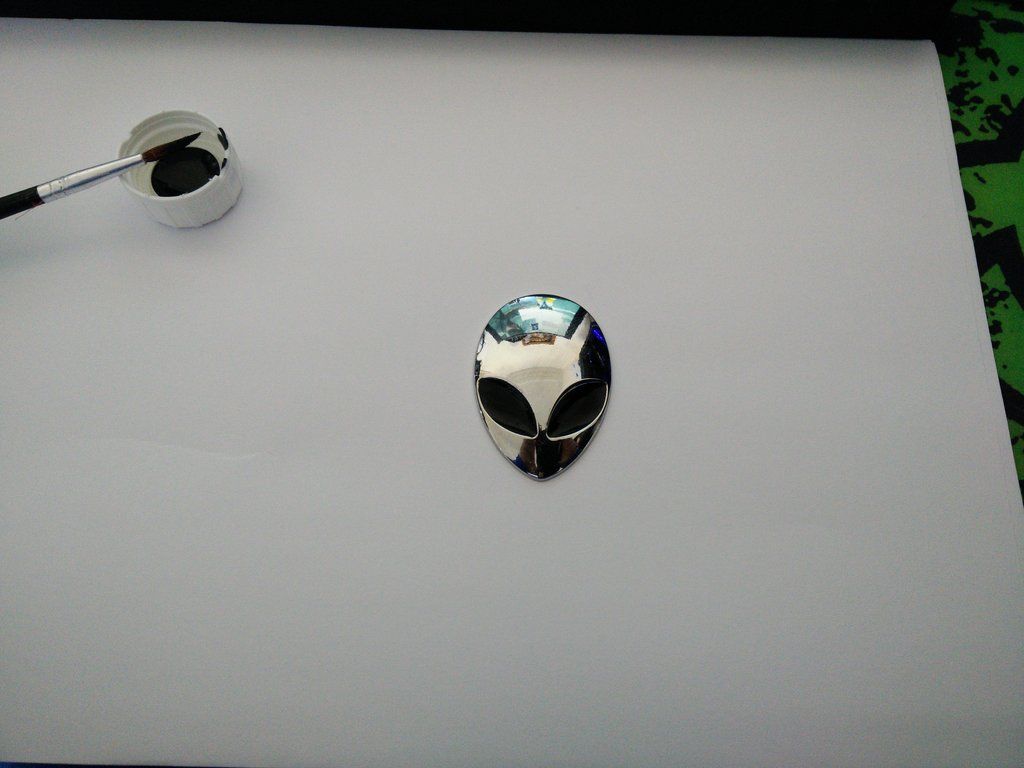
Onto the next job, the PCI plates. These came out of my 2014 Dellienware but they are silver and they have hex pattern, so they were ideal.
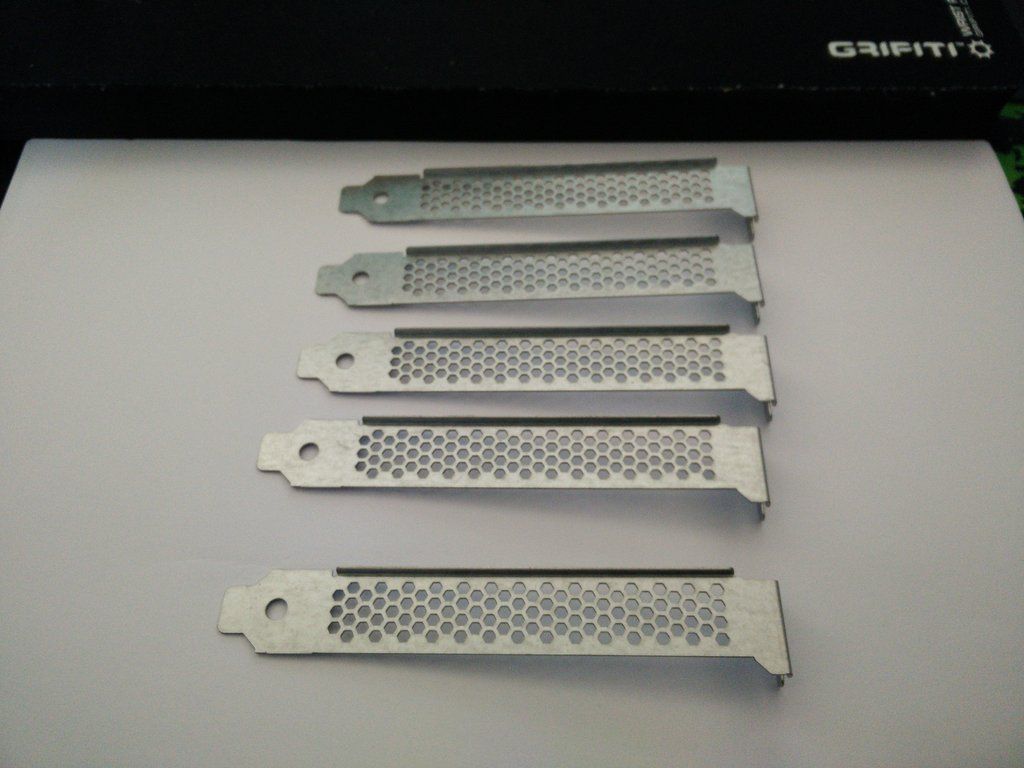
Problem is they were not quite silver enough.
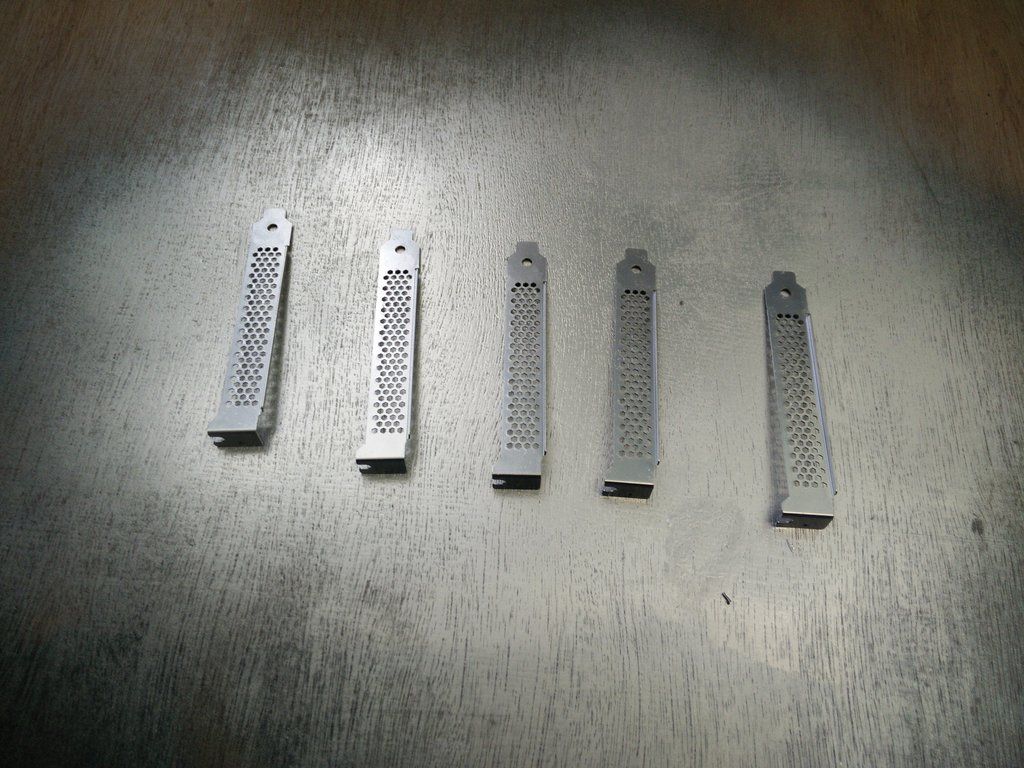
I should have done them weeks ago but I remember thinking "I CBA painting them" so I just chucked them to one side. Then two days ago it dawned on me that I had completely forgotten where I had just chucked them so I spent about an hour searching earlier and finally found them in a padded envelope at the bottom of a box. I don't particularly like them flat, so when the paint hardens up in a day or two I will shoot some clear onto them
 Firstly this.
As you can see, my brushes arrived


Onto the next job, the PCI plates. These came out of my 2014 Dellienware but they are silver and they have hex pattern, so they were ideal.

Problem is they were not quite silver enough.

I should have done them weeks ago but I remember thinking "I CBA painting them" so I just chucked them to one side. Then two days ago it dawned on me that I had completely forgotten where I had just chucked them so I spent about an hour searching earlier and finally found them in a padded envelope at the bottom of a box. I don't particularly like them flat, so when the paint hardens up in a day or two I will shoot some clear onto them

OK so the first thing I did today was clear coat the PCI plates. They are now drying. Then I decided to do some more plumbing.
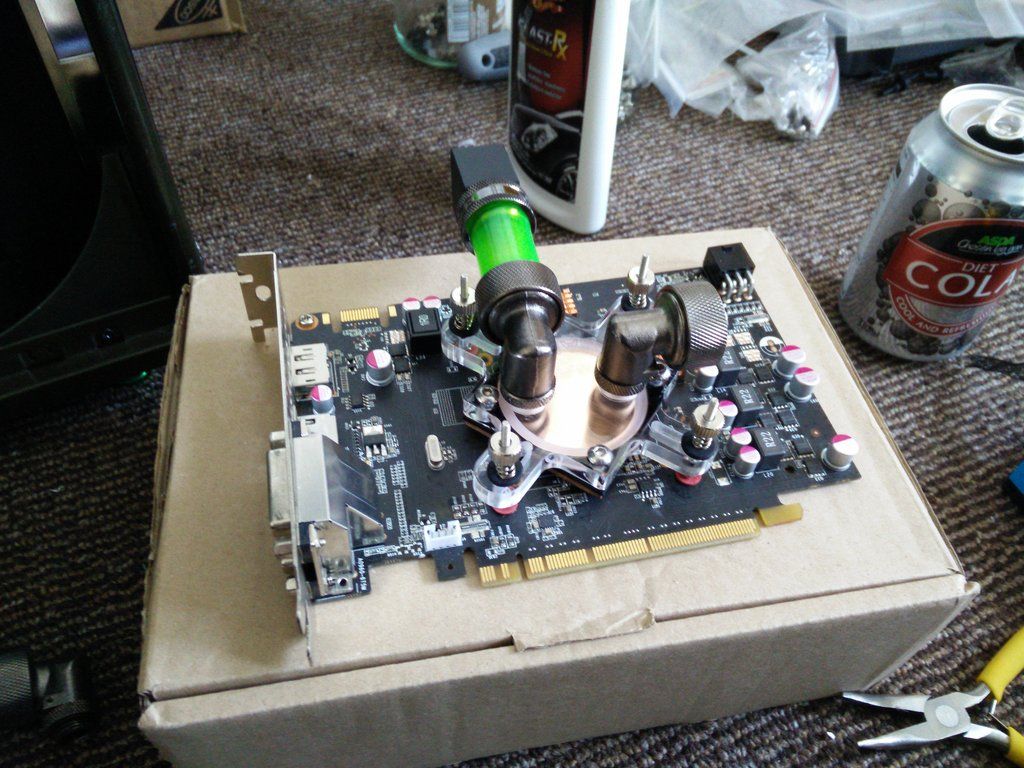
I started out making a straight pipe for the GPU, which would bring it out and then turn it 90'.
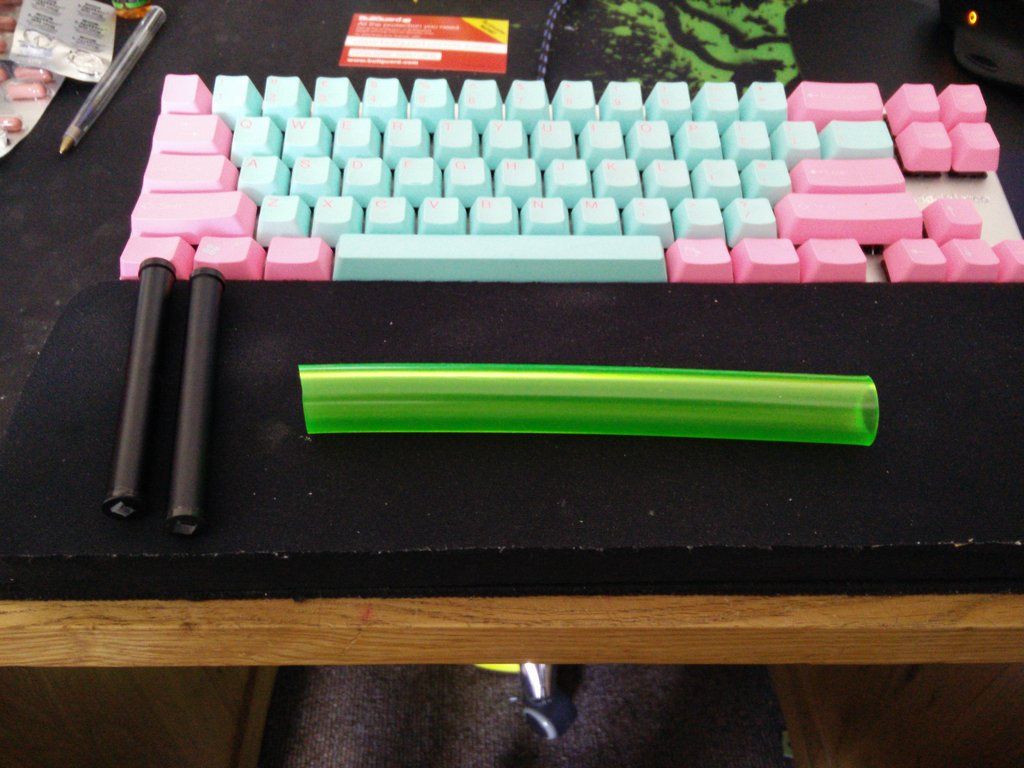
Here are my straightening tools. I [strike]snapped[/strike] carefully removed them from an old phone tripod.
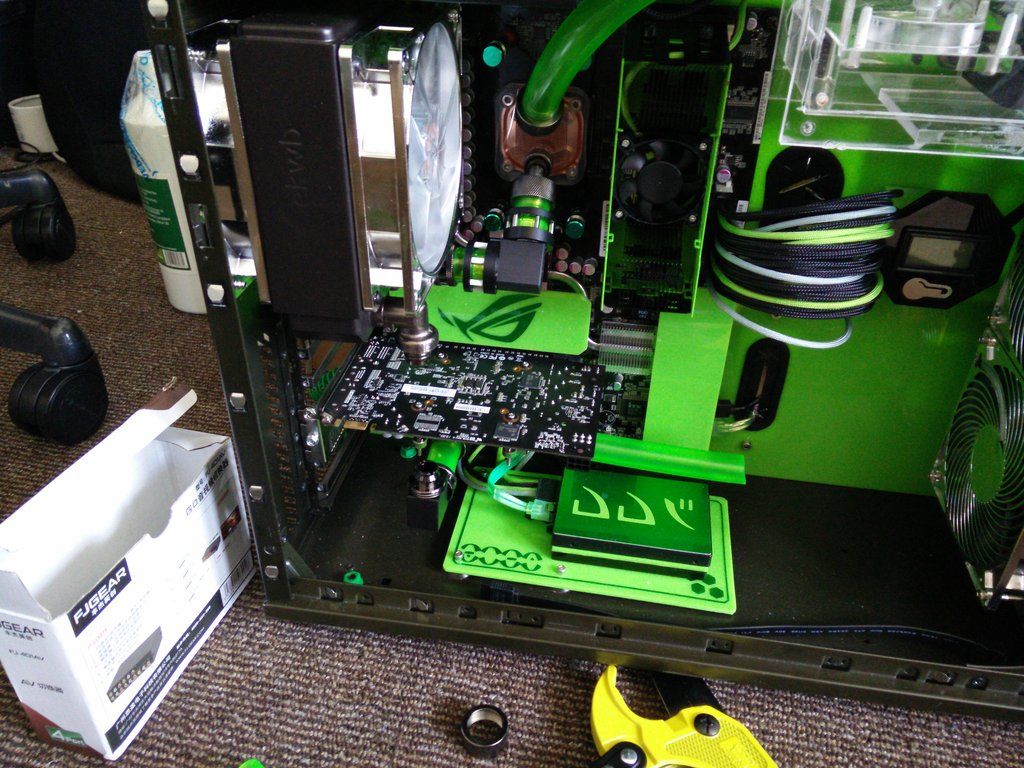
Here you can see I have fitted the GPU and pre-fitted a piece of already straightened hose to it.
Here is how my straightening tools work. If it is a short length I simply insert one in the end.
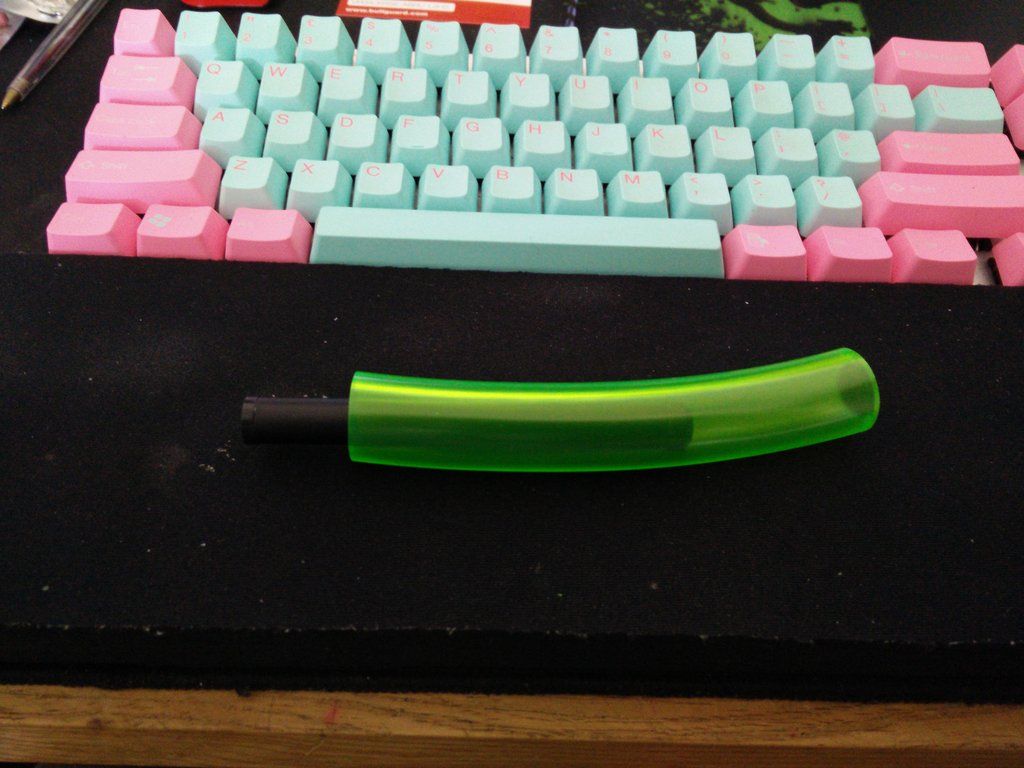
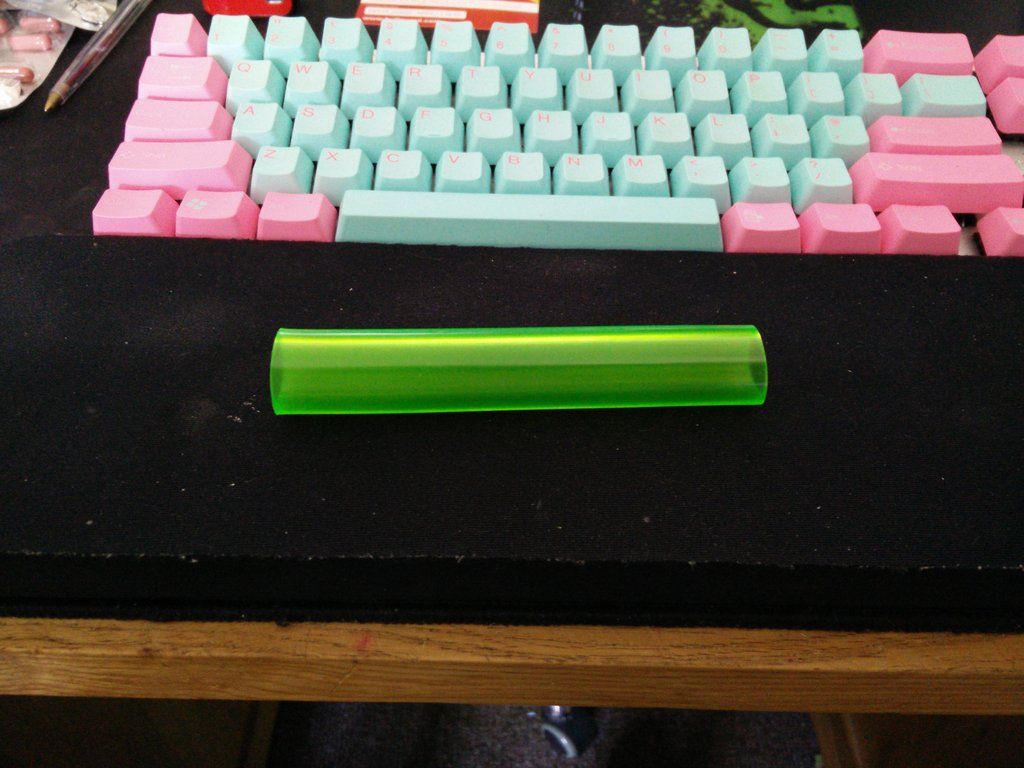
I then heat it slowly and evenly (keep the heat gun about 4" back) until it straightens. I hold onto the inserted "tool" and when it's straight I place it down on a smooth surface (like metal) do not lay the pieces down on anything textured like a mouse mat or they will end up with a textured finish.
Et voila.
And plumbed.
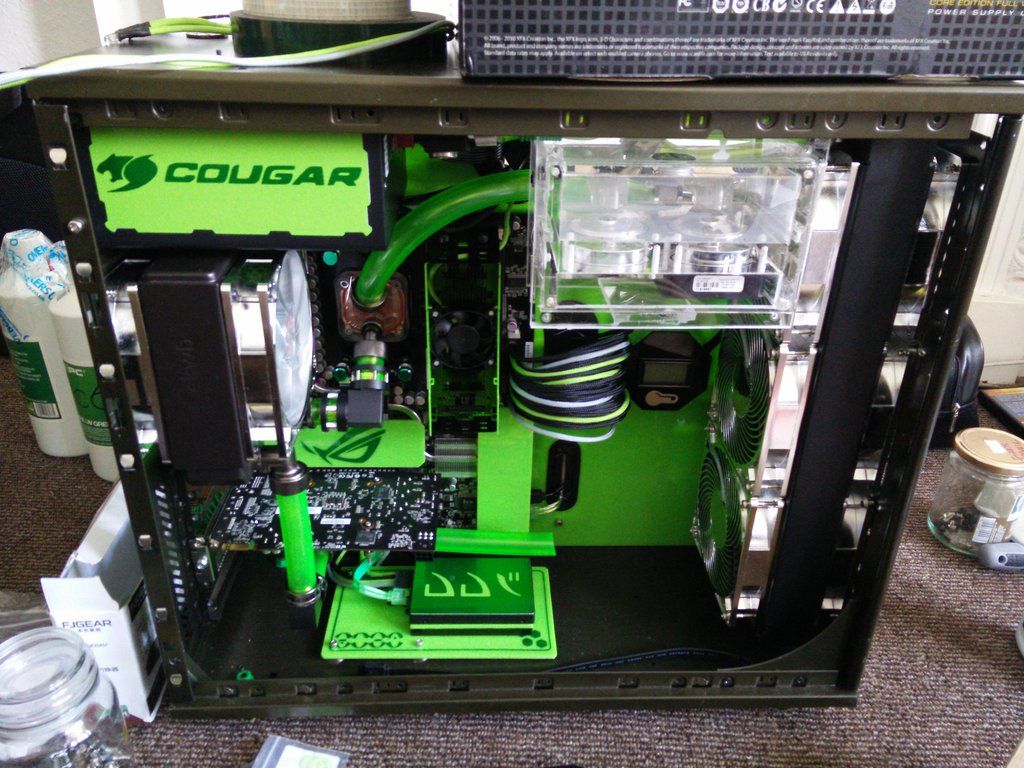
Look closah.... CLOSAH !
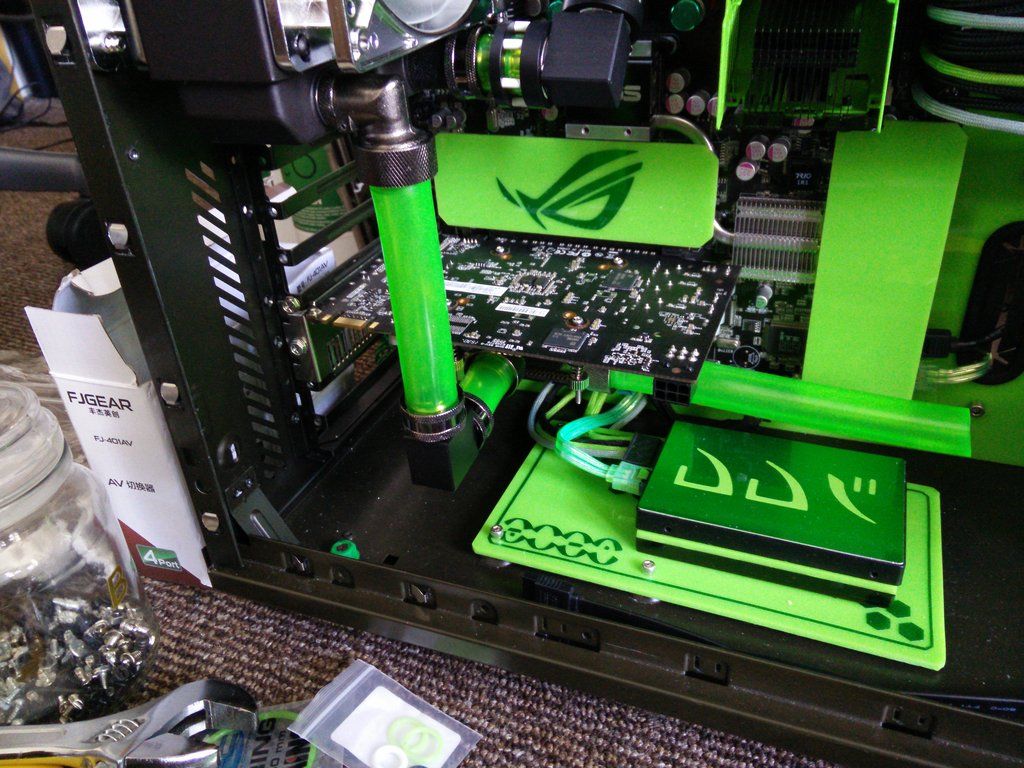
Now just as I thought it was all going incredibly well I hit a snag... The fitting at the top of the case that was going to accept the return pipe was sticking out too much from the res. Basically had I ran a pipe down there it would have hit the back of the GPU. I started to fear I would have to strip the entire loop down (because I could not put a fitting on any further as the res was in the way) then hit on the idea of simply pulling the bugger through the fill port hole, putting the fitting on where I wanted it then feeding it back.
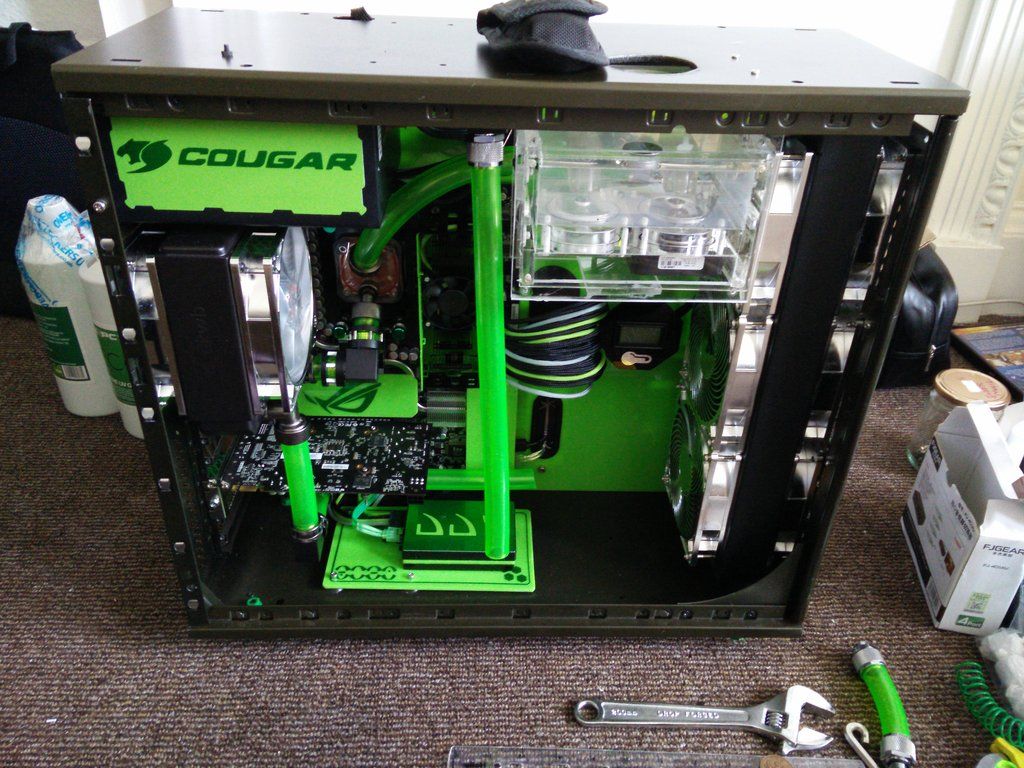
By this stage my hands were battered again. I also seemed to open up the blister I had on my fingers too, oucho. However, the finish line was now in plain view and I wasn't stopping for no one. Fit the ball valve and fitting.
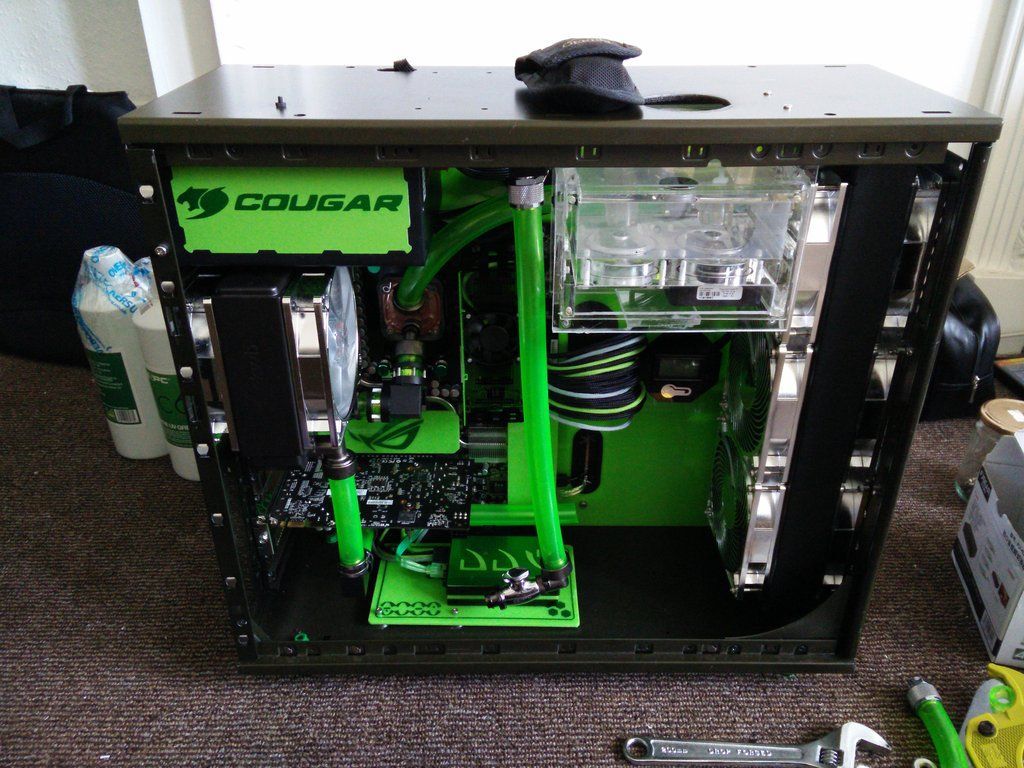
And...
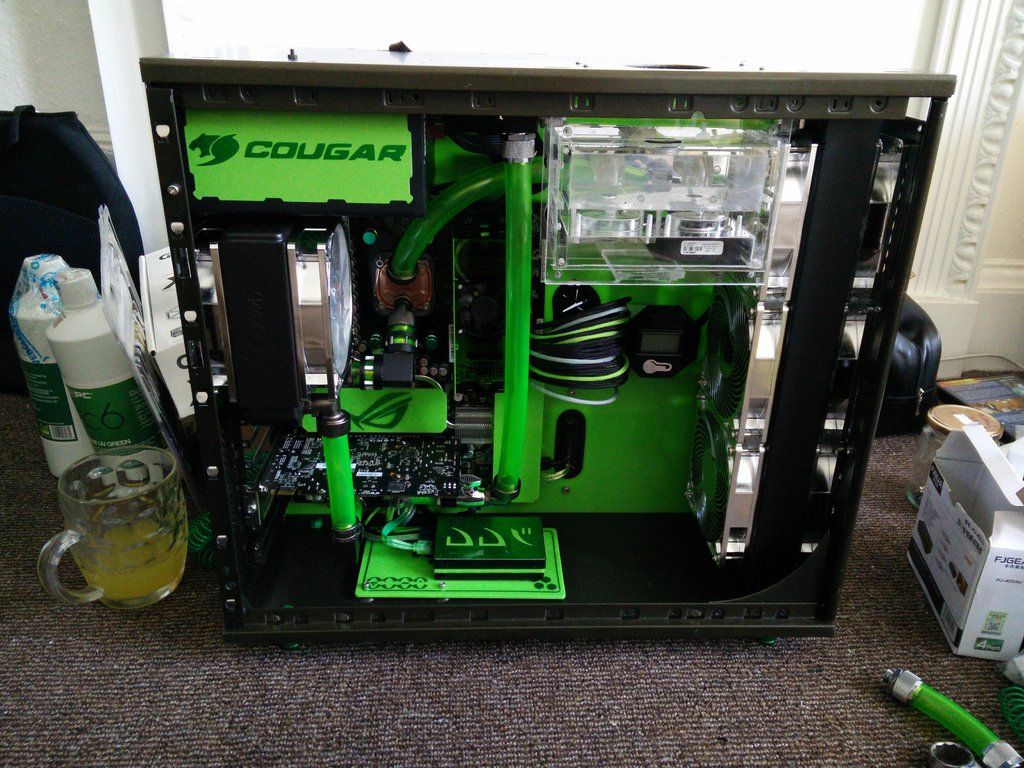
Oh hell yeah !!! Insert kill coil.
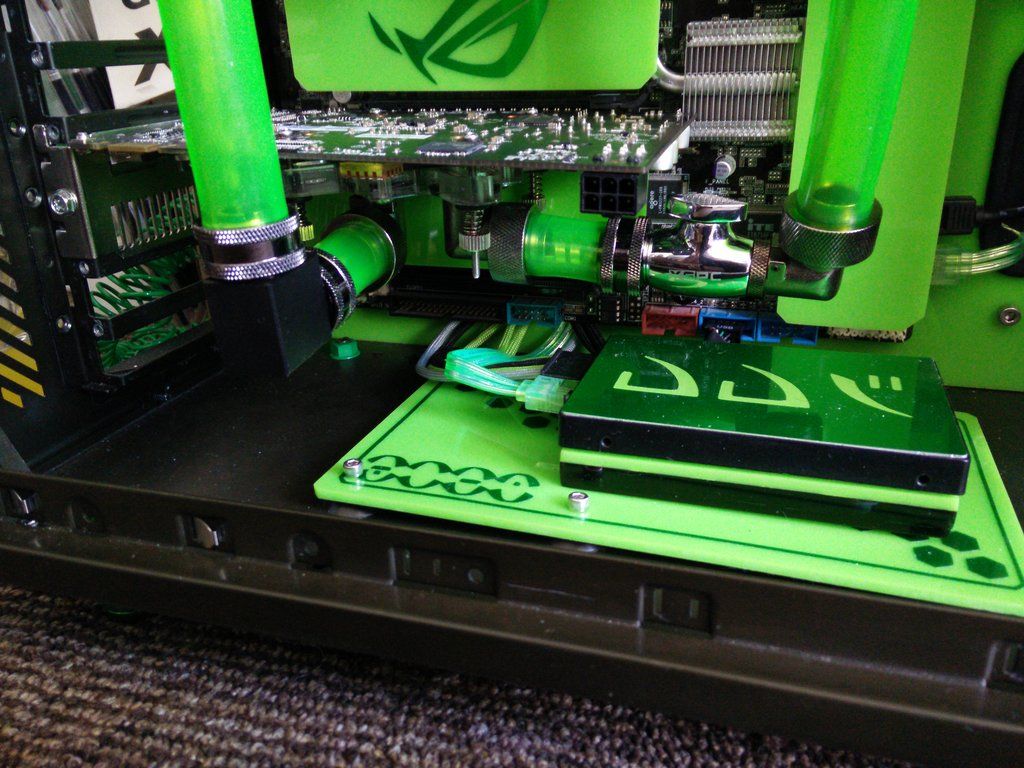
GPU back plate (don't worry about that scruffy 24 pin I will get to that later !)
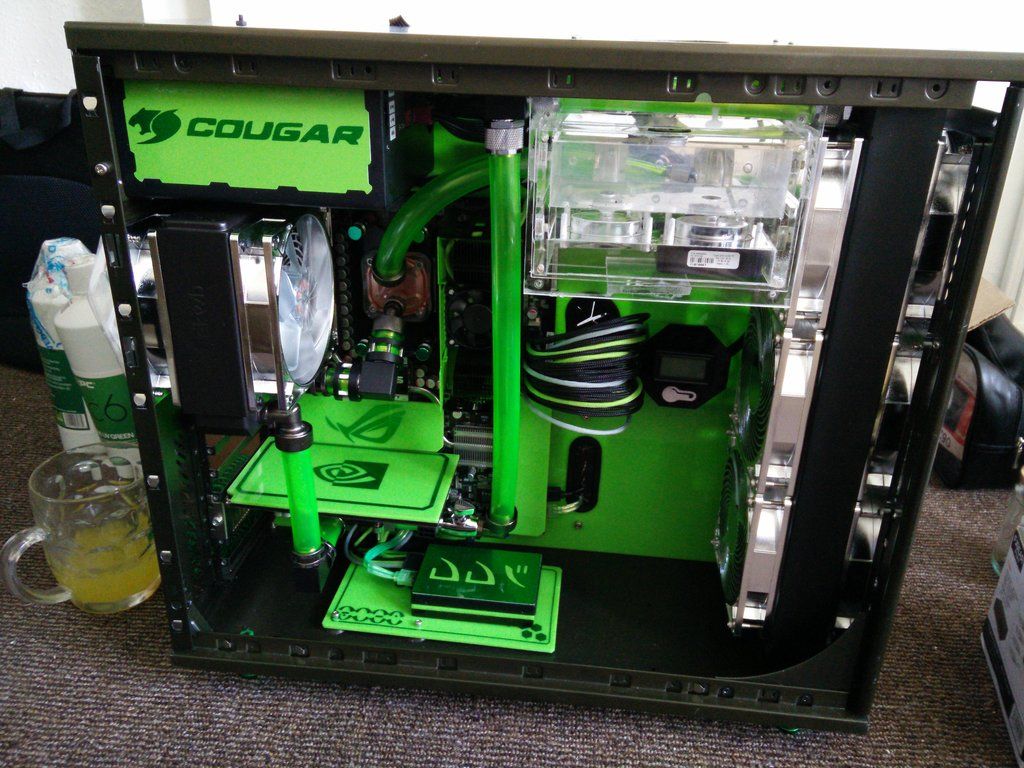
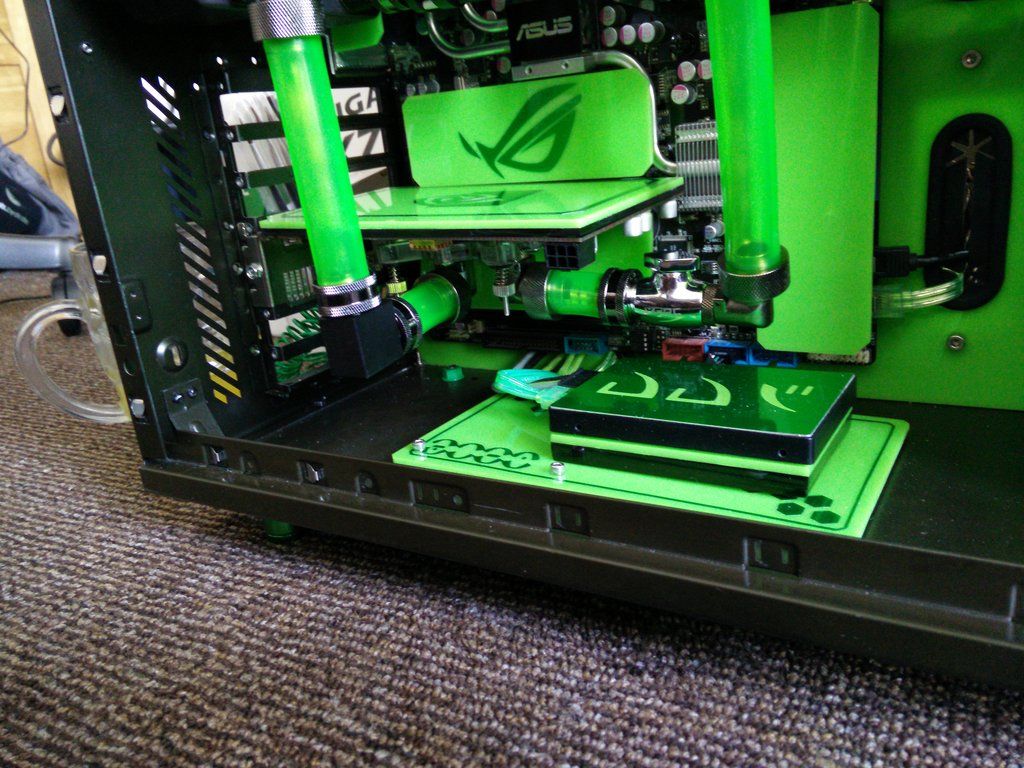
And then insert Dr Drop, connect up the pump and sing "Pump up the jam" whilst adding pressure. (that actually happened).
And she's good. TBH I wasn't expecting any leaks since I did it the hard way and tested it EVERY TIME I added a new fitting.
Sadly in my excited rush to order the other day I forgot to order a funnel. So they are ordered and en route as we speak.
I also ordered this the other day (and have it)

I will be refinishing the face of the res, as it has some marks and some paint on from where I painted the face plate and fitted it back on before it was completely dry.
More fun and frolics coming to a forum near you soon.
Notes - God damn that last connection is hard ! I had to remove the GPU to cut the hose down.
Nearly forgot the kill coil about five times...
I love the way it looks. I love hard tubing but I also like the organic curves of hose. I feel I have captured both here. I'm also incredibly proud of myself, because it's my first ever loop and it doesn't look like excrement.
I started out making a straight pipe for the GPU, which would bring it out and then turn it 90'.

Here are my straightening tools. I [strike]snapped[/strike] carefully removed them from an old phone tripod.

Here you can see I have fitted the GPU and pre-fitted a piece of already straightened hose to it.

Here is how my straightening tools work. If it is a short length I simply insert one in the end.

I then heat it slowly and evenly (keep the heat gun about 4" back) until it straightens. I hold onto the inserted "tool" and when it's straight I place it down on a smooth surface (like metal) do not lay the pieces down on anything textured like a mouse mat or they will end up with a textured finish.
Et voila.

And plumbed.

Look closah.... CLOSAH !

Now just as I thought it was all going incredibly well I hit a snag... The fitting at the top of the case that was going to accept the return pipe was sticking out too much from the res. Basically had I ran a pipe down there it would have hit the back of the GPU. I started to fear I would have to strip the entire loop down (because I could not put a fitting on any further as the res was in the way) then hit on the idea of simply pulling the bugger through the fill port hole, putting the fitting on where I wanted it then feeding it back.

By this stage my hands were battered again. I also seemed to open up the blister I had on my fingers too, oucho. However, the finish line was now in plain view and I wasn't stopping for no one. Fit the ball valve and fitting.

And...

Oh hell yeah !!! Insert kill coil.

GPU back plate (don't worry about that scruffy 24 pin I will get to that later !)


And then insert Dr Drop, connect up the pump and sing "Pump up the jam" whilst adding pressure. (that actually happened).
And she's good. TBH I wasn't expecting any leaks since I did it the hard way and tested it EVERY TIME I added a new fitting.
Sadly in my excited rush to order the other day I forgot to order a funnel. So they are ordered and en route as we speak.
I also ordered this the other day (and have it)

I will be refinishing the face of the res, as it has some marks and some paint on from where I painted the face plate and fitted it back on before it was completely dry.
More fun and frolics coming to a forum near you soon.
Notes - God damn that last connection is hard ! I had to remove the GPU to cut the hose down.
Nearly forgot the kill coil about five times...
I love the way it looks. I love hard tubing but I also like the organic curves of hose. I feel I have captured both here. I'm also incredibly proud of myself, because it's my first ever loop and it doesn't look like excrement.
Looking nice. Like the straightening technique. Haven't got any on show in this build but may have to pinch that for others 
You want to make sure that kill coil can't move about (like round the loop) once you've got water flowing though. Bear in mind too that it will degrade a bit as the silver oxidises.
What's the tap doing exactly? If it's a drain, it's placed well (lowest point) but you need a three-way piece (T or Y) and the tap stopping the third connection (plus a stop fitting for good measure). Otherwise it'll just let you stop the flow - which could help if you stop it, split the loop to the right of the tap and get the free end over a bucket. It would minimise flow until open the res to let air in.
The kill coil is right before the ball valve. This means once it diminishes I can change it "easily". The tap will be for draining yes. TBH the ball valve may not even be used to close off the flow should I need to take it apart, but, offers me somewhere to break the loop open and drain it. Like you say, bucket etc. I would need to throw a couple of towels over the SSD first, mind. The ball valve is smaller inside than the hose (obs) so was the perfect place to stop the kill coil moving around.
I'm hoping I won't need to drain it any time soon. TBH all of that (draining and cleaning) would be very hard any way. I can pretty much never remove the front rad and fans for example, so next month I will be getting one of those air dusters (the plug in proper ones not the cans).
I'm hoping I won't need to drain it any time soon. TBH all of that (draining and cleaning) would be very hard any way. I can pretty much never remove the front rad and fans for example, so next month I will be getting one of those air dusters (the plug in proper ones not the cans).
The funnels arrived  So did the chrome thumb nuts I ordered the other day.
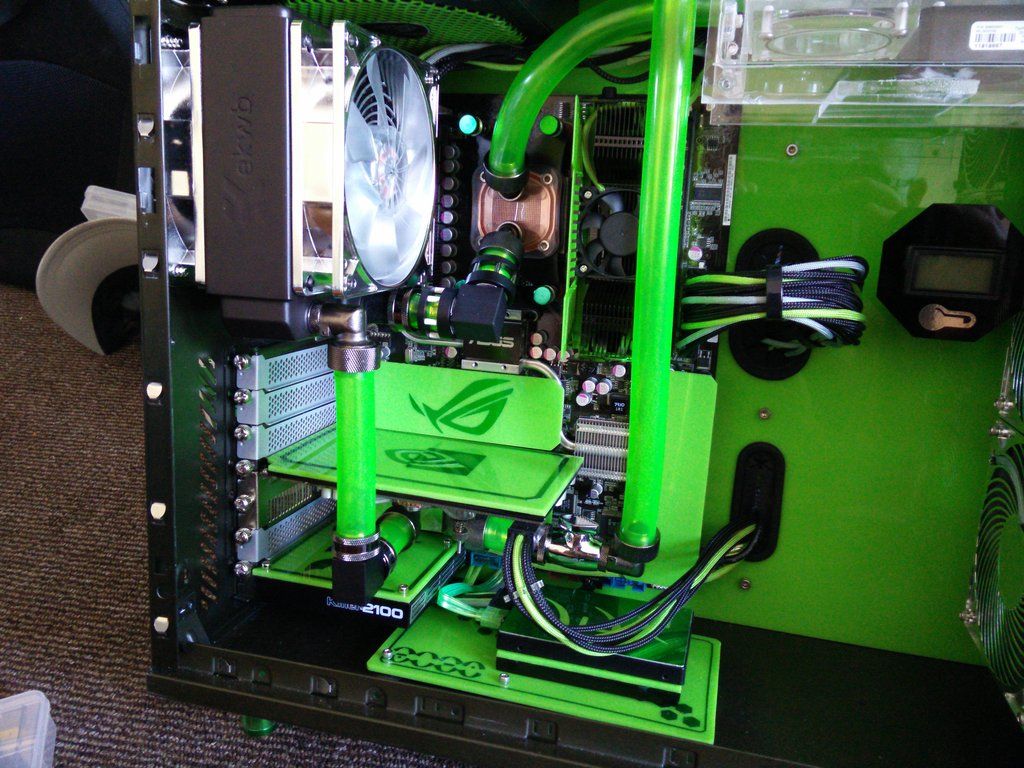
It's quite odd how the silver darkened loads when I clear coated it. I don't mind it though, as it matches the exterior panels Network card in.

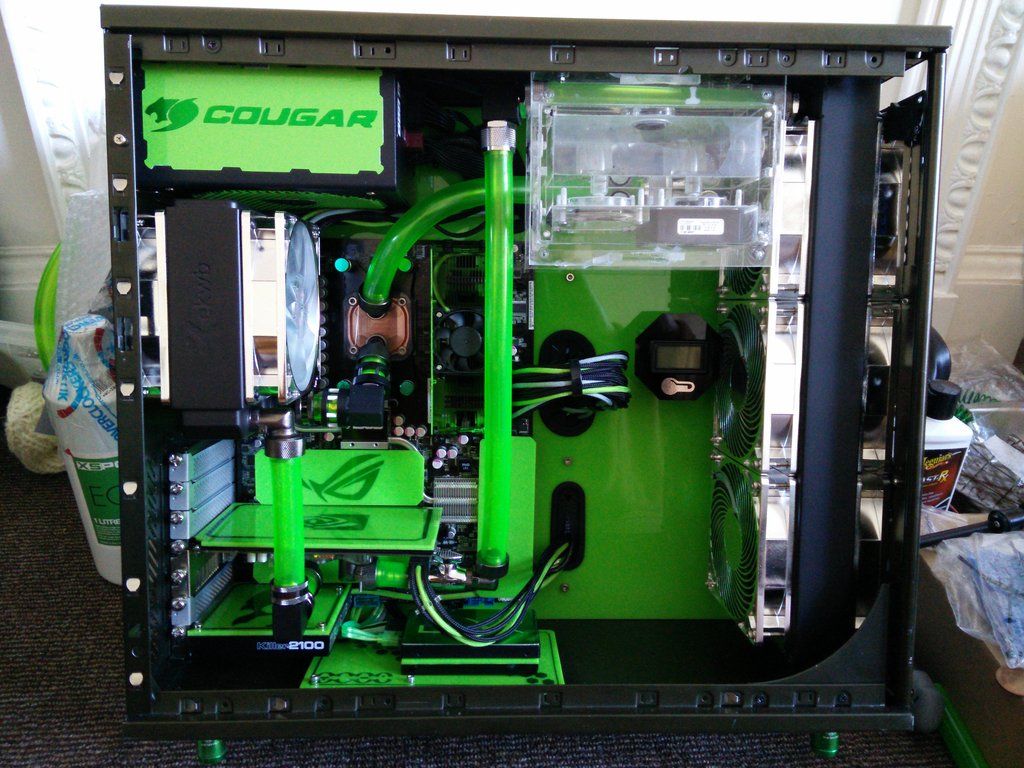
I then connected it up to Dr Drop for the very last time. I put in between 0.5 and 0.6 and then left it for twenty minutes. Nothing, zero, nada. I then figured it would be safe to do this
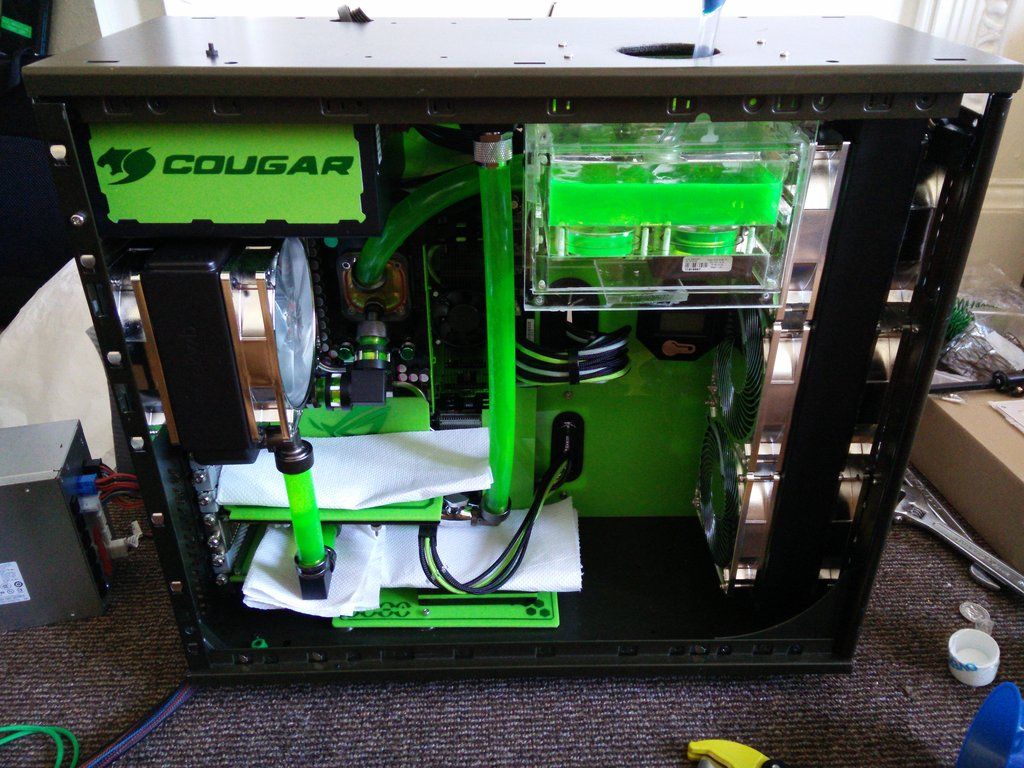
There's something alive in here !
 So did the chrome thumb nuts I ordered the other day.
It's quite odd how the silver darkened loads when I clear coated it. I don't mind it though, as it matches the exterior panels
 Network card in.

I then connected it up to Dr Drop for the very last time. I put in between 0.5 and 0.6 and then left it for twenty minutes. Nothing, zero, nada. I then figured it would be safe to do this


There's something alive in here !
Looking SO good bro! All coming together very nicely.
Thanks to you man

Nice to see it properly soon. What colour is your carpet now?!
Still poo brown. It may be a little more poo brown than before though.
So I filled the rig with water as per the video. Then I tried to fire it. Nothing. There was no one home but all of the lights were on.
It then gave me a four hour fight. The memory I have is not totally compatible with the board but I got there in the end. Posting from it now.. Initial testing..
lmao. I was kinda disappointed when I saw the GPU idle temps I must admit. Check out the load temps though !
Before on air.

After on water.
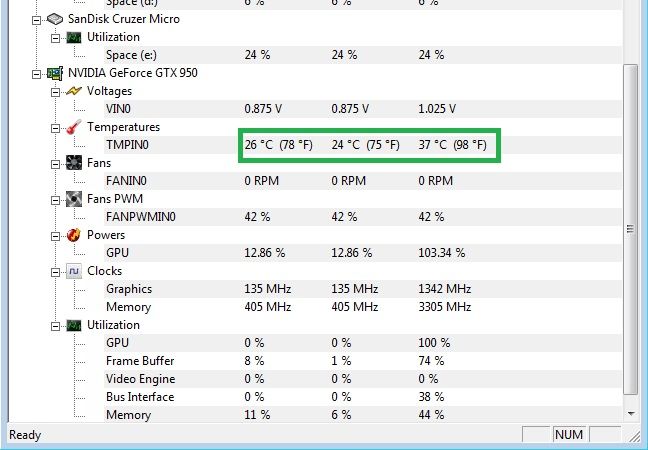
Do note, every fan is on 7v so it's only audible right now because I had to connect a fan to the CPU fan or it errored (I just need to disable it and remove said fan).
Amazing !


