Project Stealthlow

Seriously when are you gonna stop getting better!?

I revisit this post probably every other day to see whats going on and just when i think you have outdone yourself for the final time you do it again! That looks amazing!

Quit whatever you do and do this for a living! :)
 
That looks like a bloody time-consuming process!!!

So much attention to detail, it's incredible!!

I cannot wait to see this finished :D
Oh it is lol :( but worth it when it's done :D I'm pushing to get this done ASAP now so hopefully should if no more probs :).

Seriously when are you gonna stop getting better!?

I revisit this post probably every other day to see whats going on and just when i think you have outdone yourself for the final time you do it again! That looks amazing!

Quit whatever you do and do this for a living! :)
:D Thanks mate :).

Cant wait till its finished :D
Neither can I now :D that week of waiting was killing me :D so march on I will :).

I see says VOoDOo!!! Very nice Wayino!!! Thought that was a pic of a blacklight bar at first. Thank you for the visual presentation
:) Cheers VOoDOo, esaier to show photos than explain :D.

Everything antiqued after grinding down the 12mm sticks to 7.3mm.
ProjectStealthlow1072.jpg


And the fun begins oh yeah, this is them after the disc sander.
ProjectStealthlow1073.jpg


ProjectStealthlow1074.jpg


After 160 grit going 1 way, length ways so they will polish up better.
ProjectStealthlow1075.jpg


240
ProjectStealthlow1076.jpg


600
ProjectStealthlow1077.jpg


Sure wouldn't be able to do all these hours & be able to slightly smile without my trusty mp3 jukebox :D.
ProjectStealthlow1078.jpg


1200
ProjectStealthlow1079.jpg


ProjectStealthlow1080.jpg


ProjectStealthlow1081.jpg


2000
ProjectStealthlow1082.jpg


Polishing.
ProjectStealthlow1083.jpg


Result :D.
ProjectStealthlow1084.jpg


After cleaning them all up I started sticking them back together.
ProjectStealthlow1085.jpg


ProjectStealthlow1086.jpg


ProjectStealthlow1087.jpg


Copper ? clips, that's right not P clips but ? clips lol :D.
ProjectStealthlow1088.jpg


Anyway once the revised fan holders have cured that's the last time consuming bit, then it's just the optical tray & eject button & a tiny bit of wire work for a molex cable & the power switch, then the final touch install the lighting & get the copper ? clips :D installed & then route all the wires tidy, then I think it's done & time for the final photo shoot can't wait so I'll get it completed ASAP :D.
 
Been a while since I popped in here,

Still doing amazing work, those new fan holders are orgasmic! :D
:D Cheers Baplad :).

That is incredible! No idea how you keep going with this! Hopefully you'll get years out of this build! Although somehow knowing the bug that this creates from what others have said, you'll finish this and need a new project!

kd
:D Cheers KD neither do I but I've been holding off on playing any games & will do until I can play them on this :D.
And yeah I intend to use this one for as long as possible but I'll still do projects but not likely for myself, this case should do me nicely for a long time :).

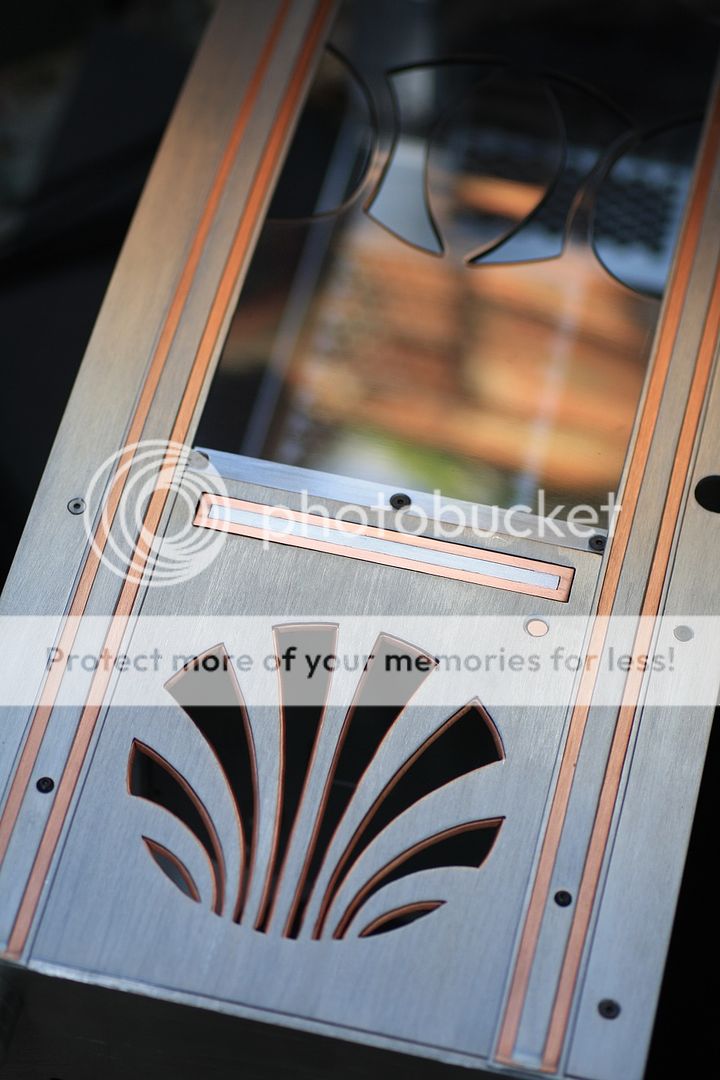
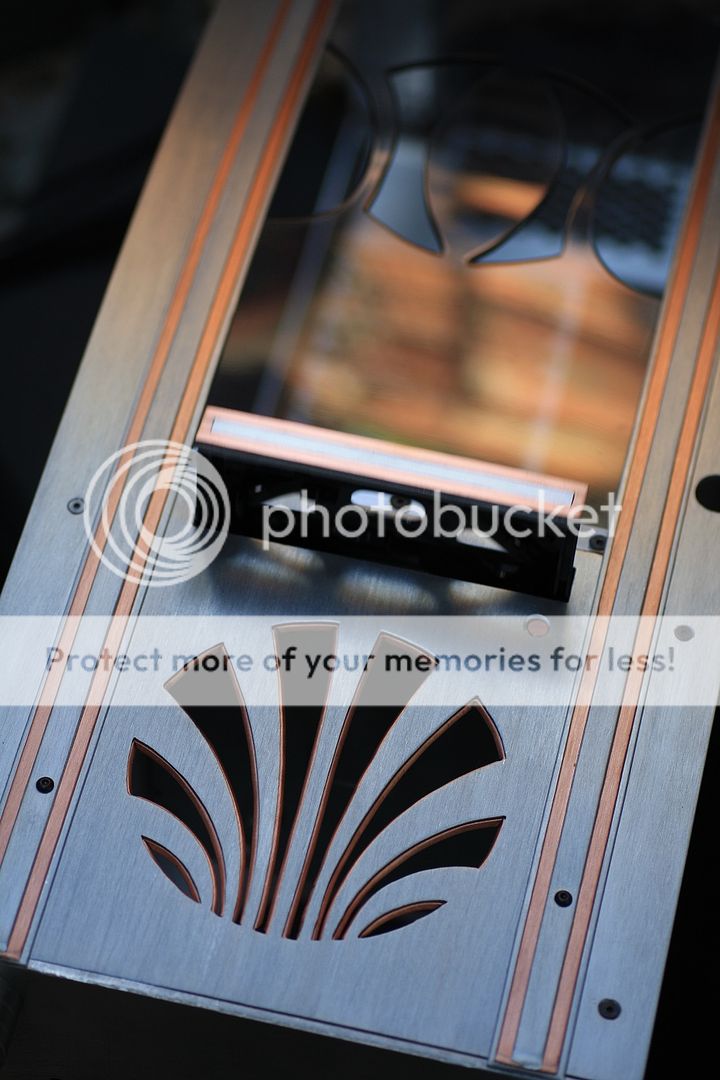
Installed the optical drive to gauge what depth is needed for the tray cover = 5mm :) & same for the eject button but an extra piece on top so it's pushable so decided on a 3mm piece of alu & a mix of 2mm copper & 2mm alu for a tray cover, figured I should power it up to make sure the tray can eject :D it couldn't but only needed a tiny bit of filing to let it work which required me to tweak my design a little again.

OK the good stuff :D.

I pre brushed the panels & then masked them up because some of the pieces would be impossible to brush once they are cut (many tiny pieces), then printed, cut up & stuck my designs on with prit stick :D it really works excellent, far nicer more accurate & faster method than marking manually saves me many hours so I'll do this all the time now, putting this student version of sketchup to good use :).

So here's the scraps from what I done.
ProjectStealthlow1089.jpg


And here you can see fan label covers for front & back, a plate I did for the psu side where the label used to be, eject button bits, optical tray cover which needs a little filing so the middle fits inside the copper one & lastly the ssd cover with yin yang alu/copper placed inside the circle :) I didn't think I'd get much use out of the scroll saw for the rest of this project but I guess I couldn't resist :D.
ProjectStealthlow1090.jpg


ProjectStealthlow1091.jpg


ProjectStealthlow1092.jpg


The ssd cover was going to be mirror polished stainless steel but I gave up trying to cut it well so tried polishing some alu sheet but wasn't anywhere near as good as the steel so brushed it instead & I'll paint that piece matt black (has to be a different look to the alu/copper & black should be sweet :D could get some brass but then I'd end up adding brass trim bits all over the place also :D), bear in mind the bits you can see here are the rough ugly side :D the nice side should pretty sweet :).
 
Well we all know what to get waynio for christmas....A waterjet!!!! Looking good Waynio!!!

:D Cheers VOoDOo yeah I'm not keen on relying on others for fabrication not to mention the cost :D, so a good scroll saw has many possibilities & so far I've only shown the most basic stuff that I have in store for future projects :D.

:D No cats or dogs for this log, just this little curious guy sat watching with all the shiny stuff about :D.
ProjectStealthlow1093.jpg


Got the stainless steel cut, I ended up using 1 of the band saw sections in the scroll saw which changed a half hour job into a minute :) & this is after a coat of metal lacquer on all these bits.
ProjectStealthlow1094.jpg


ProjectStealthlow1095.jpg


The corsair force 3 120GB which I bought the other day, need some double sided tape though to make it semi permanent & it still fits in the case :D.
ProjectStealthlow1096.jpg


ProjectStealthlow1097.jpg


Optical eject button made with 5mm opal frosted acrylic which I'm kinda hoping will catch optical activity light & create a slight glow around the 2mm copper top.
ProjectStealthlow1098.jpg


Replacement for the psu sticker.
ProjectStealthlow1099.jpg


Covers for the labels on the backs of the fans.
ProjectStealthlow1100.jpg


Pattern covers for the front of the fans.
ProjectStealthlow1101.jpg


Optical tray cover & friends :D.
ProjectStealthlow1102.jpg


Randoms :D.
ProjectStealthlow1103.jpg


ProjectStealthlow1104.jpg


ProjectStealthlow1105.jpg


List of things to do in order of which I'll tackle first :) on the final steps woooooo I could dance like a freak with or without music :D.

Work out exactly where I want the cables to be & add extra mounting holes to mobo panel
molex cable
Fix led strips cables from molex to a fan adaptor or to work with the fan cable = half done
Lay gap filling material next to all faint gaps where there will be light.
Make a block that helps keep the light control box stay in place next to psu.
Fix light strips to curve bars.
Install hardware :).

Get a pile of junk food & beer & get that 30lbs back or not I'm liking the extra energy levels I have with that gone :D.
 
Love the CD tray :)
Am I blind or has the making of that not been logged?

Cheers mate :), I did it amongst the final metal work bits, might not have seen it, all the latest bits were done on the scroll saw which is in the cellar which is cramped up so too much messing to have the camera set up around it it very much needs sorting out :D, the tripod I use has a massive foot print so only got a couple of pictures after I finished cutting but I'm loving the possibilities with this scrollsaw :) it is exactly as awesome as I thought it would be :D.
 
Last fabrication update I think :D depends on how the sata data cables are if they need a clamp piece adding to keep them tidy or not.

So I added all the required mounting holes to the mobo tray to support the cable holders.
ProjectStealthlow1109.jpg


I also decided to make a cable clamp holder also, I added the mounting holes for this before making the part & took the cable to be clamped & took measurements off it with the digital callipers & got to it on sketchup to design & print the needed piece complete with cut/bend lines & excess length so it could be trimmed down & rounded, couldn't be bothered setting up my basic bending brake & just did a quick setup with plywood & the vice & manual pressing which is easily doable when material isn't very wide.
ProjectStealthlow1110.jpg


ProjectStealthlow1111.jpg


ProjectStealthlow1112.jpg


ProjectStealthlow1113.jpg


ProjectStealthlow1114.jpg


Held the piece where I wanted the piece to be & marked where the mounting holes are & then drilled the holes in the new piece, needed an accurate drilling with me not being able to clamp this down so the drill press came in handy as it sometimes does :).
ProjectStealthlow1115.jpg


ProjectStealthlow1116.jpg


ProjectStealthlow1117.jpg


All done for this piece & all the mounting holes & that's all for the fabrication of this project, now it's just the power/hdd activity switch wiring & a molex cable & installing the lighting :).
ProjectStealthlow1118.jpg


ProjectStealthlow1119.jpg


ProjectStealthlow1120.jpg


So might not have completed the project yet thanks to me using the wrong adhesive for quite a few parts & having to re-stick them with epoxy resin but all the challenging stuff & slightly challenging stuff is done I'd say :D. Hmmm actually I have a mass of cabling to pretty up :D:o & it has to be done with windows being on both sides :D it's the sata data cables I'm unsure about looking tidy but if they are a nightmare I could make a couple of clamps like I did for the 24 pin extension.
 
Work of art. You have hardware planned out for it? Thinking the copper highlights on the GA-P67A-UD7 would look good.
p67ud7.jpg


Though if you could stuff it full of broken components, you can call it real 'art' and submit it to a gallery :p.
 
I am absolutely loving this build! The case is amazing and really inspiring!!
Chris :-)
Cheers Chris :).

Work of art. You have hardware planned out for it? Thinking the copper highlights on the GA-P67A-UD7 would look good.
p67ud7.jpg


Though if you could stuff it full of broken components, you can call it real 'art' and submit it to a gallery :p.
Cheers joxang :D That is the mobo I was going to get until I seen the price at release was almost double what the msi p67a-gd65 cost :eek: so scrapped plans for that one but don't regret it at all with the 4.5ghz OC I have on the 2500k :cool: but the colour scheme on that mobo is really sweet & would have fit in perfect with this case :D I seen someone get sponsored with that board also & it isn't even on show in the mod :eek: I expect gigabyte would have jumped at the chance to have it featured in this case, oh well :o.

I did a test run of the cabling & it doesn't look so bad until the sata data cables come into play so I will make something to keep the data cables either hidden or clamped in place.

ProjectStealthlow1121.jpg


ProjectStealthlow1122.jpg


ProjectStealthlow1123.jpg


ProjectStealthlow1124.jpg


ProjectStealthlow1125.jpg


ProjectStealthlow1126.jpg


And wow I just noticed I seemed to have accidentally made the letters s & f merged together in the 24 pin cable & 8 pin cable :D.
 
List of things to do in order of which I'll tackle first :) on the final final steps now.


Make extra clamp for the lower part of the 24 pin cable to hold it closer to the mobo panel & stop it bulging out.

Make a set of clamps & casing to hold or hide the sata data cable mess & let the modding community decide which is best :D unless I come up with a sweet cover that doesn't need feedback on :D.

The LED strips in the fan holders I need to change the molex to a fan adaptor or to work with the fan cable = half done
Lay gap filling material next to all faint gaps where there will be light.

Fix light strips to curve bars.

Do night & day photo shoots of it up & running which will rely on weather as I want to do them outside :).
 
Back
Top Bottom