Random 3D printing chatter

On my CR6-SE I ended up pulling a small chunk out of the glass bed (with PLA!) and I gave it a go on the uncoated plain glass underneath by just flipping it over and I'm getting really good adhesion/first layer smoothness with just plain glass and nothing else like hairspray or anything... Both with PETG and PLA :)

Bit annoyed about the coated side though... I was using alcohol to clean the bed and since read that although that's what Creality originally said to use they since said that would damage the coating, for me adn at least a couple of reports online it actually made the adhesion a whole lot 'better', to the point of being too good :p I printed something that was large-ish and flat/rectangular bottomed and it was well stuck, put the bed and part in the fridge for a couple of hours and that looked like it had worked but as I 'gently' pulled it up a chunk of the bed/coating came with it, d'oh
 
@Vince Let us know how you get on with the addressable RGBs. I've got lighting run with a strip of waterproof LEDs off a 12V feed and a manual toggle switch. Worked well enough but the LEDs are all failing because it was crap strip. I knew this when I used them but I had a spare length so it was free. Was contemplating trying a section of COB LED strip but it's pricey for what it is. RGB LEDs seem an odd choice (by BTT/the industry) as they're traditionally not as good at white lighting which would seem to be their main aim - excluding decorative frivolity.

@Scougar I was having adhesion issues with PETG and hairspray wasn't helping much. I brought the bed up to 85 - although people are going up as far as 100 - and that helped. People have also said 250 for the first layer and then drop to 240. I haven't got that option in my slicer (Fusion 360) and 235 seemed best on the temp tower I printed. The main thing I changed was to reduce the speed for the first layer to 10mm/s and then nothing faster than about 40mm/s for the rest. It's slower but to be honest I'd prefer slow and hassle-free to faster and fighting it every step of the way! I also cleaned off the hairspray with IPA (not the best for the hairspray but what I had) and levelled as normal to some drag on 80gsm A4.

I wired it all up today and set it up in the firmware. I now have 28 adafruit addressable rgb's controlled from the skr1.4 and I can also turn the printer on and off from the pi3 using a relay which I also wired up:


20210220-142413.jpg


I also went ahead and put the new extruder on and put new belts on all round:


Put it away for the night now will finish up tomorrow :) First print will probably be some clear tpu diffusers for the led's.
 
Last edited:
@SKILL Forgive me if I'm teaching you to suck eggs but are you waiting for the bed to cool before trying to remove the print? Not so important with a removable magnetic bed as you can flex it but more so with a rigid bed like glass.
Would be interesting to know what sort of settings you're using for bed temp, hotend temp, first layer speed and fan. Purely because I started from having terrible adhesion of PETG to glass and have got it better. So it would be interesting to know what makes it stick too well and maybe meet in the middle!

@Vince Nice. Are they any good for lighting it in a dark room? I'm thinking of the webcam getting a good picture for auto monitoring for spaghetti when the room lights are off.

The white is as good as my old 12v ones :D 
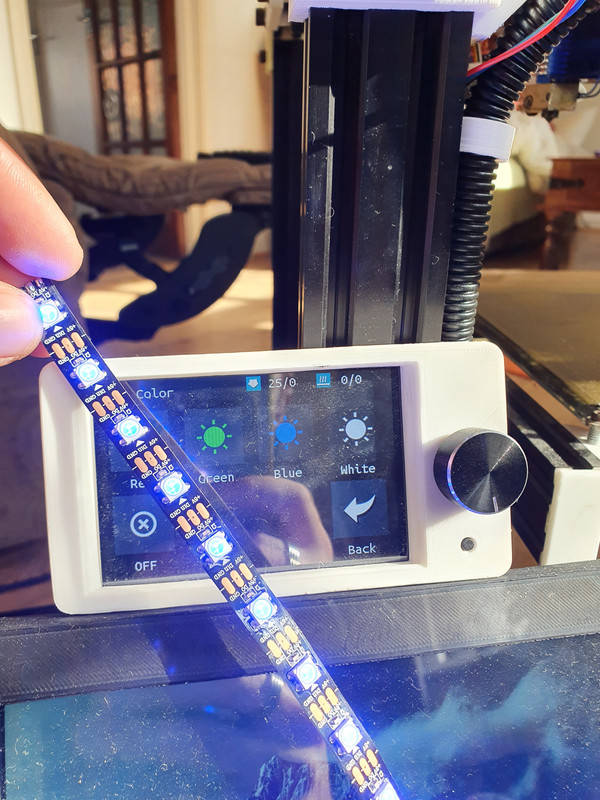
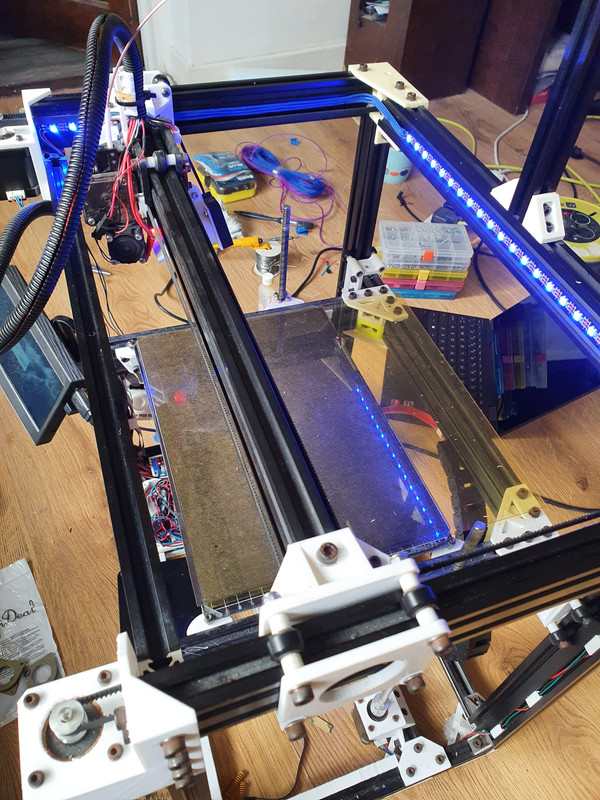
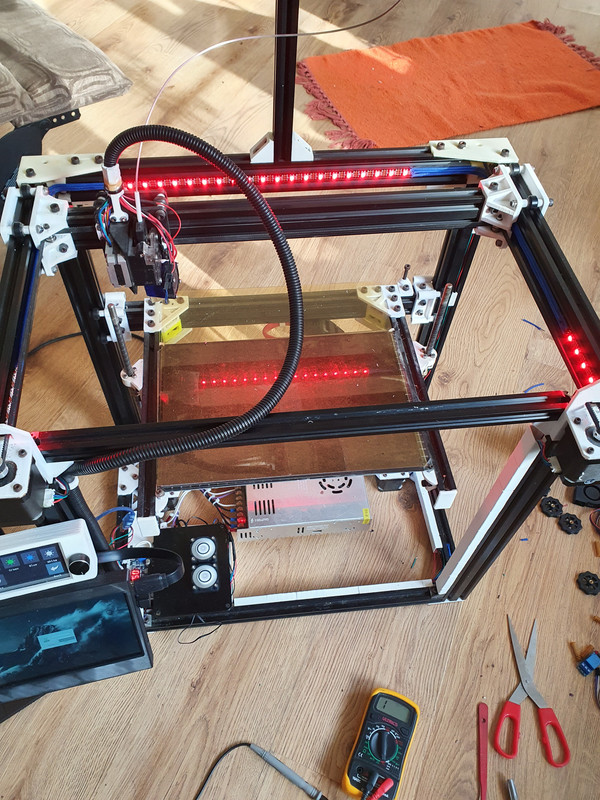
Its just these are all adressable, controllable by the printer and look good in my sleeved cables :D has taken me all day messing about! Oh i also put new bed springs on.
 
@Cenedd I'm pretty sure it was because of the effect of using alcohol on the Creality coating...

I don't always wait for it to cool but never use that much force, in this case it didn't come off originally with light force and even after waiting for it to cool it wasn't coming off which is when I put it in the fridge to cool further.

For PLA I use 60c bed and 200c hotend, and now I've switched to plain glass with no coating it adheres perfectly and comes off easily even only a minute or two after finishing usually. PETG is 80/230 with no fan at all, same thing (but with some stringing)
 
@SKILL Wasn't criticising your handling/method/whatever....just in case it came across that way. Just meant that once you'd swapped over to the plain glass side and still found it was sticking too well that was different from my experience. Temps seem about the same though.
 
Nooooo... once I swapped over to the plain glass side it was *perfect*, that's what I was trying to say at least... better than the coated side before it failed...
 
Ahh, I see. That makes sense then if we're getting the same result with more or less the same settings.

@Vince Cool, cheers. Might check those out as another option...given I will have the header for them shortly. Sleeving looks good but I detect a significant amount of "What do you even need that thing for?!” "Well, I've printed all these mounts and clips and tidies and brackets..." "Yes but those are for the printer. If you didn't have the printer, you wouldn't have needed those!” "Ah."
I get that with my mill as well as the printer. Once in a blue moon I make something that ISN'T self-servicing! :o ;)
 
is there no way you can measure around the board and find 5v and run a wire? The board must have 5v on it somewhere!

So... with the bltouch surely you just use z endtop pins for the sensor..


looking at the board pinout:


You use z endstop for the sensor right but you need 5v and ground? if you are using the BTT tft, why not just pull 5v and ground from the first and last pins on the original tft port?

BTT have loads of oversights in their products... second ill go grab a driver I bodged...


I spent ages trying to work out why the printers firmware was doing weird things and wouldnt talk with the drivers... turns out they are meant to have a resistor across those two pads and mine clearly didnt. Now all of them (btt 2208's) have this same bodge to make them work propely in uart mode. Ive got some 2209's coming but tbh dont expect them to be any better.


Thanks dude.
I could use the EGB 5V.
But I can not find out were the 5V connects to on the creality Z sensor.
 
Thanks dude.
I could use the EGB 5V.
But I can not find out were the 5V connects to on the creality Z sensor.

Time to get a meter out :) test each one connection while its running and see where the 5v is. Isnt there only about 5 cables so not much to test.
 
Time to get a meter out :) test each one connection while its running and see where the 5v is. Isnt there only about 5 cables so not much to test.


3 wires.
I'll see if I can find out later from the creality forum.

I was thinking.
Wouldn't it be good to have a 3D printer with memory on the motherboard.
And true ABL.
 
3 wires.
I'll see if I can find out later from the creality forum.

I was thinking.
Wouldn't it be good to have a 3D printer with memory on the motherboard.
And true ABL.

What's your definition of memory on the motherboard and true ABL?
 
What's your definition of memory on the motherboard and true ABL?


Like the memory we have on a PC to store STL files.
True ABL to me means it can monitor and move the Z axes on the fly.

It would be great to have a 3d printer with a 10" screen and a small like NUC built in.
 
Like the memory we have on a PC to store STL files.
True ABL to me means it can monitor and move the Z axes on the fly.

It would be great to have a 3d printer with a 10" screen and a small like NUC built in.

So like a PC has a SSD or HDD, for the OS and user files? Isn't that the SD card? I don't see how a built-in memory would add any benefit.

I mean once a mesh is taken at the start of a print, the Z is adjusted as the hot end moves around the bed. Marlin and RRF can take measurements at the location of the lead screws and adjust them so they are truly level, that requires the Z steppers to be using there own driver each.

Closed loop steppers are making an appearance so the position of a axis is always known.

And isn't a screen and NUC a Raspberry Pi essentially?
 
So like a PC has a SSD or HDD, for the OS and user files? Isn't that the SD card? I don't see how a built-in memory would add any benefit.

I mean once a mesh is taken at the start of a print, the Z is adjusted as the hot end moves around the bed. Marlin and RRF can take measurements at the location of the lead screws and adjust them so they are truly level, that requires the Z steppers to be using there own driver each.

Closed loop steppers are making an appearance so the position of a axis is always known.


The best ABL I ever saw was the E3D BigBox.
With my CR6 I still have to do the Z offset with a piece of paper.

If you knock the sdcard and it comes out the printer stops.
With built in memory that won't happen.

I am thinking of getting my touch screen AIO computer out and hook that up.
 
3 wires.
I'll see if I can find out later from the creality forum.

I was thinking.
Wouldn't it be good to have a 3D printer with memory on the motherboard.
And true ABL.

Most machines do have eeprom space so memory to save changes to firmware without uploading new firmware.
 
If you run OctoPi you can upload the gcode to it over the network and then you have a library of files you can print at will. Now, I'll grant you it could still come out but, if you're short-sighted enough that you mount it inside a screwed-shut box with the card inaccessible, it'll never get accidentally knocked loose!! :cool:
Alternatively there are other storage solutions for a Pi mainly over USB3 (memory stick or NVME SSD in a USB adapter) but newer ones are starting to get PCIE. Probably no reason you can't run OctoPrint on a higher-grade board that will take M.2 directly if you really wanted to.

I think I went 128gb sd card that cost about £12 for the Pi - You don't need more than that I don't think. Octoprint really is a game changer! Im going to explore the LED plugins for it later tonight!
 
Really need to look at Octoprint. Tired of constantly swapping over the memory card, plus I seem to suffer from static shock a lot, and eventually something is gonna take a hit.
 
Octoprint is definitely worth it, I'm 'only' on a 16Gb card and that's plenty for me really, and it just makes everything so much easier... I definitely reccomend getting a camera as well, just for observing the print, or maybe that's just me being lazy as the printer is downstairs and I'm usually in the office upstairs :p
 
Back
Top Bottom