Random 3D printing chatter

Is there a easy way to convert a marlin bin file to normal marlin?

There isnt a simple way to uncompile the bin no. :mad: this is why I had to start from scratch as all the firmware for the corexy was old and for the wrong motherboard.

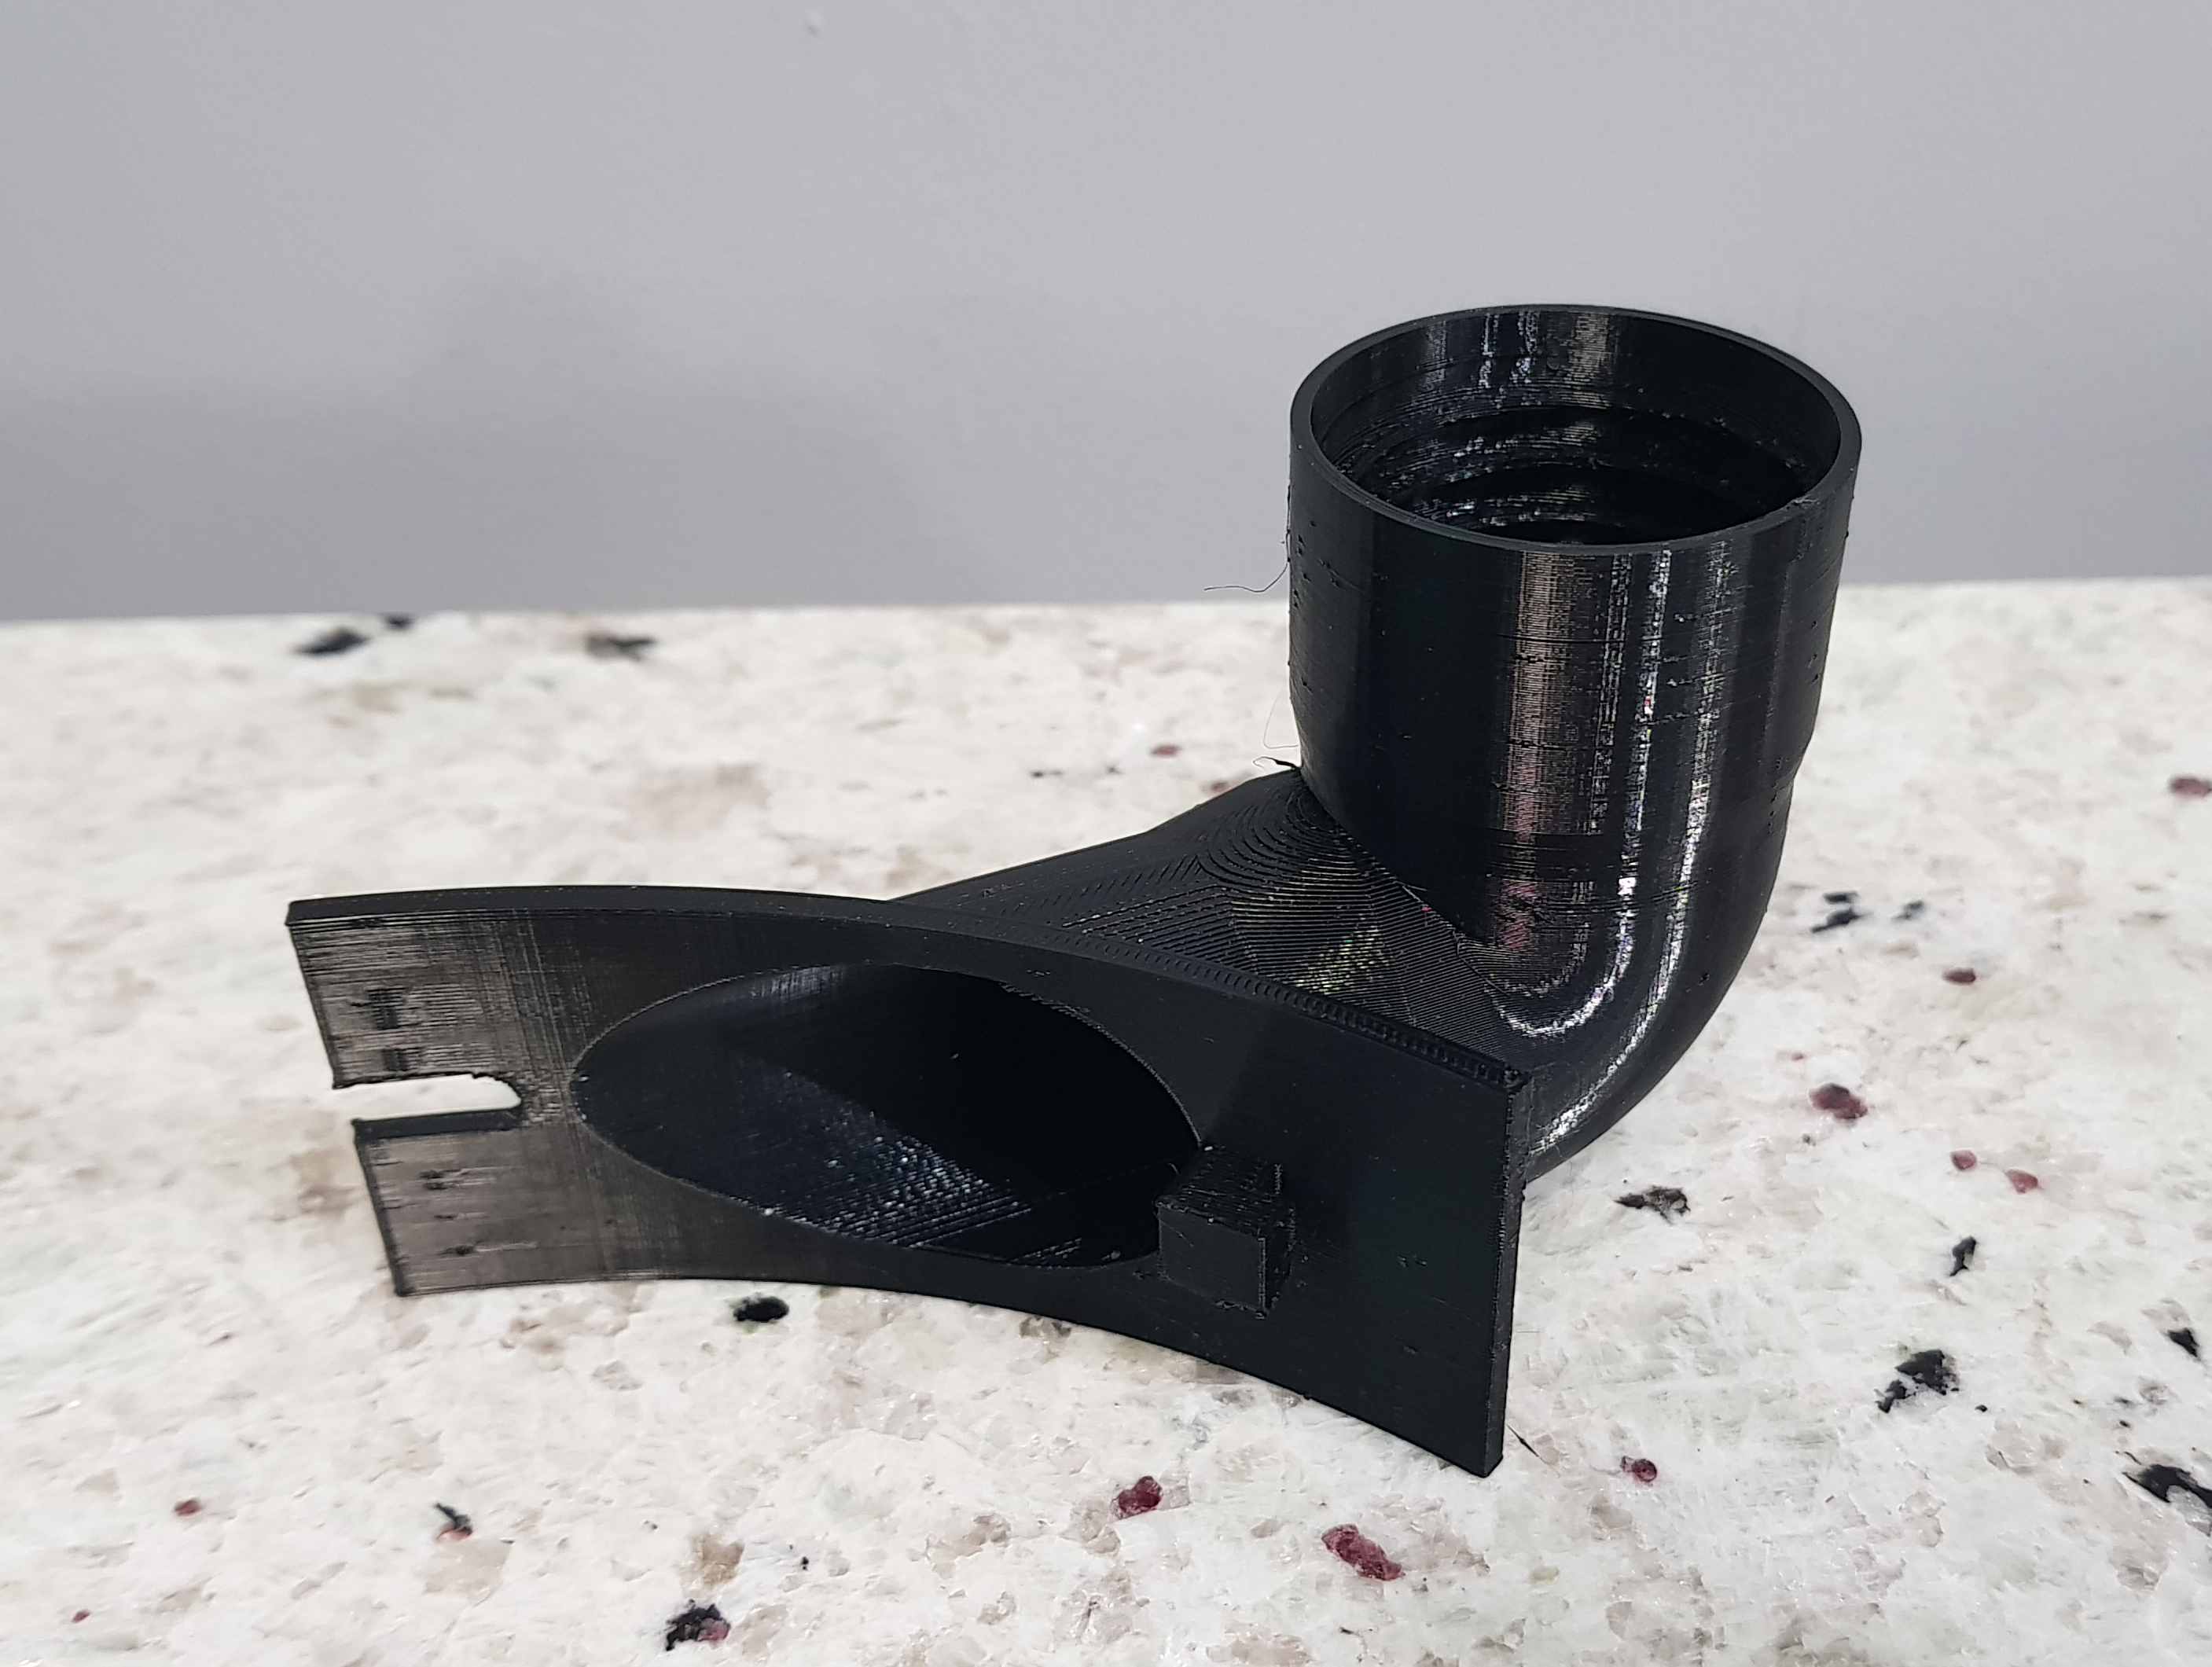
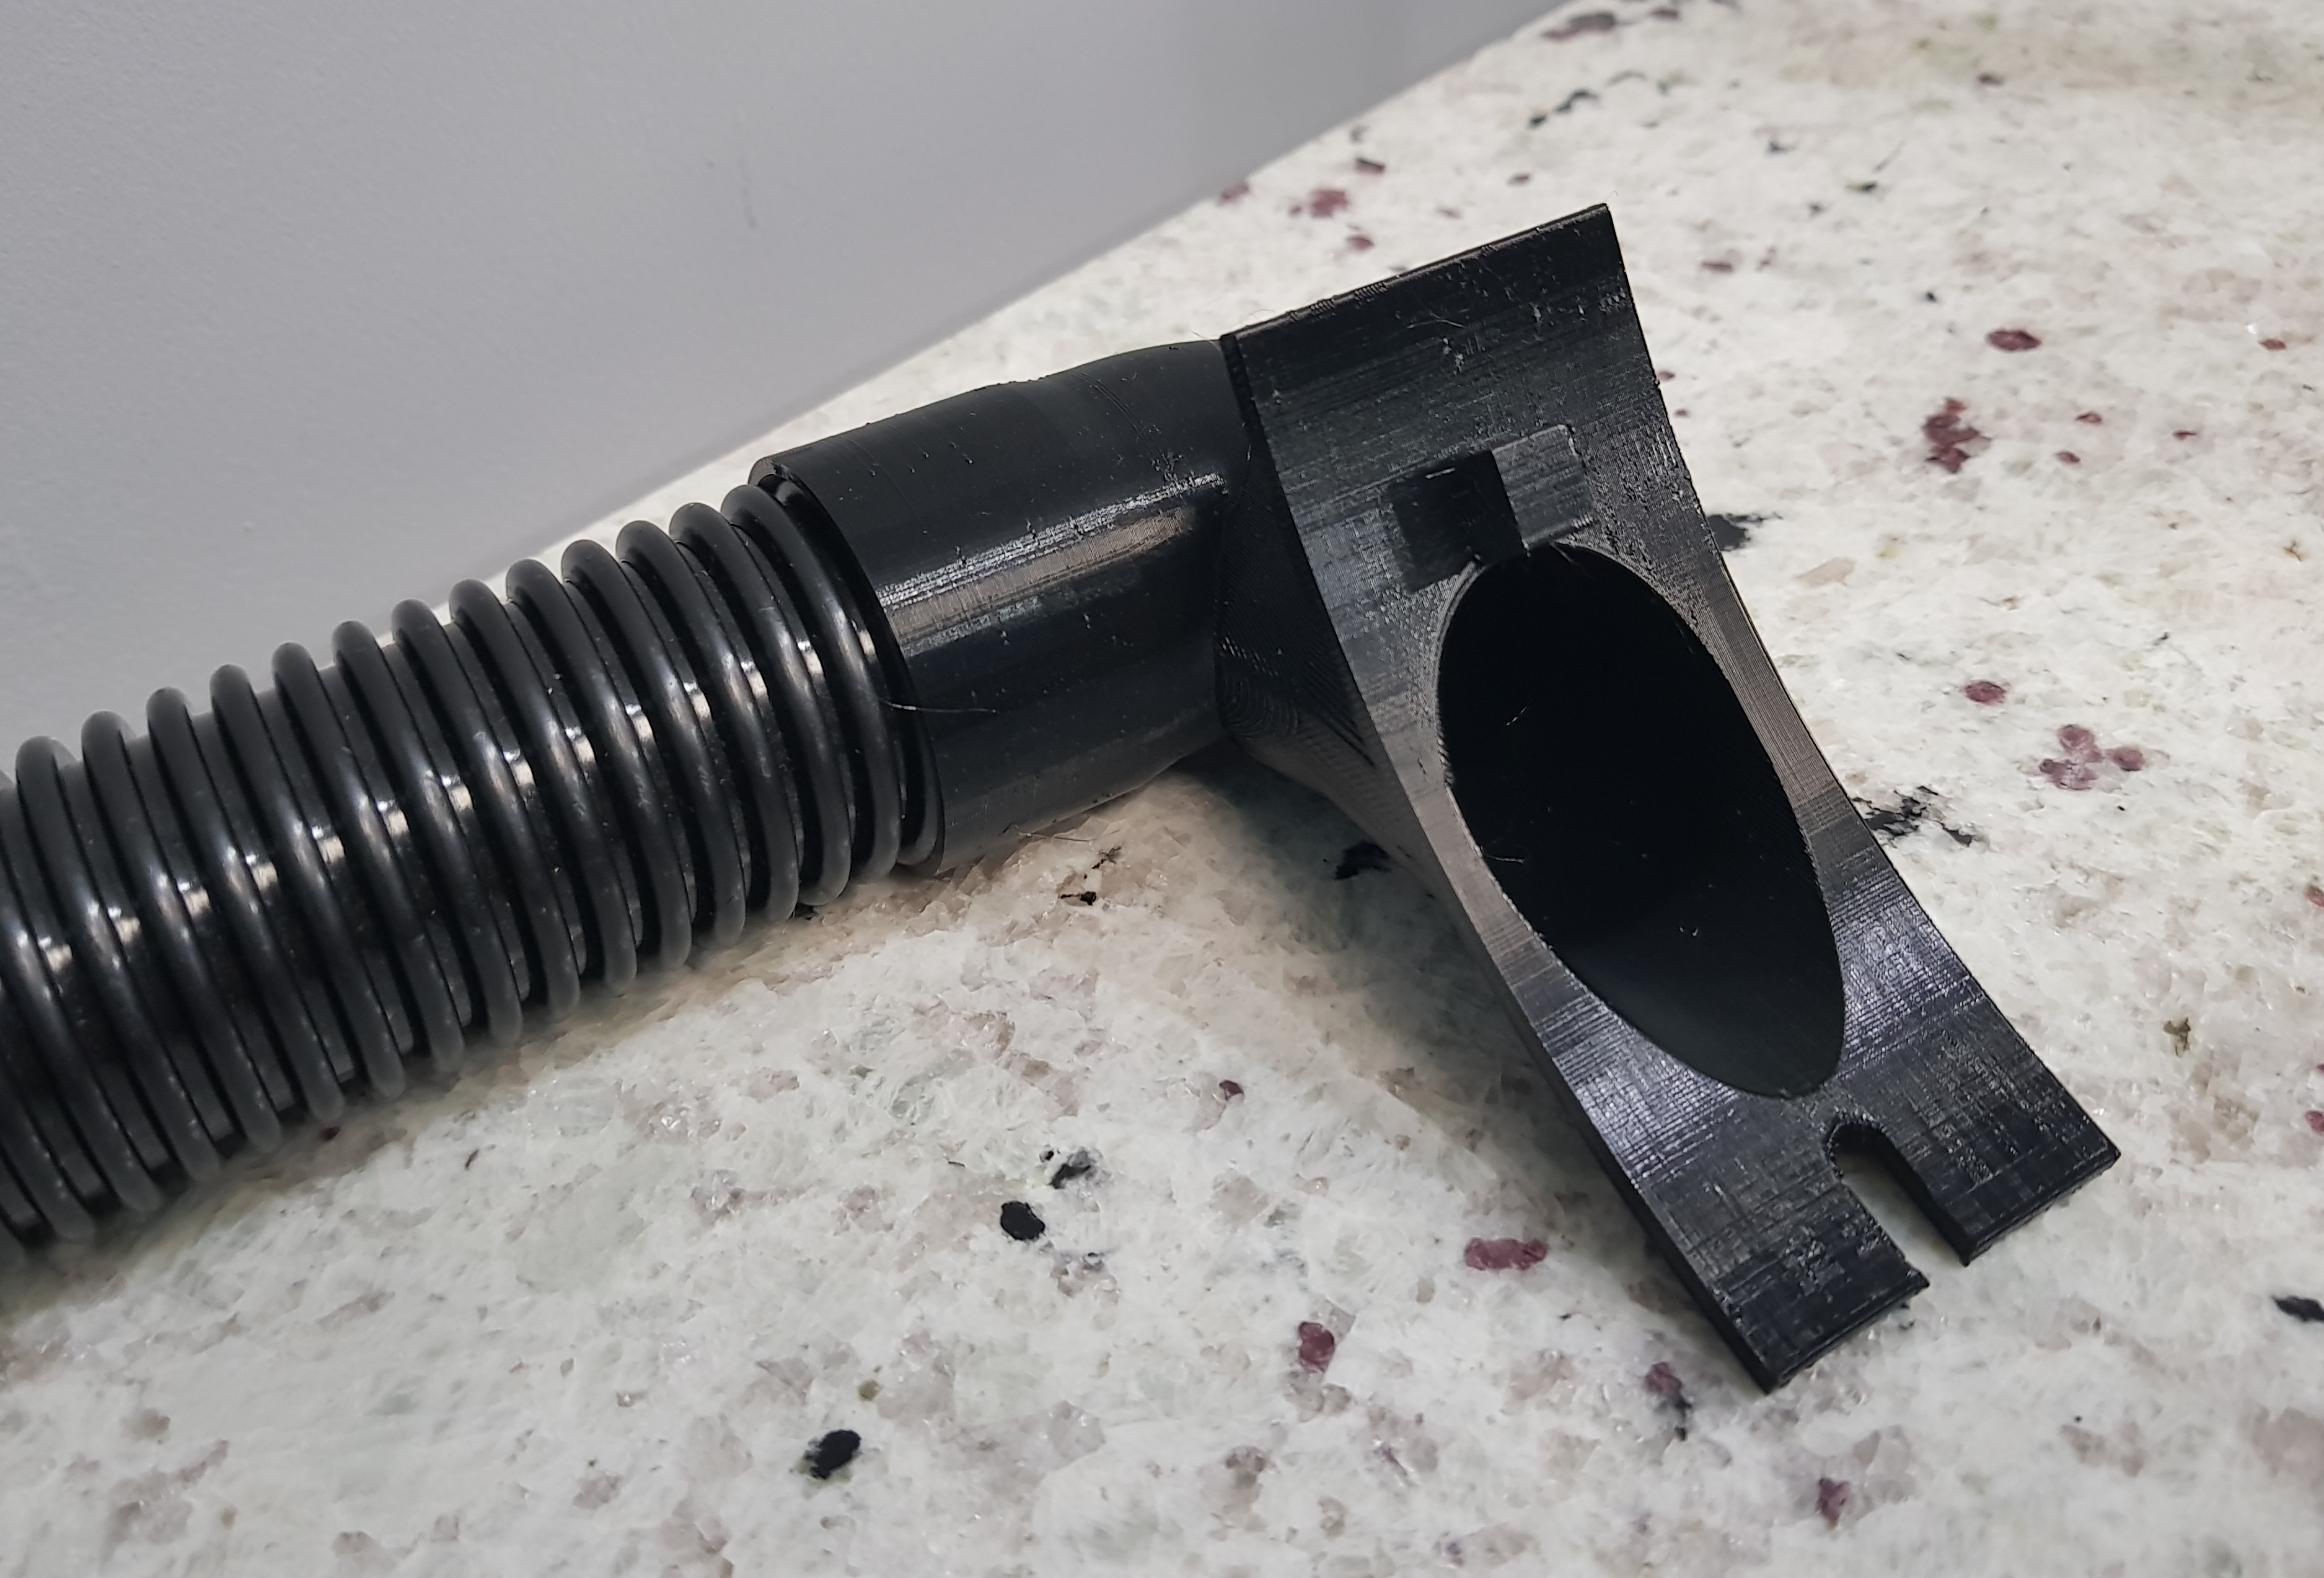
In other news I printed a shroom:

 
Dual extruders would let you print soluable support filament too. May not be necessary for a lot of the prints you do but it would sure come in handy for the custom ducting I'm trying to print!

How did you multi-part the shroom? Is it close enough tolerance to be press-fit or was there no attempt to size-match the parts and just super-glued together? Just thinking that if printing this duct with no internal support doesn't work, it may work if printed in two parts and slotted together somehow - given it needs to be air-tight (ish) I wasn't keen to make that the starting point though.

I printed it in parts then used a dab of glue to put it all together :D fits really well though!
 
I printed it in parts then used a dab of glue to put it all together :D fits really well though!


I can let the filament run out.
The printer will ask me to insert more. I just change color then :)
You can do it in cura
 
Having grief with PETG still. My infill layers aren't actually touching each other and it looks like it's either under-extruded, hasn't stuck to the previous layer or both. Found that my extruder esteps/mm were too low (93 previously vs 99 now). If only you guys had suggested I calibrate that before now!.....several times :o
Now printing some squares across the bed to check level. Have also slowed it down a lot since people say the first layer needs to be around 10mm/s for good adhesion. Cleaned the hairspray off the glass and it does seem to be sticking so fingers crossed!

Sounds about right im 15mm first layer even on pla and you know the problems ive been having with the extruder before yesterday so don't kick yourself too hard :D
 
It's looking better. Still a bit too fast on the infill so started again. There does seem to be some cohesion between the infill layers already so I'm hoping that slowing it down a bit more will sort that. Only one way of finding out though :D
There's some resistance to twisting the aborted piece that just wasn't there before.
After printing the squares for bed level testing, hey, the lines join up now! :D There's some variation still and some were really good - proper shiny. I might have to finish off those bed braces I started and then lost - spoiler, I'd bolted them onto the bottom of the bed! *facepalm* And I think there may have to be a bed probe in the SKR's future!

Just get a bed probe, dont even ask the question :) its well worth it! today ive been printing some self watering planters in my rainbow pla :)


Im trying to get to the blue :D because of that i printed a mini set of drawers between them...


Just printing stuff for the sake of printing stuff now :)
 
Last edited:
Got my ender 3 v2 setup and working great. Printed the webcam stand and raspberry pi with 3.5 inch screen case

Very pleased with the quality for a £200 machine.

I've found ocotoprint/octopi a game changer. Makes life a lot easier and simplifies the use of the machine. Along with the b raspberry pi touchscreen means I can view the prints via the webcam and control everythimg without having my pc switched on

 
@ScoobyDoo It's a massive improvement not having to transfer everything by micro SD card too - not that I'm implying full-size SD would be any better!
Which Pi did you go for and have you had any issues with it failing to enable the network card or WiFi?

@Vince Fully intend to get one as all my test squares came out ok but some were notably better on the underside finish and even the top. Just the merest fraction of Z difference.

Print finished and it looks lovely. Full horizontal tube about 40mm diameter and 3mm wall thickness (15 - 20% infill - which seems denser in Fusion than Cura) printed with no supports. Just a tiny bit rough (some looping that ought to clean up) at the very top of the inside. Alright, "no" support is a bit of a lie as I modelled in the odd bit to help stick a round surface to a flat bed and for an unsupported overhang. The main thing I needed was none inside the tube as it's really hard to get out and none in the printed thread as it just trashes it. Tried support blocking for the threads in Cura and it printed in PLA but the threads didn't fit. I suspect it changed dimensions slightly in the export to STL and then import to slicer.

Right now, it looks glossy and a thing of beauty. Haven't cleaned it up or tested the threads yet. It's a Schroedinger's cat: right now, it COULD be perfect. I'll open the box tomorrow :D
 
Morning Deuse. There's a piece of software called OctoPrint and OctoPi is the build that's specifically for a Pi. My initial use was to run a webcam because I wanted the remote monitoring - my 3D printer is in my office which is an outbuilding. I'm also running The Spaghetti Detective as a plugin to OctoPi and that watches the video feed and will pause the print and alert me if it thinks it sees spaghetti. It's not perfect (sometimes a bit over twitchy) but it's caught all the prints that would have turned into birds nests.
I've also shoehorned the Pi and a couple of buck convertors (one 12V for fans, one 5V for Pi) into the existing case so now I haven't got access to the micro SD card slot on the motherboard. All prints are sent to the printer over the network via OctoPi's web interface. The Pi is connected inside the case with a short USB cable to the motherboard. Pretty much everything you can do on the printer's control panel, you can do on OctoPi from a PC or an Android app on your phone.
I think it's possible to slice in OctoPrint but I can't say I've tried it to be honest. I would suspect - perhaps unfairly - that it isn't going to be as full-featured as the PC-based slicers and I tend to slice directly out of Fusion 360 where I've modelled most of the things I'm printing.

Im setting up the timelapse on mine with a pi cam this weekend... be rude not to!
 
Right now, it looks glossy and a thing of beauty. Haven't cleaned it up or tested the threads yet. It's a Schroedinger's cat: right now, it COULD be perfect. I'll open the box tomorrow :D

The cat's alive and t'is a thing of beauty! :D

As printed. There's a flat on the bottom modelled into it. I also modelled a very thin wall at the end of the slot which I then cut out - just gave it something to bridge to. There was also a thin tower modelled under the retaining tab on the right that was then cut away.


Assembled ready to go on the bench grinder. The hose thread was modelled into the print and screws on very nicely. I'd done test prints of just that bit in white PLA and they fitted but very tight. I was concerned that having increased the extrusion, it may not fit but it's great; not as tight as it was in the test parts but enough that it should be air tight and not trash the hose screwing it in.


Now all I need to do is be able to print its partner that will have a T shape through-connection instead of a right angle. To make sense of that, this is what it will fit on:


Morning Deuse. There's a piece of software called OctoPrint and OctoPi is the build that's specifically for a Pi. My initial use was to run a webcam because I wanted the remote monitoring - my 3D printer is in my office which is an outbuilding. I'm also running The Spaghetti Detective as a plugin to OctoPi and that watches the video feed and will pause the print and alert me if it thinks it sees spaghetti. It's not perfect (sometimes a bit over twitchy) but it's caught all the prints that would have turned into birds nests.
I've also shoehorned the Pi and a couple of buck convertors (one 12V for fans, one 5V for Pi) into the existing case so now I haven't got access to the micro SD card slot on the motherboard. All prints are sent to the printer over the network via OctoPi's web interface. The Pi is connected inside the case with a short USB cable to the motherboard. Pretty much everything you can do on the printer's control panel, you can do on OctoPi from a PC or an Android app on your phone.
I think it's possible to slice in OctoPrint but I can't say I've tried it to be honest. I would suspect - perhaps unfairly - that it isn't going to be as full-featured as the PC-based slicers and I tend to slice directly out of Fusion 360 where I've modelled most of the things I'm printing.


Thanks dude.

I watch mine via a security cam.
Which has a android and windows app.

Useful for sending files to the printer is great.
 
@Cenedd

Im running octopi on a raspberry pi 3b+
No issues with network connection, im using ethernet to connect to my home network and ive also done the 'tape' trick on the usb cable to the ender to stop it sending a permanent +5v to the printer.

Really useful being able to monitor my prints via the webcam, sending files directly to the printer instead of sd cards and also for controlling the x,y,z axis if i want to move the print bed etc.
 
Back
Top Bottom