

I've not really had an issue with power transfer between the two....that I'm aware of, at least. They both run off the same PSU with one power switch so I wouldn't really notice. I wonder if that has anything to do with the networking problem though. Hmmm, might be worth looking into next time I have the case open (sounds lazy but it's a bit of a mission). For reference, this gives the details of the issue: https://www.raspberrypi.org/forums/viewtopic.php?t=269898
You are using an out of date browser. It may not display this or other websites correctly.
You should upgrade or use an alternative browser.
You should upgrade or use an alternative browser.
Random 3D printing chatter
- Thread starter Cenedd
- Start date
More options
Thread starter's postsI am going to learn how to program the BTT wifi chip.
I have a programmer. So I'm hoping it not to be a pain.
I'm told not to bother with the BTT wifi module if you are considering the octoprint route which to be honest I would strongly recommend.
Vince, how much you out for that job and postage?
I'm not mate, don't worry about it, it's literally pence.
I'm told not to bother with the BTT wifi module if you are considering the octoprint route which to be honest I would strongly recommend.
I bought them both for £4 and I'm bored

Last edited:
I bought them both for £4 and I'm bored
Do it
I have a spare wifi module for one as I didn't bother installing it as I was planning on Octoprint. My LED's have turned up though... we are going RGB baby!Do it
I done it and it's easy. BUT.
My BTT CR6 V1 is crap.
It can't run the 5V sensor for the ABL.
It took me 2 weeks to get it out of them. So now I have to wait till they bring out a new board or a V2 before I can use the TFT70 and wifi.
Won't be buying any BTT stuff ever again.
I done it and it's easy. BUT.
My BTT CR6 V1 is crap.
It can't run the 5V sensor for the ABL.
It took me 2 weeks to get it out of them. So now I have to wait till they bring out a new board or a V2 before I can use the TFT70 and wifi.
Won't be buying any BTT stuff ever again.
That's a bit of an oversight! selling a compatible product that isn't compatible. Nice.
That's a bit of an oversight! selling a compatible product that isn't compatible. Nice.
Yep.
Even if I want to buy a new one I can't as you can't tell the difference.
After trying out hairspray for a while, I have been trying out 'Nano Polymer Glue' to stop my warping on corners with PETG. It works as advised, and very happy with the results. it is just very expensive for what you get, and not sure how long it will last.
Having been so happy with the results, I looked for a cheaper alternative, and found Layerneer's Bed Weld. From reports, also meant to be excellent on glass, and easy release once cooled. Ordered some just now and will let you know.
Note: I do actually wonder if what these are really doing is cleaning the bed of any oil's, rather than being an adhesive, but I'll take it.
Today i'm going to fit my new extruder and carriage as well as btt dcdc module. I have 60 addressable RGB LED's (the board maxes out at 30 so two attempts ") ), I have a relay so that the pi3 can turn the printer on and off so am going to wire that up and I also have a pi webcam that has arrived so some bracketry so that bad boy can sit just on the side of the bed, I have also made some new firmware over the last few days as I have been investigating acceleration and jerk for coreXY as I just left it stock marlin and didnt really think about this when getting the printer running. so yea plenty of toys and firmware to play with today.
), I have a relay so that the pi3 can turn the printer on and off so am going to wire that up and I also have a pi webcam that has arrived so some bracketry so that bad boy can sit just on the side of the bed, I have also made some new firmware over the last few days as I have been investigating acceleration and jerk for coreXY as I just left it stock marlin and didnt really think about this when getting the printer running. so yea plenty of toys and firmware to play with today.
), I have a relay so that the pi3 can turn the printer on and off so am going to wire that up and I also have a pi webcam that has arrived so some bracketry so that bad boy can sit just on the side of the bed, I have also made some new firmware over the last few days as I have been investigating acceleration and jerk for coreXY as I just left it stock marlin and didnt really think about this when getting the printer running. so yea plenty of toys and firmware to play with today.Yep.
Even if I want to buy a new one I can't as you can't tell the difference.
is there no way you can measure around the board and find 5v and run a wire? The board must have 5v on it somewhere!
So... with the bltouch surely you just use z endtop pins for the sensor..
looking at the board pinout:
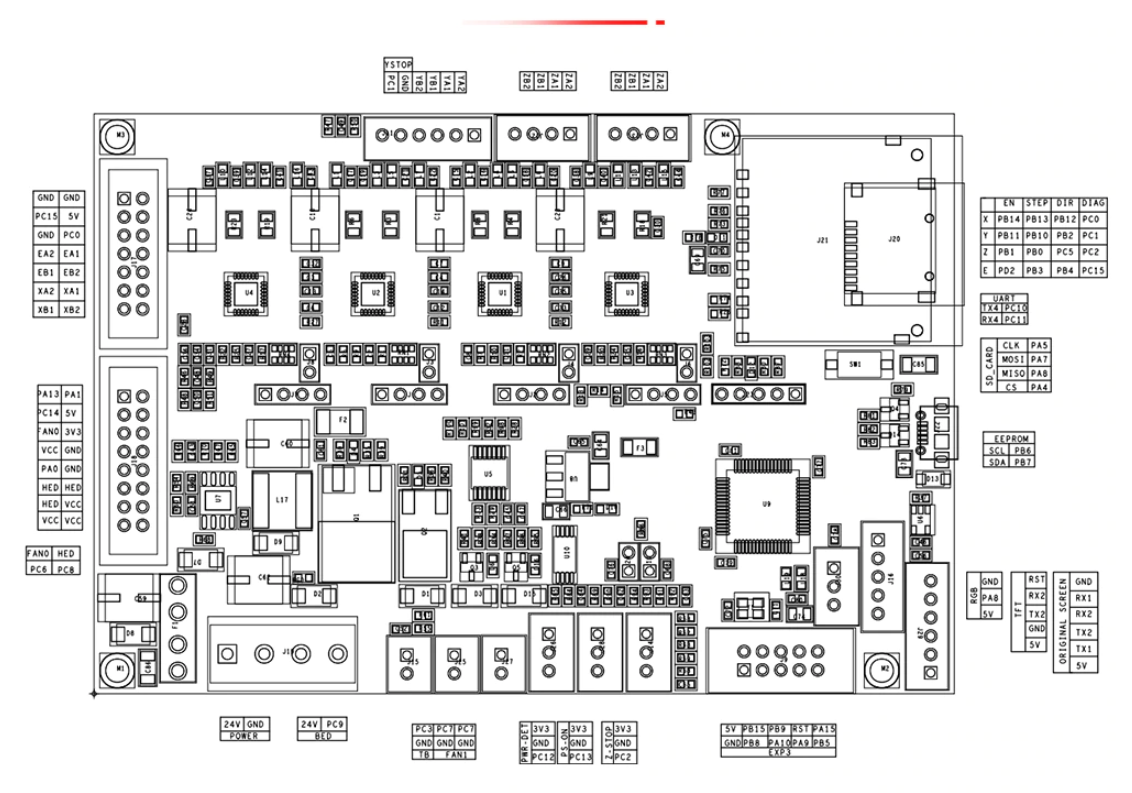
You use z endstop for the sensor right but you need 5v and ground? if you are using the BTT tft, why not just pull 5v and ground from the first and last pins on the original tft port?
BTT have loads of oversights in their products... second ill go grab a driver I bodged...
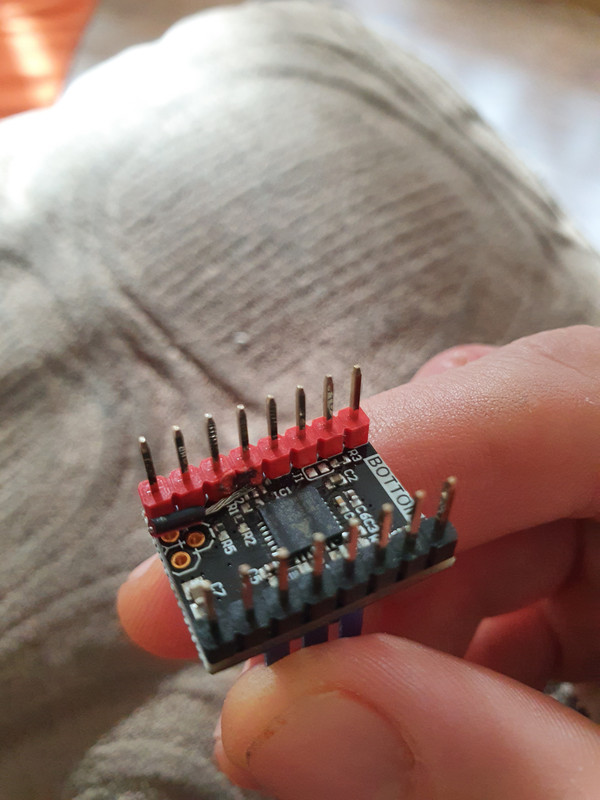
I spent ages trying to work out why the printers firmware was doing weird things and wouldnt talk with the drivers... turns out they are meant to have a resistor across those two pads and mine clearly didnt. Now all of them (btt 2208's) have this same bodge to make them work propely in uart mode. Ive got some 2209's coming but tbh dont expect them to be any better.
Last edited:
@Vince Let us know how you get on with the addressable RGBs. I've got lighting run with a strip of waterproof LEDs off a 12V feed and a manual toggle switch. Worked well enough but the LEDs are all failing because it was crap strip. I knew this when I used them but I had a spare length so it was free. Was contemplating trying a section of COB LED strip but it's pricey for what it is. RGB LEDs seem an odd choice (by BTT/the industry) as they're traditionally not as good at white lighting which would seem to be their main aim - excluding decorative frivolity.
@Scougar I was having adhesion issues with PETG and hairspray wasn't helping much. I brought the bed up to 85 - although people are going up as far as 100 - and that helped. People have also said 250 for the first layer and then drop to 240. I haven't got that option in my slicer (Fusion 360) and 235 seemed best on the temp tower I printed. The main thing I changed was to reduce the speed for the first layer to 10mm/s and then nothing faster than about 40mm/s for the rest. It's slower but to be honest I'd prefer slow and hassle-free to faster and fighting it every step of the way! I also cleaned off the hairspray with IPA (not the best for the hairspray but what I had) and levelled as normal to some drag on 80gsm A4.
@Scougar I was having adhesion issues with PETG and hairspray wasn't helping much. I brought the bed up to 85 - although people are going up as far as 100 - and that helped. People have also said 250 for the first layer and then drop to 240. I haven't got that option in my slicer (Fusion 360) and 235 seemed best on the temp tower I printed. The main thing I changed was to reduce the speed for the first layer to 10mm/s and then nothing faster than about 40mm/s for the rest. It's slower but to be honest I'd prefer slow and hassle-free to faster and fighting it every step of the way! I also cleaned off the hairspray with IPA (not the best for the hairspray but what I had) and levelled as normal to some drag on 80gsm A4.
@Cenedd Thanks for that. I actually raised bed temps to 85 previously just to get PETG to stick, but that also seemed to cause warping once a few layers in. Reducing to 80 as I found out about hairspray seemed to reduce that a little.
I seem to be getting reasonable results for now though with an adhesive and I was never really keen on the hairspray going everywhere.
It's clear I need to get a supply of windex and paper towel to clean my bed though lol (and buy some bigger paperclips for the bed ends).
@bulb66 Is this for production scale stuff? (Mirror mode)
@bulb66 Is this for production scale stuff? (Mirror mode)
Nope just for fun . The build was in part sponsored by Duet3D so I'll be helping with updating their iDEX documentation in return.
@gitbags Nice. Was wondering quite what it was until the last shot where you put the two together. Damn, now we know who's got the nuclear football.....but not how stable
@Scougar I'm not going to say you shouldn't be using glue/hairspray/tape/whatever. If I can get away without the additional faffing about though, it'll make me happier. I forgot to mention that I was also printing with no layer fan at all. I did get some warping or loss of adhesion in the last print but it's only really in the areas that are a 3mm thick vertical wall and 70mm high so maybe asking for it. Might be a classic use-case for a brim....but I don't like making life easy for myself!
Print came out looking mostly nice. One layer went a bit odd and a couple of layers above it so I'm thinking filament issue? Main issue is that I went too robust on the manually created support structure. No, it didn't fall over.....but I don't think it's coming off either! Threads seem to work but look very different - printed with no support, you get the classic drooping of bridging but on the one pointing upwards, that's on the side obscured by the threads. On the one pointing downwards though you can see them. I thought it was trashed but seems to work just about - should be fine after a bit of clean-up work. Now to see if I can cut off the supports and leave something I don't hate the sight of!