Ah, well that's where it gets confusing!

That's the front you can see there - with the camera held awkwardly selfie-like. My Ender has been....reconfigured slightly
That stepper is normally at the back but if it's at the back, the whole thing sits that much away from the wall...and then the front feet fall off the front of the bench

So I modified it a tad. I'm trying to work out what I did exactly from where the holes are but I think I spun the entire top frame (the square of extrusions that mount to the upright extrusions), reversed the carriage (to keep it as it was) and then used a transfer punch to mark where the holes needed to be drilled for the extra bit of extrusion that holds the top of the z axis.
There's enough space in the slots of the extrusions to hide quite a lot of cable and that's where both the camera and light cable are run. Some simple clips across the extrusions stop them falling out - I've got models if you need them.
See if this makes any more sense of it (click for larger):
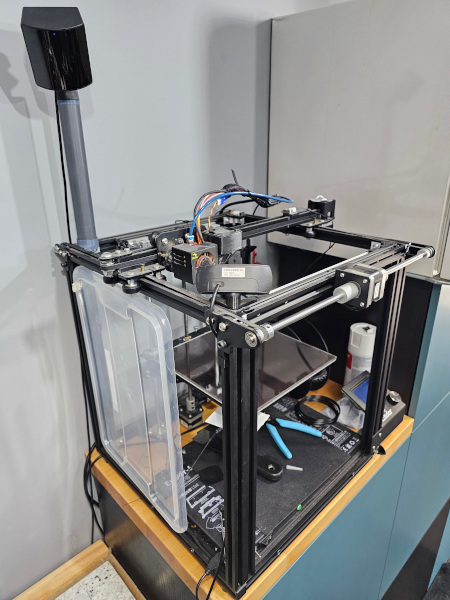
Yes, that's a VR lighthouse mounted in the back corner now. Just in time for my headset tether to fail on me

Side plate is just a container lid to stop some of the breeze from the heating hitting the build plate.
The dangly cable from the camera was more neatly tucked in until I moved it to work out how I'd modified the top frame


/https://fbi.cults3d.com/uploaders/21022332/illustration-file/5c4c838d-c0da-4e86-825a-827212d9516b/MinGhstAni.gif)


