Rise of the triad, The 2014 Area 51

Soldato
OP
Joined
23 Apr 2010
Posts
11,890
Location
West Sussex
It's the best way really, like instead of watching a T.V series piecemeal week-in-week-out you just binge on the whole thing in a day or two, left feeling satisfied yet in a slight daze!

hahaha that made me laugh :D

Sadly since starting the project my hands have flared up in eczema and have gotten so bad that all I can do is smother them in cream :( that means I shouldn't be prepping as I would leave oils all over the place :(

However I can do other things for now. I needed a couple of SATA cables but really wanted these.


They're Bitfenix Alchemy blue SATA cables. Sadly they seem to be out of stock everywhere in the UK and Cable Mod do not make them in blue (yet?). So I was looking at £20 each and I need two for the project :( Whilst I was humming and harring about whether I should really spend £40 on two SATA cables Tom at OC3D said he would check his garage and see what he had lying about. A week later and -


I am super super happy, Tom, you're a leg'
 
Soldato
OP
Joined
23 Apr 2010
Posts
11,890
Location
West Sussex
OK so even though my hands are bad atm I still got some stuff done :) firstly I spent about four hours doing nothing but graphics. These are pretty much all done now.


The very small ones are in envelopes so they don't get lost :)

Second job of the day was to relocate the boot SSD.


Which I then covered.


And set up.


I really like the way they look.
 
Soldato
OP
Joined
23 Apr 2010
Posts
11,890
Location
West Sussex
Good morning all :) I did some thinking whilst lying in bed last night about how I am going to power up the two SSDs without it looking like bum. Basically on a SATA run the final end plug looks OK but I would have had to use the one down too, now that I decided to display both SSDs and not just the one. This is a problem because those loops don't look very nice. So I had a think and decided that I was going to ask Shakmods to make me up two Molex-end SATA cables. What I mean by end SATA is that the end plug is sometimes different to the rest, looking nicer and sticking out straight.

However, I soon found these for £3.50 each.


As it goes it turns out to be a blessing and will reduce cable mess. Instead of having a Molex run hidden under the panel for the lighting, switch gear etc *and* a SATA run now I can just use the Molex run meaning there will be less wires :)
 
Soldato
OP
Joined
23 Apr 2010
Posts
11,890
Location
West Sussex
SATA port cover.

If there is one thing I hate about motherboards (other than how the 24 pin socket is located, oh and the 8 pin ETC) it's SATA ports. They look honking, no matter how nice your cables are. I guess with 6 completely matching cables without the silver clips things would look OKish but I have 2 different cables. So, I decided a while back I wanted to do a SATA port cover but I wasn't sure how I would do it. Problem is I usually attach everything with double sided foam tape but if I do that how do I access the ports if I need to?

So faced with that problem (and another, right next to the SATA ports is a header that sticks up by about 10mm) I decided to make it in two pieces. One piece will be permanently fixed to the ports themselves and the other piece would be a main cover. So I marked things out.


I also marked out the second of the SSD plinths and cut that today too. OK so here are the pieces cut.


Then I taped up all three and put them over some tissue as plastic weld tends to ruin anything it touches.


So now they are all welded together. I then marked it out.


And then flipped it upside down and marked the exact same markings on the bottom.


Then stuck the holder down with double sided tape to keep it in place for drilling.


OK, so here are the pieces all prepared and sanded etc. I also edge polished the SSD plinth.


And the finished SATA cover ready for paint.


Basically the black block will be secured to the SATA ports, then I just screw on the cover :)
 
Last edited:
Soldato
OP
Joined
23 Apr 2010
Posts
11,890
Location
West Sussex
Hand made, hand bent.

OK so it was time to do the cover for the fet cooling on the motherboard. This has been annoying the crap out of me ever since I bought the rig. I guess Alienware did it to save money but it's not very pretty.

So one potato pic coming up.


OK so as you can see it's kinda like unfinished alu. It looks like it may be removable, but sadly to get to it I would need to remove the mobo including the cooling so I couldn't be arsed doing that. Far too much for something I can just remake. OK so the story goes like this. Ages and ages ago I bought a sheet of 2mm alu so that I could fashion a removable cover that I could then paint and put some graphics on. Something, anything just to cover that silver lump. However, given my hatred of working with alu and a Dremel I put it off for nearly a year before deciding it was time to do it.

So first up I planned it.


You will note I added some masking tape to get decent markings onto. I then marked it out and realised I had one of my measurements wrong. Remember, measure as many times as you need to (more than twice if need be) and then cut. So as you can see I changed the size at the last moment :D


OK so then I needed to stick a piece of card against the side of the fin thing and then make a piece of cardboard that I could use as a "stop" when it came time to bend.


Then I figured that two would probably be better than one.


OK sadly the progress stops there, for a couple of reasons. Firstly I absolutely hate cutting aluminium. With a Dremel the best cutting bit to use is a reinforced disc but that doesn't make it easy. It skids, it jams, it makes a horrible mess of fine black powder and I was not about to take my brand new (and a little bit expensive) mobile phone into the workshop as I didn't want it getting buggered. My new phone takes much better pics than my old camera but I did consider using that but sadly the battery was flat and it takes all day to charge.

For those of you wanting to do something like this yourself here is how I did it. Firstly obviously you need to measure everything up and get the angles you need etc. Then map it down onto a piece of metal.

However, given I used no specialist tools to bend it I will explain how I managed it with just my hands. Once I had cut out the piece (and used the Dremel to partially tidy the edges so I didn't slice my hand open on it) I then turned it over and marked the bend like again, in reverse. Then I simply used the Dremel and common sense to score into the alu underneath so that it A. Removed material giving room for the bend and B. Would make it easier to bend.

To bend it I simply cracked out my work bench (you know? the old Black and Decker workbench type affair) and then clamped the piece into the bench so I could use my body weight to bend the alu. I then placed the cardboard bits onto the bench and held them up so I knew where to stop.

And the end result is this.


It hasn't been prepped yet because obviously it's different and needs prepping differently but once I'm done filing ETC the only major difference is that I need to use different primer for it before putting on any paint.
 
Soldato
OP
Joined
23 Apr 2010
Posts
11,890
Location
West Sussex
More madness :D

As I mentioned earlier in the build log I really wanted to go for detail. So that means pretty much that I would like some really fine details on the build as well as just the boxes and covers.

So I was walking down the hallway earlier and spotted this in one of my junk boxes (fans, wiring, fan grills etc).


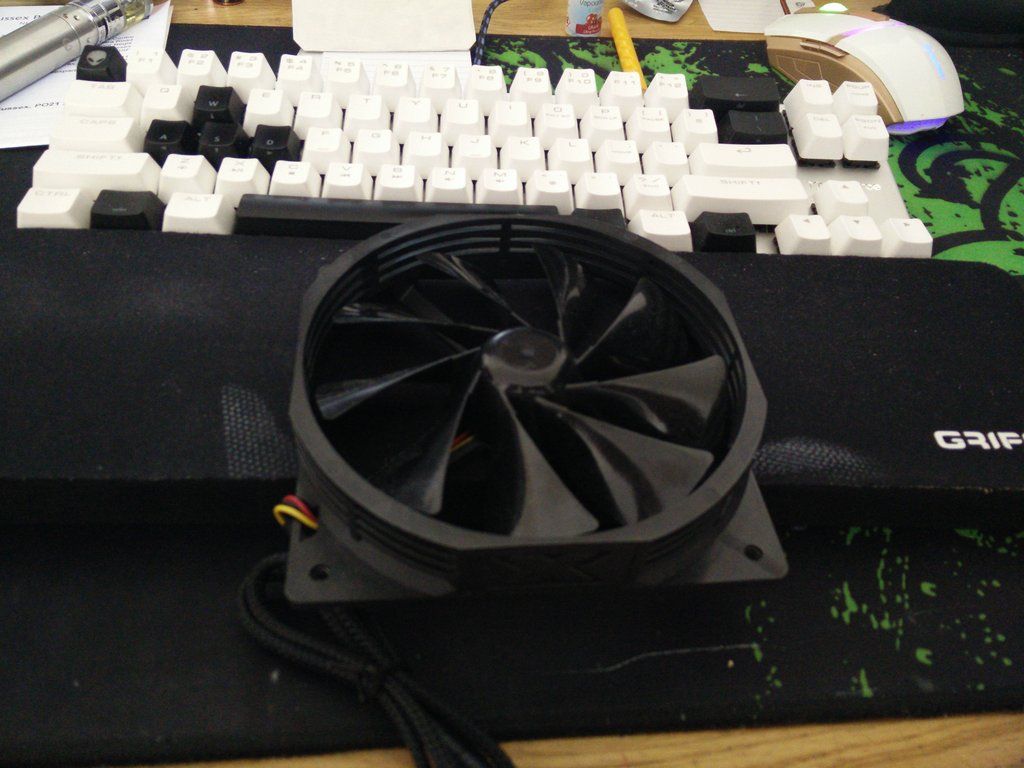
Now I have a lot of fans. And I mean, a lot. Some were from rigs I no longer own (or no longer even exist) and some were for projects that never got started and so on. This is a Xigmatek one way 120mm fan that I picked up in a sale for about £3. I remember ordering about five of them with big plans and ended up only using a few for a few weeks. You see fan, I see nose cone....

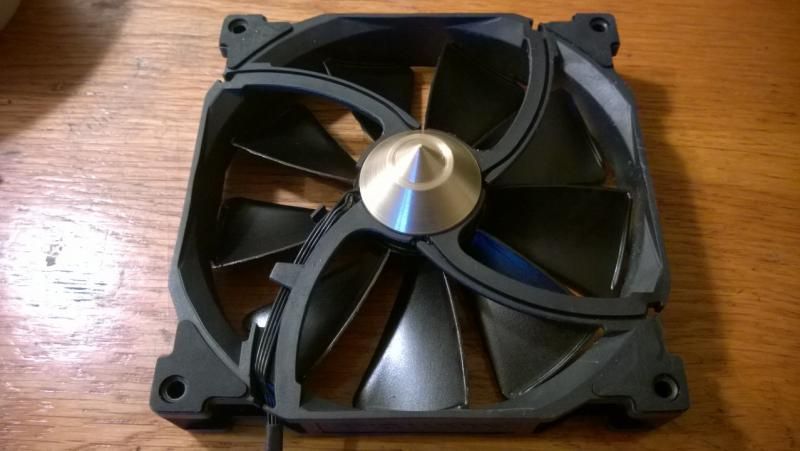
Let me explain. There's a guy on one of the forums I visit called Nexxo. Nexxo is building a rig called Metaversa 02 : Ada. It's a Steam Punk build but christ, it's good. He has a lathe and many machines and has slowly been building his vision for what feels like forever. As an example of this here are what his fans look like with nose cones that he has machined using a lathe and some brass.


I like it. However, I ain't kidding myself. I don't have the machinery nor the knowledge of how to use them so I won't be making parts like that. I did think about contacting some one and asking if they could make one for me (in fact that was a white lie, I did contact some one but he doesn't have a lathe). Any way, he suggested that I just use a drill or Dremel to machine the part. I did know what he meant thankfully so I decided to begin.

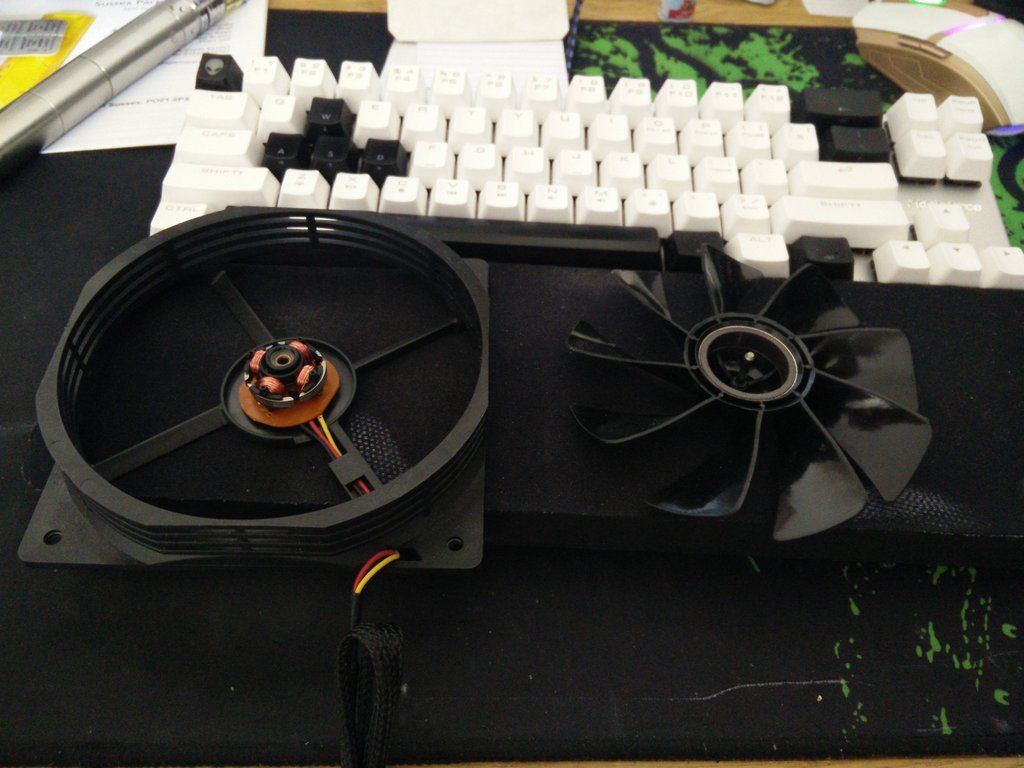
OK so first I needed to turn the fan over in order to get the blades out.


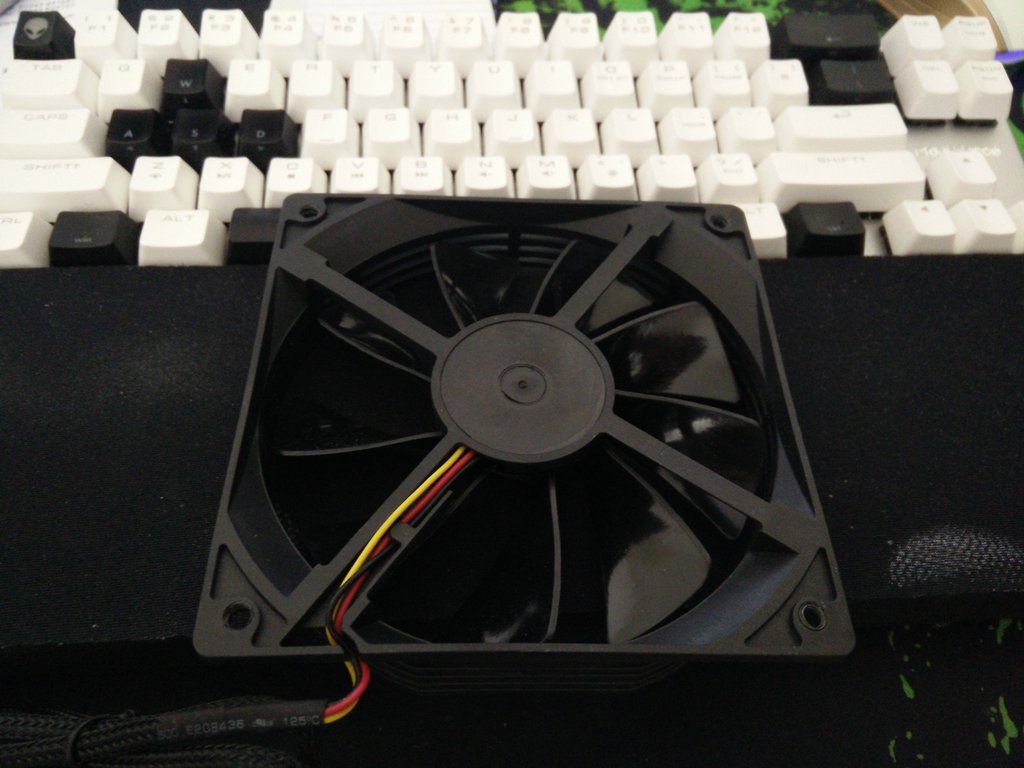
And bugger, it's a sealed unit :( There are a few things you will find here. Firstly you find a soft rubber plug that comes out easily. Secondly you find nothing at all and can see the split washers holding the fan on and thirdly you find this, a plastic welded solid plug. It's a real pain to get them out and I tried cutting it out first with a razor blade but the edges just snapped off. After a bit of wrestling and some brute force I got this.


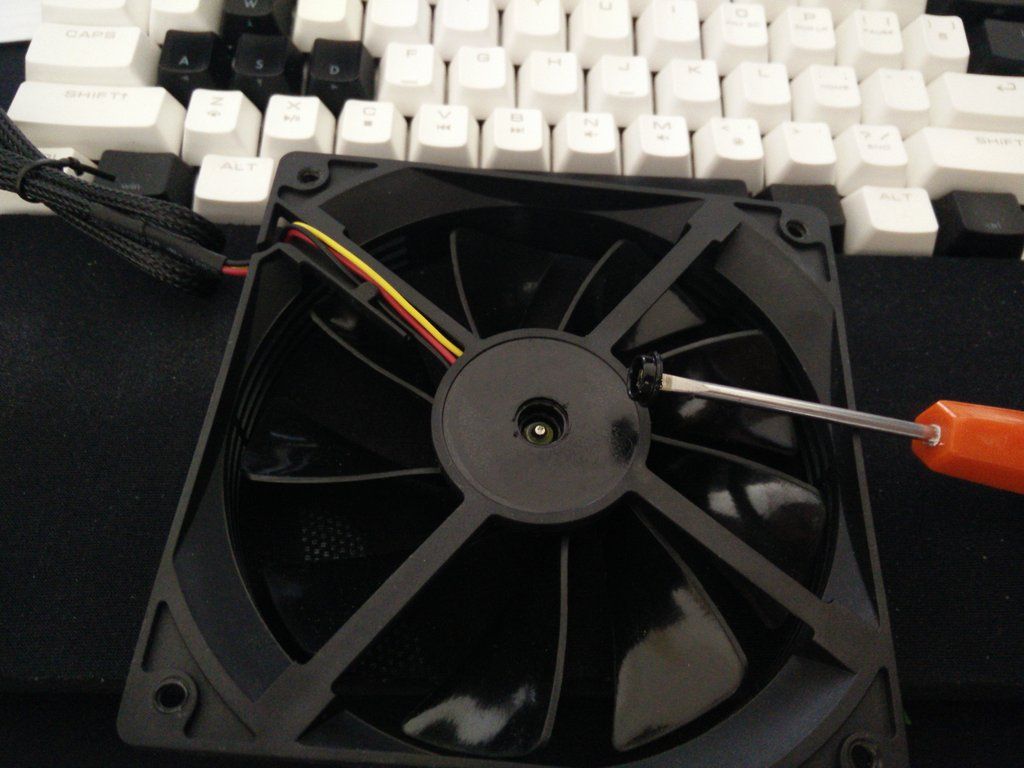
OK, so now I can get access to the split washer. Thankfully they used cheap glue and it snapped out pretty easy, phew. Then I removed the split washer and pulled the fan blades out.


And then I got out something I bought ages ago that I ended up not even using, a fully adjustable chuck for my rotary tool. I initially bought this thing to make it easier to switch bits and use different sized drill bits etc but it ended up being perfect for the job.


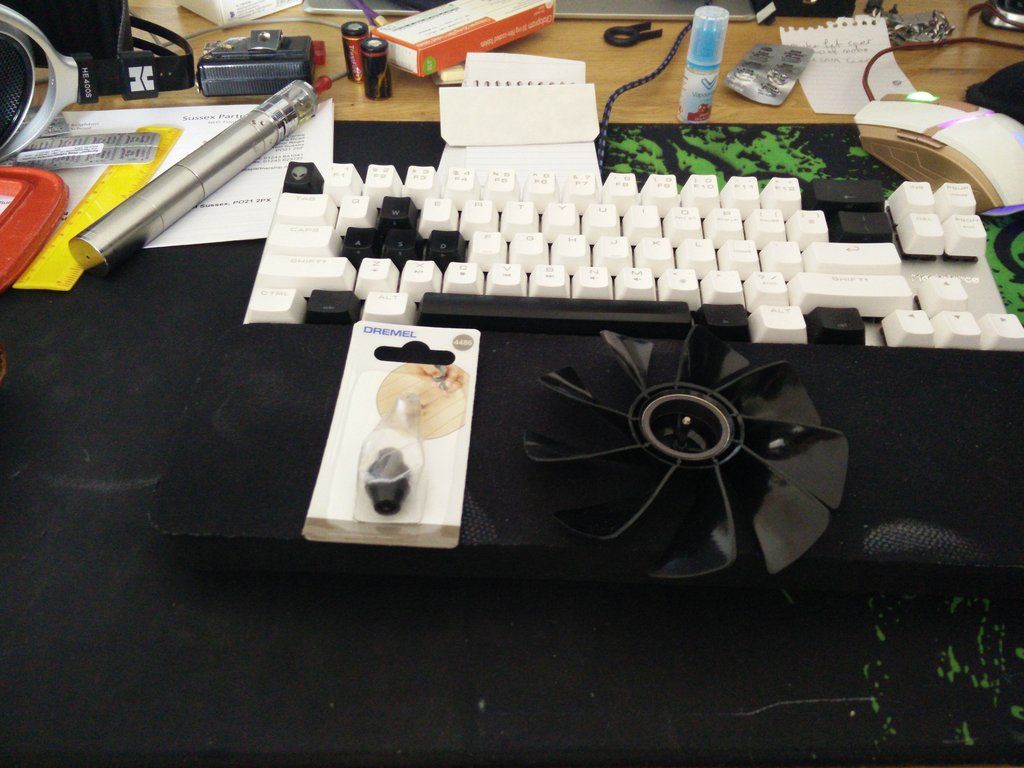
OK now sadly this is where it got really messy. However it basically involved me going into the workshop (the kitchen :D ) and very carefully removing as much of the blade material as I could without damaging the cone (which didn't happen and I created a couple of cut scars). However, once I had done cutting and grinding off as much of the blades as I could I then bolted the bugger into the end of my Dremel using the chuck (which tightens at the bottom which was handy because otherwise I would not have been able to get to it to do it up !) and then slowly introduced the sandpaper to it.

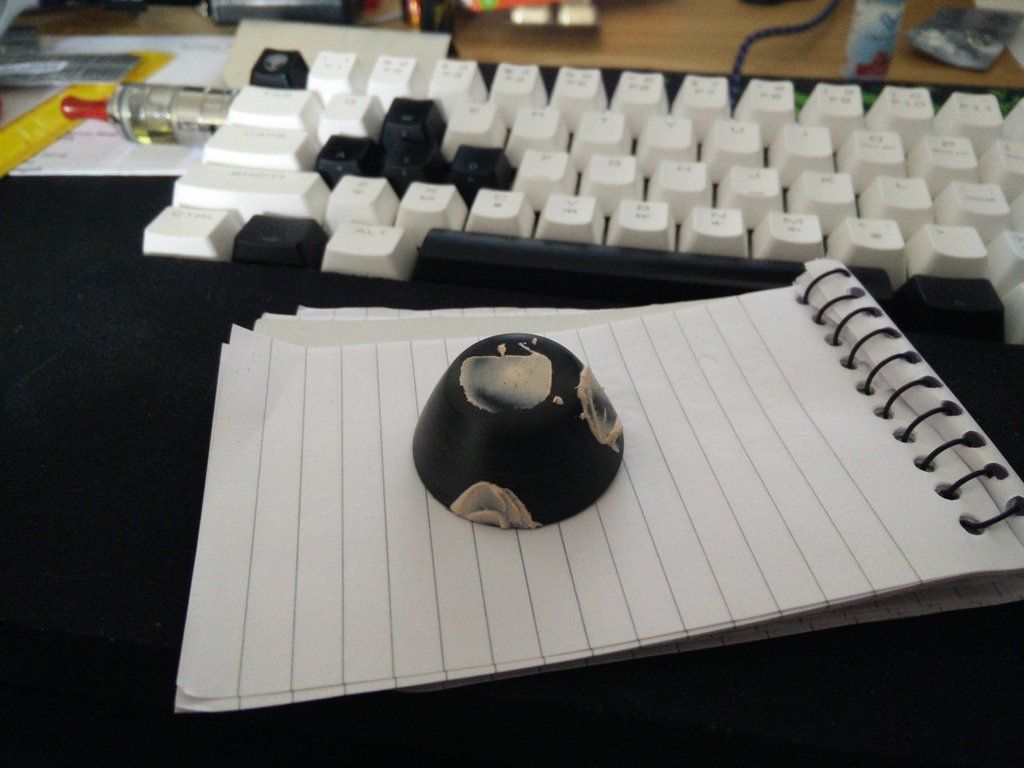
I started off with a piece of alu based cloth and then slowly moved down the grade of the sandpaper to shape the nose cone. After about 30 mins (and then 30 mins of tidying it up, jesus it made a mess !) I had this (note I have put some filler into the dremel scars)


I was pretty darn pleased with myself considering I had never attempted any such thing before ! Any way, after the filler had set (took a while it's very humid in here today) I had this.


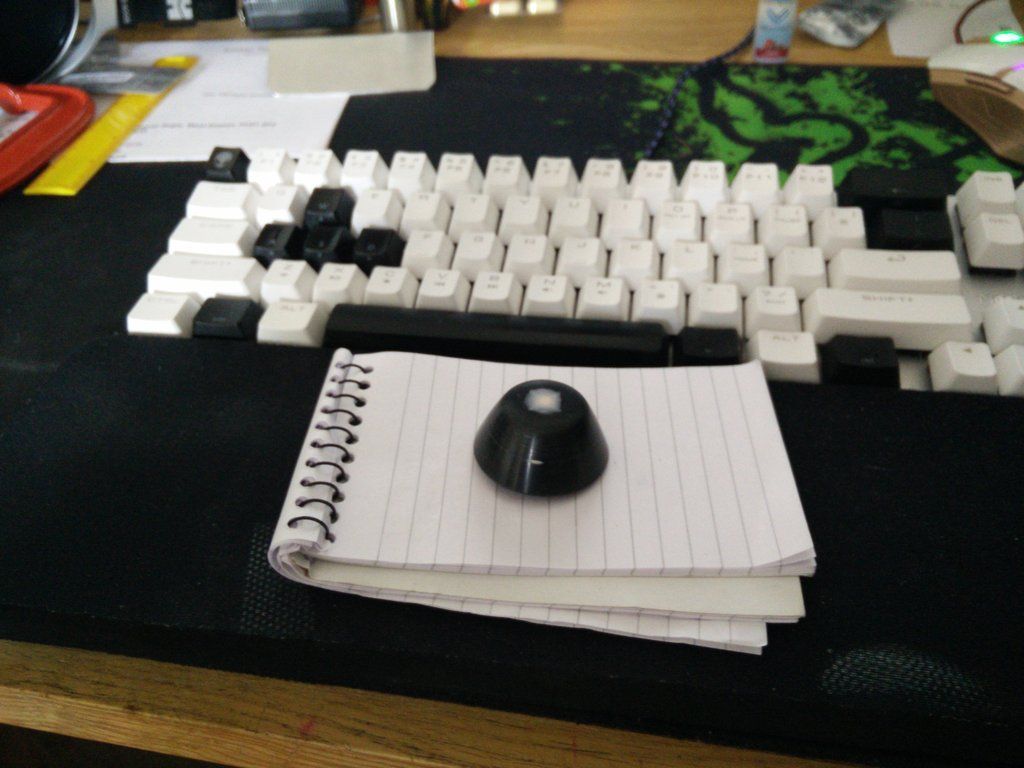
Which is pretty much ready to be primed and painted. However, I don't think I'm done yet. I've had another idea I want to implement that should take me a couple of hours to do :)
 
Soldato
OP
Joined
23 Apr 2010
Posts
11,890
Location
West Sussex
I doubt I will be using any more alu on this project. For everything else I can use acrylic, but obviously the bend line on a piece of metal is far more attractive than plastic which can sometimes "camel hump" along the bend. Plus alu is much thinner so far more suitable for covering heatsinks :)

The nose cone will be for the bottom intake fan. Right now it's still one of the old fans that are making their way out, but when the build is finished there will be another Eloop fan down there. Sadly it's on intake so you don't get to see the true beauty of bionic fans so I decided to dress it up a little. The nose cone (that nice shiny plastic thing) should just be one part but I have not decided yet what else I want to add to it. It will all depend on what sort of parts I can machine with nothing but a Dremel and a drill I guess :D

If I posted all of the ideas I've had and the fails I've made along the way the log would probably be twice the size it already is :D
 
Soldato
OP
Joined
23 Apr 2010
Posts
11,890
Location
West Sussex
3-2-1 GRRR.

SATA cable issue !. I ordered these the other day.


They were supposedly Powercool cables. However, I was beginning to seriously doubt that because they look like paracord to me. I was right to have my doubts too, as the cable in the picture is actually a Bitfenix Alchemy. It seems that somewhere every single vendor online selling these Powercool cables got the wrong memo and are actually selling these.


HONK HONK. Nasty shrink, not even black. So I grumbled to the seller who said to return them. However, when my eyes had gotten over the nasty shock I decided to take a closer look. It turned out that the braid went all the way up and was clamped in :confused: so the shrink was completely unnecessary. Why on earth would you use honking nasty shrink in a god awful shade of blue if it wasn't even necessary?

The mind boggles. Any way, thankfully I did not snap any of the little plastic flaps (lol) and they all look quite nice now.

Sorry for lack of updates BTW. Had two days from heck and am finally back to normality.
 
Soldato
OP
Joined
23 Apr 2010
Posts
11,890
Location
West Sussex
OK so final test fit and adjustments (cable holes for SSDs etc)


I've also edged off the purple cover so it should look nicer and have filled the panels ready for final final prep :D


Next stage : test painting different types of plastic to see how they react.
 
Soldato
OP
Joined
23 Apr 2010
Posts
11,890
Location
West Sussex
Things that go 'eww' in the night. OK so today I decided to give my hands a rest from being in dirty water etc and sort out the cards. If you have been reading this log daily you will remember I modded the sound cards but stopped short of finishing them because time ran out.

OK, so today I wanted to finish up the sound cards as well as take care of a couple of other things.

1. Stop the Asus RAIDR (the PCIE SSD) lighting up red. I hate it, I hate it I hate it.
2. Paint the edges of the sound cards.
3. Remove annoying white sticker on top of Asus D2X that you can see.
4. Change the Titan X. I liked it, but I have now decided on a different theme for it, I think it will look better :)

OK so if you take a look at the rig here and look at the arrows you can see the offending areas.


Right, so first I took out the XFI Titanium HD.


And took it apart.


Matt black model paint and some cotton buds.


And fashion a holder out of a clamp and plenty of tissue.


And then paint. The technique I used was to basically squeeze paint into the tip of the bud until it was nice and full then simply roll the bud along the edges. Don't try and paint, the cotton bud will get ripped to bits.


And now it was Asus' turn.


Yay.


Then the Titan X came out (god, what a faff that was !)


And the shoulder.


OK so I was going to paint the edge I promise. Then I remembered this is a very very expensive card and it's still in warranty. Having said that, looking at the rig now? there's a very strong possibility I will do it.

 
Soldato
OP
Joined
23 Apr 2010
Posts
11,890
Location
West Sussex
Machining the nose cone by hand. OK, so as you saw I cut out the centre of a fan a few days back and then shaped it and polished it by fitting it into a drill. I wanted a secondary piece that I could mount it to but I wasn't quite sure of what I wanted. Then I came up with an idea for a base that I could then light up.

So it basically went 3mm black acrylic - 5mm smoked acrylic - 5mm black acrylic - 5mm smoked acrylic - 3mm black acrylic.

I cut out all of those with my donut cutter that was sadly a bit blunt, so it was kinda rough as you can see from the pic.


As you can see I have put a bolt through the sanwich and done it up in order to make them all weld. I put that into the drill and set it to reverse.


And began shaping with aluminium fabric sand paper.


Checking the measurements as I went...


Then I started to wet sand. I went 400 - 600 - 800 - 1000 - 1200 - 1500 - 2000 - 2500 - 3000 - 3500.


And with it off the drill you can see the layers now.


And a test fit for size.


Fits perfectly. The only thing I don't like is how one of the joins is not so good and the line sticks out. However, it doesn't look like that when the cone is wet so I think I am going to just blow it over with some clear coat.
 
Soldato
OP
Joined
23 Apr 2010
Posts
11,890
Location
West Sussex
Painting anything is all about prep fella. The more time you put into prep the better the finish will be.

Paint has improved over the past few years so long as you avoid the cheap crap. You can get a very good finish on things these days with a rattle can but that doesn't mean prep is any easier.

Talking of prep I had an idea last night, given that the weather has been playing peek-a-boo. Watch this space :D
 
Soldato
OP
Joined
23 Apr 2010
Posts
11,890
Location
West Sussex
Another side project. However, this one is very important. I won't say what it is yet, let's see if any one can guess :D (and no, me making a huge mess doesn't count :p )

OK so last night I was poking around on Ebay (as you do) and I saw something that filled me with want. However, it was expensive and when I broke it into logic I realised I could make my own for almost nothing.

So the first thing I needed to do was empty out two plastic storage boxes (I know right, this is weird but I promise it will make sense in the end !)


I then needed to mark and draw lines so I busted out the heavy gear, my metre ruler.


And drew a line.


And then drew another line.


Then I marked the centre and two more markings 1/4" apart.


Then came the "lots of markings" bit.


And then I went off to the kitchen and drilled some holes, then drew a cross through each set to make a centre point.


And cut them out.


It then looked like this after I had cut along all of the lines.


Then it was time to introduce the other box. I bolted it on.


And cut a third hole in the bottom.


And maybe this pic will help people to identify what it will be. A hint, this pic is side on.


And a final clue.


And a video :)

https://www.youtube.com/watch?v=QWtq_W93XWg&feature=youtu.be
 
Soldato
OP
Joined
23 Apr 2010
Posts
11,890
Location
West Sussex
Time to explain :)

It's a paint booth. I saw this on Ebay a couple of nights ago.


It costs £60. However, firstly it's too small (I would not be able to rotate the parts) and also it's for air brushing, not painting out of a fast rattle can. I did some research and it appears it has one 120mm fan in the front behind that blue paper filter. That's it. Inside it is stuffed with the same breathable fluffy stuff you find inside a fake pillow (I only have feathers me).

OK so you can see how I have sort of copied the design, only made it much larger. I am also using two 120mm Nidec fans (brutal) for extraction and then a further 92mm fan on a 120mm plate for exhaust.

OK, so basically at the back I am going to insert this (£2, tumble dryer hose)


I am then going to snip around the edges and duct tape it. Then i put on the back fan and bolt it in and hey presto, we have exhaust. Not sure the Polish bloke in the flat downstairs will appreciate it when he sees it dangling out of my window but DILLIGAF right?

The front paper filter is nothing but this.


£1. And of course I will need me one of these.


£6. The only other thing I will need is this, which is £3.


That goes inside and prevents the fans from sucking in the fluff. As for the fluff? we're due some new pillows ;) (we're actually not, but hey, we are now :D )

Oh BTW you may be saying to yourself "But it's full of gaps !" Yeah, I know :) that's where liberal use of Gorilla tape will occur :D
 
Soldato
OP
Joined
23 Apr 2010
Posts
11,890
Location
West Sussex
Some more work on the nose cone :) First up I did some measuring and calculating and soldered two LEDs together like this. This is so that when fitted they will be at the right place to light up the clear rings in the bottom.


OK so they are stacked 5mm apart. I then shrunk and braided them.


Machined a channel into the bottom.


And built.


And how it will look.


All I need now is another of those adjustable voltage PCBs so I can put exactly 3.5v through it. I've fitted the resistor into the cable :)
 
Back
Top Bottom