Tiger Style: Build log

IMG_0098.jpg


can i ask what screws you've used as for my case mod i couldn't find any long enough to go through 25mm fans, neo foam stuff, the shroud and then bite on the rad.

cheers.
 
can i ask what screws you've used as for my case mod i couldn't find any long enough to go through 25mm fans, neo foam stuff, the shroud and then bite on the rad.

cheers.

Use two sets of screws! Basically the Shroud on its own has a set of screws for fitting to the Rad, then use some short self tappers for the fan to shroud mating, and then again some more self tappers for the Grill/Case/Fan mating.

I found drilling 4mm holes and then using 5mm Self tappers worked wonders for the security of the whole thing as I had it mounted into the roof of a Lian Li G70 case and the top aluminium was only 2mm thick.
 
Will update later guys -The critical parts of the build are complete, it just needs some final touches . So once vista is installed I'll upload some pics. Looks 'fan-dabby-dozey' so far even if I do say so myself:cool:
 
Pumps

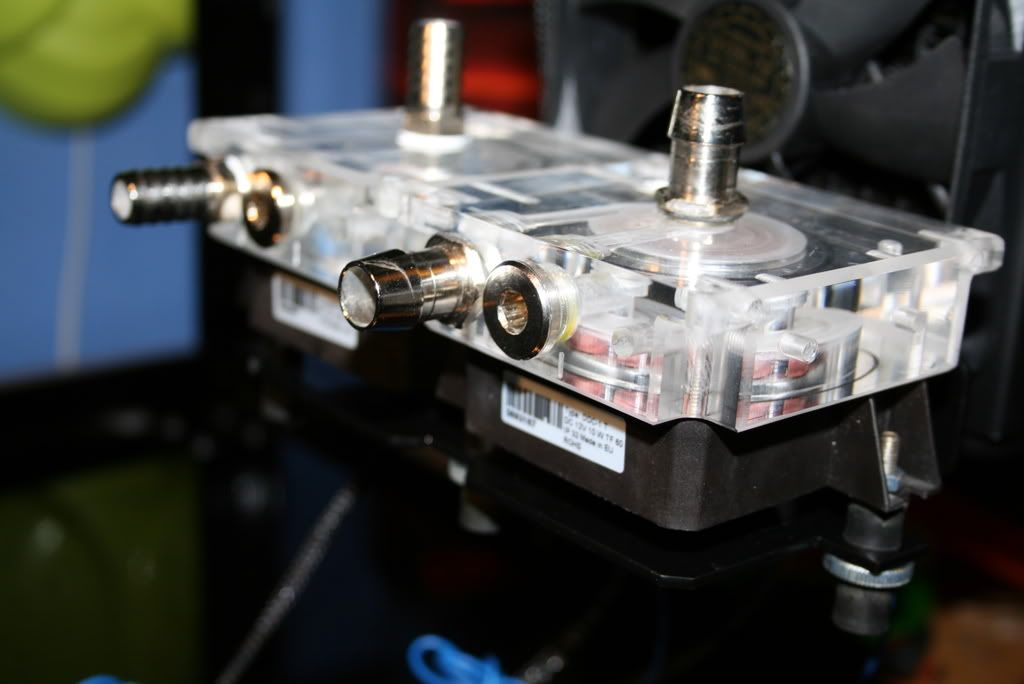
As previously stated I wanted to stick with the DDC pumps but to get the most out of them you need to us the top inlets and as my previous mounts had the pumps mounted verticlly I wouldn't be able to utilise both top inlets. A friend however sorted me out with a nifty bracket which I had powder coated to match the case.

076.jpg


This enabled me to fit the pumps side by side allowing me to use the top inlets and as an added bonus allowing me to fit a few more HD's should I need to in the future by utilising the free space above the pumps. The bracket fits onto a fan which is in turn fitted onto the PA120.2 on the guts side of the UFO.

I still wanted the pumps to be as silent as possible and although they don't give off much sound they can vibrate slightly which can be transfered through the case and then onto the desk. To counter this I fitted some anti vibration mounts.:

088.jpg


Anyone keen eyed enough to spot the mistake here (apart from the missing barbs!).

And here they are mounted in the case :

123-1.jpg


They just fit together and in hindsight maybe the petras or EK pump tops would have been an easier choice but I have further plans for the tops which will appear later in the build log;).
 
Last edited:
Close but no cigar m8. The wattage of the bases dosn't match the impellors of the pumps :) (although it does now after the pump mod of course!).
I'm just in the middle of writing the next part of the log m8 and uploading pics but bedtime is calling lol.
 
Stripping the Blitz

My weapon of choice for this build is the Asus Blitz Extreme. I was fortunate enough to win this motherboard which is renown for being the one of, if not the best P35 board around. I had the blitz formula previously (DDR2) and its an overclockers wet dream. It has all the settings you could want from a bios and then some! It got my previous quad to 4ghz P95 stable so I know how capable they are but this board is the DDR3 version so we shall see later how well it performs - fingers crossed.

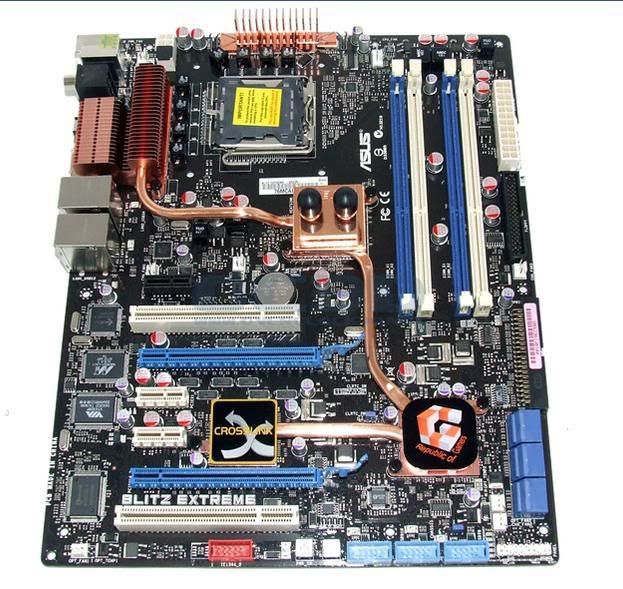
Heres the board as it comes stock :

blitz2.jpg


As you can see it comes with a pre-attached waterblock on the NB, which while effective and a lot better than traditional aircooling, it's also very restrictive and will kill the flow. While its great to see a major board manufacturer like asus to be innovative and consider enthusiasts needs, it seems to me to be a little short sighted that after providing a waterblock they use thermal concrete to badly mount it which will negate a lot of the cooling effect it has. Still something is better than nothing so big credit to Asus there.

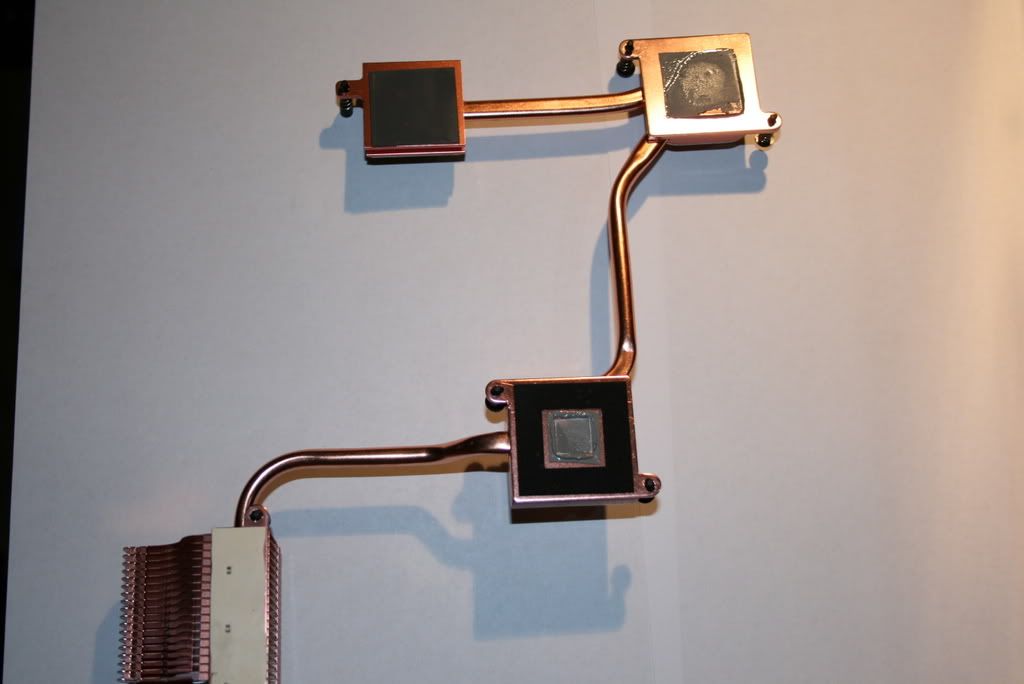
So I needed to strip the heatsink off to get some decent thermal paste on the chipsets. The pain here is that you cannot take the nb alone off. The NB is connected to both the mosfets and the SB which inturn also cools the crosslinx via a heatpipe assembly. So that makes the whole thing a tad more difficult, anyway heres the board naked :

096.jpg


The heatpipe was a SOB to get off. I don't think the thermal paste(or cement as I prefer to call it!) asus used is designed to allow multiple mounts. After unclipping the push through pins, the trick to remove the heatpipe (which is the same method that should be used for maximus users) is to heat the assembly up with a hairdryer. This should loosen the cement enough for it to become pliable. DON'T pull the heatsink assembly, you need to twist it gently if you are considering doing the same. Pulling it will most likely damage the board by either ripping the NB clean away from the board ( I have seen pics of this!) or chipping the die - either way your board will be little more than a doorstop if you do this.

150-1.jpg


Pics of the naked chipset to follow:
 
Last edited:
Northbridge

093.jpg


South bridge

097.jpg


Crosslinx chip

094.jpg


Cleaning the cement off also took some effort. I found that IPA just didn't cut the mustard and I had more success with some Acetone.
 
Last edited:
Cleaning the cement off also took some effort. I found that IPA just didn't cut the mustard and I had more success with some Acetone.
When you say IPA are your referring to IPA isopropyl or something else?

I'm not sure what this cement is that they are using? did you try some citrus based stuff? that seems to deal with a lot of the goo/gunk I've encountered, but as you already stated if all else fails. . . . break out the Acetone (with caution, it can eat important stuff too!).

Good work w3bbo, that must have been tricky to remove that heatpipe arrangement? Still not sure how you can wiggle one section without stressing the connecting heatpipes?

All the water cooling stuff is totally over my head but I'm sure its all good stuff, I'm keen to see what the rough finished result looks like (did you do any conceptual art, sketches etc?)

Also when you did that little mod for the LED pins, did you use a tool for adding/crimping the little pins on? its something I been meaning to look into, adding different pins to wires (molex, floppy etc) but I've not seem much info on it before?
 
Aye, Isopropyl Alchohol. I have some akasa tim clean which is citrus smelling but it also appears to be oil based iirc which defeats the object imo.

The mod for the pins I didn't do any crimping. I just took the motherboard headers of an old office case (I always rip them apart for spares :D) and soldered them onto the end of the existing wire. The led wires just slot straight in. I guess a little solder here wouldn't go amiss but like I said previous I don't want them to be permanent.
 
Last edited:
Isopropyl Alchohol
Lol I didn't know thats what IPA stood for!:o I was thinking it was a brand name like SERVISOL

re79an2.jpg

A must have item!

I have some akasa tim clean which is citrus smelling but it also appears to be oil based iirc which defeats the object imo.
Hmmm your meaning that microscopic particles of the oil will seep into the surface of the now clean & de-cemented chipset, therefor acting as a barrier between the actual surface and your newly applied premium goo!

I reckon a bath in Citrus followed by a good shower in IPA will pretty much remove everything, failing that there is always that Arctic Silver Cleanser stuff, I've bought some but didn't get a chance to test it yet.

I reckon you may be a tad obsessive with certain details but I understand where you are coming from, its just I hate to think of you scrubbing away working up a sweat removing ASUS cement with inferior cleaning products when you could get the job done loads easier with the right products and then be able to concentrate on more important things!

Anyway you have motivated me to attack a few motherboards I have lurking (ASUS P5K-E, P5K-VM) and remove the stock heatsinks and see what is underneath. I have used the P5K-E for about 4 weeks now so that is ready to be de-gunked but I will leave the otherboard until it has been tested first.

Did you test that motherboard first before you attacked it or did you just remove its brand new wrapper and maul it? :D

Lastly do you own a heatgun? I bought one a couple of months ago and it makes such a difference when your doing a load of braiding/heatshrinking, and from what you stated above this tool could also be pretty useful at warming up the heatsinks prior to attack?

heatshrinkgunoh8.jpg

The heatgun - A modders friend cost approx £16

I still don't 'get' how you managed to remove the heatsink assemble? You quickly heated up all the heatsink blocks and then wiggled each one in turn or?
 
I find the best thing to remove pre applied paste is good old lighter fluid, and the beauty is it's very easy to get a hold of, costs next to nothing, and dries very quickly.
 
Lol I didn't know thats what IPA stood for!:o I was thinking it was a brand name like SERVISOL

Thats the exact same stuff I use. It aint 100% alcohol but its pretty close.

Hmmm your meaning that microscopic particles of the oil will seep into the surface of the now clean & de-cemented chipset, therefor acting as a barrier between the actual surface and your newly applied premium goo!

Yup. Pretty anal I know but when you spend every last penny on the best cooling available, lap a cpu and risk killing it I can't see the point of not cleaning the cpu as best you can.

Did you test that motherboard first before you attacked it or did you just remove its brand new wrapper and maul it? :D

Nah, I always test it first before forfeiting the warranty. If it boots up - it works.

Lastly do you own a heatgun? I bought one a couple of months ago and it makes such a difference when your doing a load of braiding/heatshrinking, and from what you stated above this tool could also be pretty useful at warming up the heatsinks prior to attack?

Heatguns are perfect for the braiding but I wouldn't buy one for just that purpose - not when a 50p lighter can do the same job ;)

I still don't 'get' how you managed to remove the heatsink assemble? You quickly heated up all the heatsink blocks and then wiggled each one in turn or?

I just pointed a hairdryer on full heat about 50cm away from the board for about 1 minute. Just be carefull not to heat the chips up too much, if you can get the copper to just below 'ouch' point then its good to go.
 
Back
Top Bottom