

Made a change to my rig, looks a bit better now. The change was inspired by a new motherboard that allowed me to put the GPU in the 3rd PCI-E slot further down providing enough space to add a quick disconnect between the CPU and GPU and improved airflow supplying the the top two radiators from a side mounted 140mm fan that wasn't possible in the old configuration.
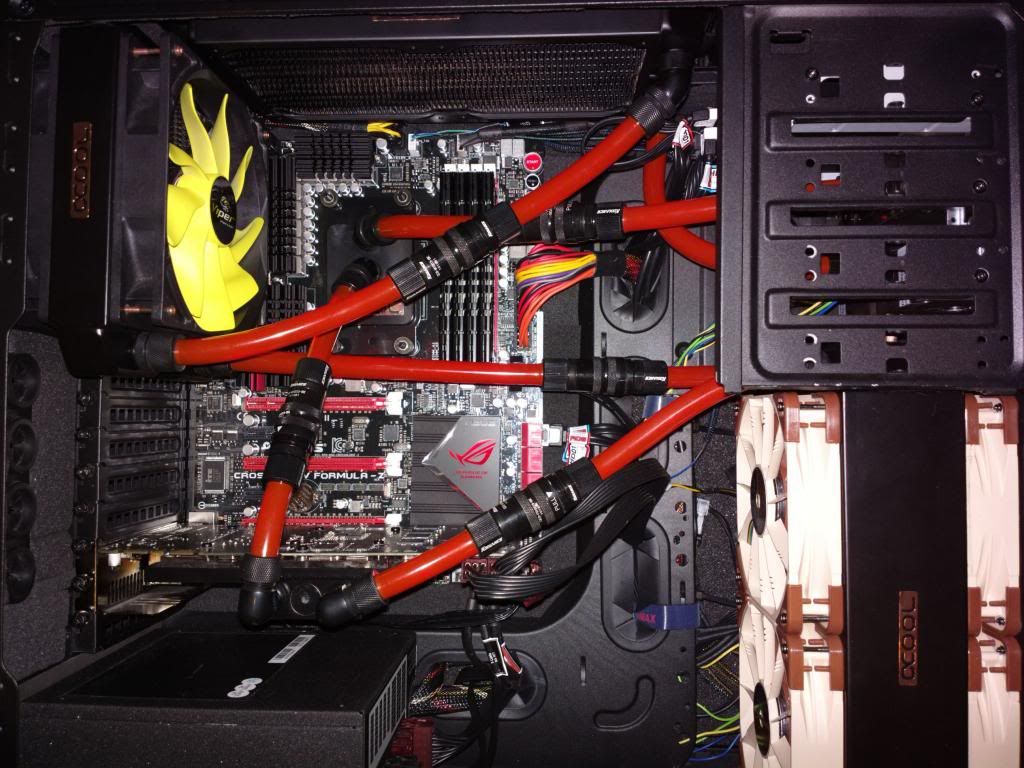
The FX 8350 dumps more heat into the system so my water temps are higher now but system still remains as close to inaudible as I have gotten a computer so I am very happy with it.
The FX 8350 dumps more heat into the system so my water temps are higher now but system still remains as close to inaudible as I have gotten a computer so I am very happy with it.


 you!
you!

")


")