What "man jobs" have you done today?

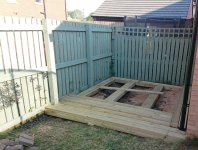
Finally got round to sorting the empty space at the back of the garage.

I initially bought the sleepers for the raised bed I am building, but as the ground was so uneven and on a slope I used up some of the sleepers and bought some cheap decking to go on top of the sleepers.
PyWIWvY.jpg


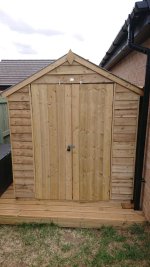
The 8x6 overlap Shed turned up a few days ago and typically, all the pieces didn't quite fit, but you get what you pay for and it cost less than £300.
Just need to feed some twin and earth from the garage into the shed
FYmekul.jpg
 
After waiting over a month to find a plumber to swap out an old aged cylinder for a pressurised system have finally been able to make some positive progress in Flat renovation. Ripped out all the old plasterboard and battens. Put new battens and board up. Had to modify the kitchen carcasses to accommodate the increased dimensions of the new cylinder. Managed to get away with cutting an access hole for the thermostat and drainage area and putting some reinforcing cross members in. First time working with plasterboard but it was quite easy to work with. Hardest part was measuring/estimating the socket cutouts. Cheapo recirc. extraction hood put in, I was not about to start drilling ventilation holes through half meter thick external walls.

Advice online about prepping plasterbaord for tiles is all over the place - PVA, PVA and water, don't use PVA at all, don't use anything etc. In the end I bought a proper tile primer which was easy to apply and seemed to do the job. Once dry had a almost brittle hardened surface to the plasterboard.

Spent about 7 hours tiling splashback itself. Lot's of corners, outlets and cutting of tiles. Diamond blade electric cutter absolutely essential! Absolutely lost my rag with a slide cutter, wasted more tiles than ones I cut and kept to use I think. Just waiting for tile adhesive to set completely then will grout. Quite happy with progress thus far considering it's my first ever tiling job. Some apprentice marks here and there but I can live with that.

Next after grouting is work surface, cut opening for sink and plumb in. Sockets/switches and cupboard doors back on and then pretty much done for the kitchen!

flat_reno_kitchen (5).jpg

flat_reno_kitchen (1).jpg

flat_reno_kitchen (2).jpg

flat_reno_kitchen (6).jpg

flat_reno_kitchen (3).jpg

flat_reno_kitchen (4).jpg
 
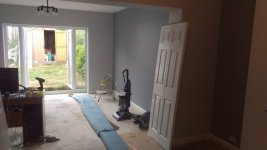
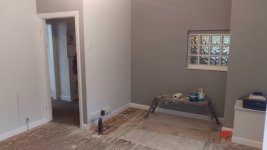
Finishing off in the dining room section of the extension. Pretty much ready for the carpet fitter now.

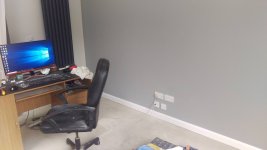
While the floor was accessible I ran 2 new network points into the newly built part. Concrete slab meant fishing the wires behind and under the plasterboard.

We've also just had an upgraded TV aerial fitted as the old one had never been used in the 15 years we've been here as we've always had Virgin Media. So I used a splitter to distribute the signal to the site of the new TV and lads bedroom, as well as spares to the kitchen and front room for possible future use.

YYi5vqz.jpg

DCvjQvK.jpg

DsdeK3U.jpg

Once the carpet is down a new desk will be going where the router is in the second picture, probably a simple IKEA Malm unit as it'll match the existing furniture we have in there.
 
Over the past few days:

  • Grouted tiles
  • Cut new work surface to size
  • Provisioned plumbing for kitchen sink
Was really happy with the finish on the laminate side of the worksurface. Was really concerned it was going to chip/blow out. Used an 80 tooth blade and cut upside down.

Nearly there in the kitchen!

flat_reno_kitchen%20(9).jpg

flat_reno_kitchen%20(19).jpg

flat_reno_kitchen%20(13).jpg

flat_reno_kitchen%20(11).jpg

flat_reno_kitchen%20(10).jpg

flat_reno_kitchen%20(8).jpg

flat_reno_kitchen%20(12).jpg
 
Last edited:
Pulled down a 6 panel fence which was utterly ruined by ivy (I really hate that stuff!). I then bought 8 foot concrete posts, concrete gravel boards and 6 foot panels. All the existing posts were wooden and held by spike mounts. No worries. Except that the previous owner (the moron with an ivy fetish) had concreted in ground spikes. So, 1.5 really hot days of digging out concrete with my SDS drill and my hands. I couldn't just dig the whole chunk out due to room. Took forever and I can barely feel my hands. Got 4 panels up and then found some old foundations where I needed to place the last 3 posts. I surrendered and fitted some bolt on ones. The fence kinks due to this but it's stable and ivy-free, at least. Never again.
 
Kitchen continues!

Was dreading the kitchen sink cut out, not because it's technically difficult but because if you mess it up you need a new surface. Templated around the kitchen sink as no template is provided. Bring back the template by 11mm all around and measure twice ten times before cutting. Used a reverse (downward cutting) blade in the jigsaw and a 16mm spade bit in the corners to start. Freshly cut edges were sealed with clear silocone. Went well and thankfully the sink fits in, included seals are in the right position and it's all square *phew*

Monobloc tap in, drainage 99% done but need to bridge the new drainage with the old copper pipework which will require a shop visit.

Worksurfaces endcapped and some L brackets used to secure in place from the underside. The original surface was secured with screws through the cabinet carcasses themselves but in some places the clearance is next to nothing making drill use impossible. Decided to position the surfaces, trace the desired bracket positions and fix to the surface with it flipped. Meant I only needed to do horizontal drilling which I had plenty of space for. Siliconed the edges (I HATE using silicone, I suck at it).

Put the cabinet doors back on (finally) and just need to get the electrician back to second fix the hot water cylinder, outlets and switches. The comparison picture doesn't look too dissimilar but that old surface was gash and the tiling was proper nasty, grout falling out and generally shoddy.

flat_reno_kitchen%20(21).jpg

flat_reno_kitchen%20(19).jpg

flat_reno_kitchen%20(14).jpg

flat_reno_kitchen%20(14).jpg

flat_reno_kitchen%20(17).jpg

flat_reno_kitchen%20(18).jpg

flat_reno_kitchen%20(16).jpg

flat_reno_kitchen%20(20).jpg

flat_reno_kitchen%20(15).jpg
 
Stripped and cleaned the Dyson (DC40) tonight, after realising a couple of years of use by the gf with no mechanical sympathy had rendered it pretty much blocked solid. Very therapeutic stripping and cleaning stuff like that :D
 
Finished plumbing, still no leaks *phew*. Put new mitre saw to good use on the pipework, worth every penny (And not all that expensive either!) Will be getting much more serious use when it come to starting the bathroom from scratch. I redid all the silicone in the kitchen also. Was unhappy with it. Bought a Cramer Fuji II kit which is just infinitely better than messing about with a finger. Not a perfect finish but 100x better than the poor effort first time around.

Downstairs woodwork painted. I'm never, ever painting those stairs again. Ideally I would have removed carpet to do it. But it was all stapled and glued down. If it ever needs sorting again I think I'll be removing the entire staircase and putting a newly built one in.

Sanded down parquet flooring and also rediscovered copper edging. Was covered in tile adhesive/otherwise oxidized. Need to spot clean up some areas I'm still not happy with then varnish it. You can see how abused it was before I stripped the old varnish off, proper grubby. Absolute back breaking work using a small 1/3 orbital sander. Was reluctant to use something bigger as the nature of parquet means for every block you are sanding with the grain, you have just as many sanding cross grain.

flat_reno_kitchen%20(25).jpg

flat_reno_kitchen%20(26).jpg

flat_reno_kitchen%20(28).jpg

flat_reno_kitchen%20(22).jpg

flat_reno_kitchen%20(23).jpg

flat_reno_kitchen%20(24).jpg

flat_reno_kitchen%20(27).jpg
 
Been refurbishing the living/dining room and adding some character features the past week - tiling the hearth with terracotta red/black tiles, paneling the dining room and adding a chair rail, picture rail and starting on the alcove shelving.
Now waiting on a sander to become available so I can take back the floorboards and varnish them.
Luckily know a heating engineer so the radiators have been replaced as well.
 
Yeah it's not square. I didn't build it, I just have to live with trying to fix what I can :D

Haha, I know I know. What you've done looks really good.

That parquet floor running so much out of line would drive me mad though. I'd have to line that wall with furniture to hide it. But then the front line of the furniture would be out of line with the flooring too! ARGH!! :p
 
Stripped my washing machine down as it turns on, but when you press start nothing happens and it makes a faint clicking sound. Looks like it might be the brushes as they have reached the end of their travel and the motor was spinning really easily, like there was no resistance from the brushes. So £7 for two new ones. I was kinda hoping it would be terminal as the washer is pretty crappy, but if it can be fixed so cheap it seems a waste to replace it.
 
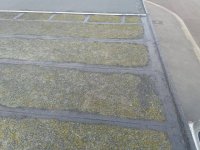
Fixing a leaking flat roof (garage).

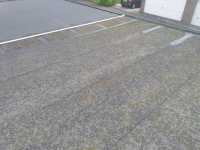
Heavy rain the other day, noticed inside garage that the roof panels looked damp.. Got up on roof and quite a few (most) of the felt lap joints were dry/gappy and not right. The felt is very dry and tired so not long left before it needs replacing.

Wire brush a good few inches either side of all joints, broom all loose material away then stipple roof repair stuff into the joints to really get it in, had dinner and did the boys bedtime to let it set a bit then paint a quantity over the top and a few inches wide.

Used B&Q "Rooftrade Black Roof Sealer 1L", took 4 tins to do what you see.

Looks good, we shall see how it stands up. If it buys me a year then I am happy...

lgUNa40l.jpg

tb8s9RMl.jpg

rrvUeVol.jpg

HI0r41il.jpg
 
Back
Top Bottom