You are using an out of date browser. It may not display this or other websites correctly.
You should upgrade or use an alternative browser.
You should upgrade or use an alternative browser.
***Official Electronics Thread of Officialness (it starts off with lots of Nixie Tube Clock goodness
- Thread starter Aod
- Start date
More options
Thread starter's postsI'd love to make one of these but my soldering skill ranges from "dodgy" to "sucks balls".
Grab a piece of veroboard and a length of wire. Strip the wire and cut it into pieces.
Solder wire to veroboard.
Repeat.
Simple practise, you won't need to do much to get your skills up.
Soldering is very easy, just takes a bit of practise.
Make sure the tip is clean, tin the soldering iron a bit by putting a small amount of solder on the tip of the iron, touch the iron to the join and feed the solder in to it. Works every time.
Make sure the tip is clean, tin the soldering iron a bit by putting a small amount of solder on the tip of the iron, touch the iron to the join and feed the solder in to it. Works every time.
Grab a piece of veroboard and a length of wire. Strip the wire and cut it into pieces.
Solder wire to veroboard.
Repeat.
Simple practise, you won't need to do much to get your skills up.
Dirt-cheap too if you get your stuff from the right places

Soldato
- Joined
- 10 Mar 2009
- Posts
- 4,473
- Location
- South West
Very nice, I want one! Would look great in my study with all my music kit, nice valve amp theme!
Dirt-cheap too if you get your stuff from the right places
and what are the right places?
I'd love to make one of these but my soldering skill ranges from "dodgy" to "sucks balls".
Some tips -
Associate
- Joined
- 27 Nov 2006
- Posts
- 1,334
- Location
- Coventry
That's true, I see what you mean, I just kinda like the glass look with them sitting on top, able to see the electronics through it.
I wonder if you could do these but take away the LEDs from the circuit and replace them or just simply bridge over the connection gap with a wire and by-pass having them at all.
If you don't want the LEDs, you can choose not to install them. Or there is an option in the clock's menu to disable them.

Associate
- Joined
- 27 Nov 2006
- Posts
- 1,334
- Location
- Coventry
I've spent the day making phone calls to buy a few tons of concrete mix and appropriately I was just pointed towards this!
Haha yeah, I had seen this. Quite... Industrial looking

and what are the right places?
Initially, anywhere that isn't "That Cartographic sounding place"
eBay's a very good place to start.
RS and Farnell (can i say those Feek?) are okay, but only if you're close enough to buy in person so you don't have to pay the hideous delivery charges. they're also much cheaper in bulk.
Haha yeah, I had seen this. Quite... Industrial looking
I think they'd look good behind some of that circle hole mesh

folded over them like a cage (might need bigger holes and smaller solid frame gaps) but with a rusted/red/yellow finish of aged weather beaten steel.
Yay! no suspension for meYes, fine.
There's also Rapidonline who also have a trade counter if you're anywhere near Colchester.

That's sort of my plan for the case for mine, i'm going to use hexagonal-holed aluminium-mesh as a case for the PCB, should look epic.I think they'd look good behind some of that circle hole mesh
http://img703.imageshack.us/img703/8050/stockphotobrushedmetalm.jpg
folded over them like a cage (might need bigger holes and smaller solid frame gaps) but with a rusted/red/yellow finish of aged weather beaten steel.
Soldato
- Joined
- 7 Jul 2009
- Posts
- 16,234
- Location
- Newcastle/Aberdeen
Yeah, i use Rapid most of the time, free delivery on orders over £30 and around £5 otherwise so not that bad, and their actual product prices are great compared to the cartograph and similar places.
Associate
- Joined
- 27 Nov 2006
- Posts
- 1,334
- Location
- Coventry
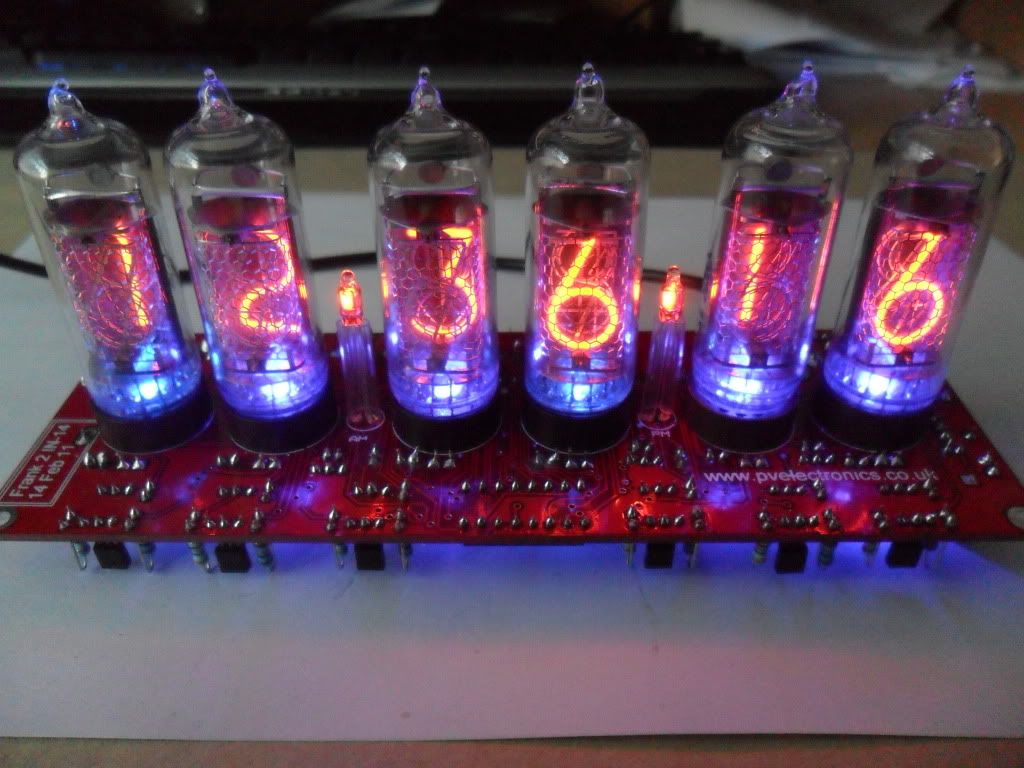
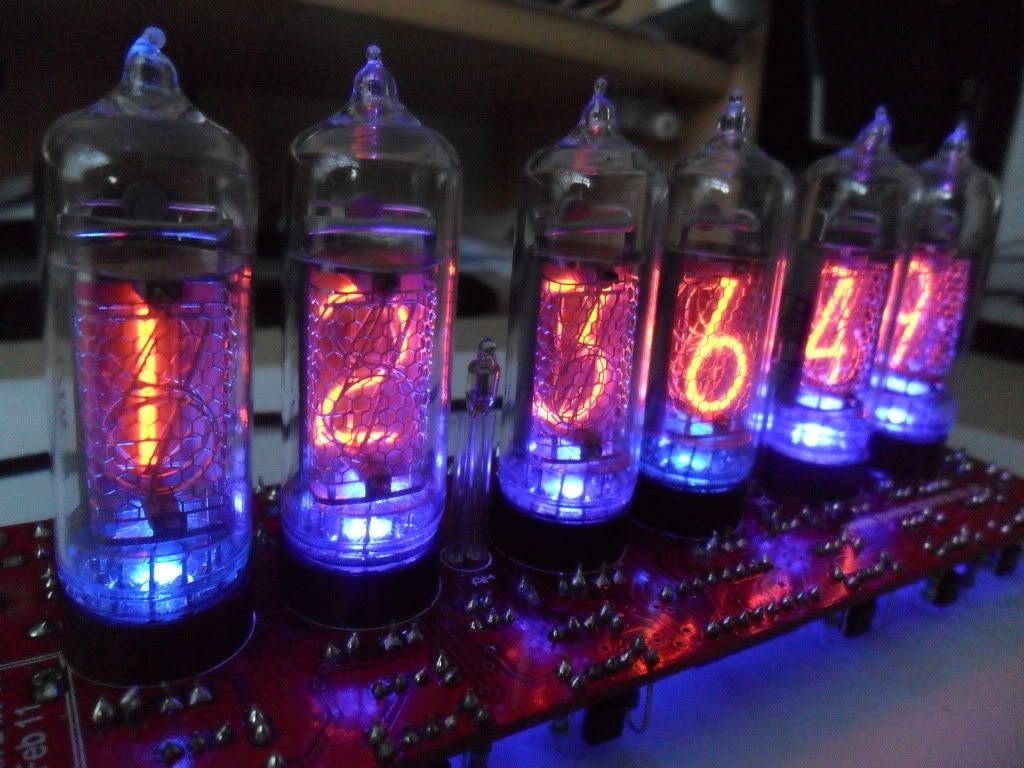
Finally got around to taking some photos of my completed clock 
Looks better in real life, pictures don't quite do it justice.


Looks better in real life, pictures don't quite do it justice.


See im not a fan of those blue LED's and i think the cases all need to be weathered/aged steel! The rust orange just gives the clock a better look IMO!
Everytime i check the updates on this thread i find it harder and harder not to go buy the gear i need to solder, practice and get one of these kits!
Damn they look schweeeet!
By the time i get around to it GD population will own the last of the Nixie lamps!
Everytime i check the updates on this thread i find it harder and harder not to go buy the gear i need to solder, practice and get one of these kits!
Damn they look schweeeet!
By the time i get around to it GD population will own the last of the Nixie lamps!
See im not a fan of those blue LED's and i think the cases all need to be weathered/aged steel! The rust orange just gives the clock a better look IMO!
Everytime i check the updates on this thread i find it harder and harder not to go buy the gear i need to solder, practice and get one of these kits!
Damn they look schweeeet!
By the time i get around to it GD population will own the last of the Nixie lamps!
when you build the kit you can leave them out, and you can also turn them off in the clock-software.

I agree with you about the case

Soldato
- Joined
- 7 Jul 2009
- Posts
- 16,234
- Location
- Newcastle/Aberdeen
I'm not sure, yes weathered steel would look great, but it would go well with the right kind of wood too - something dark (or, more likely cheaply dark stained  ).
).
 ).
).Hands up everyone who just knew I'd do more tonight 
I did a lot more...

Infact there's a tube on that board...

Getting to the base of the tube to solder it was the only really tricky bit.
Here's the one tube with power applied.

Very happy so far but I really don't have time to do any more tonight, the iron is off.
I've got a dedicated GPS on the way, no faffing with manual time settings for me

I did a lot more...

Infact there's a tube on that board...

Getting to the base of the tube to solder it was the only really tricky bit.
Here's the one tube with power applied.

Very happy so far but I really don't have time to do any more tonight, the iron is off.
I've got a dedicated GPS on the way, no faffing with manual time settings for me


