Project: Angel

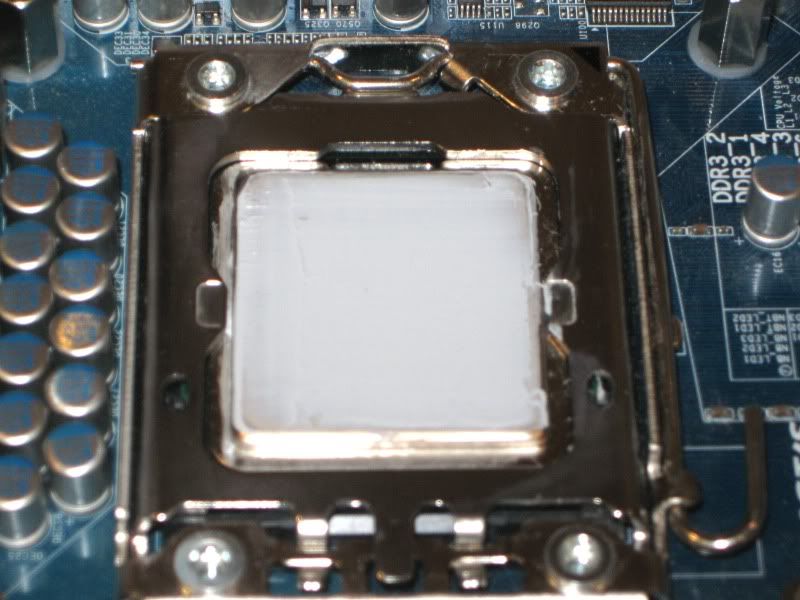
Spreading the microSI was a total PITA as the batch I got was very dry but with a little persuasion I got a then sliver onto the CPU. I prefer to use the spread method rather than the blob, it's what works best for me but I have little doubt that the blob method works best for others so I won't get into an arguement about that here!

IMG_0462-1.jpg


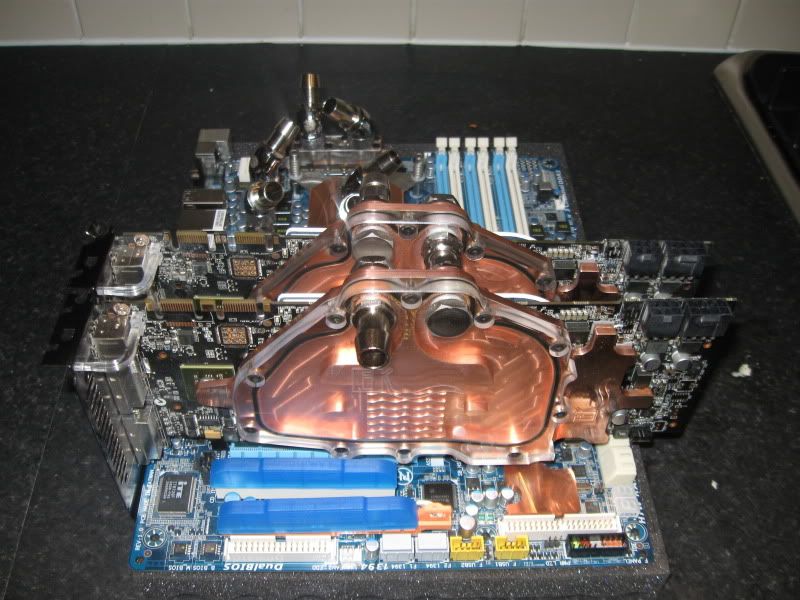
Fitting the CPU block at first presented no problems, however after doing a little research I quickly realised that the Heatkiller block should be fitted horizontally on the UD5 thanks to the row of caps (highlighted below) that prevent a good mount.

highlight.jpg


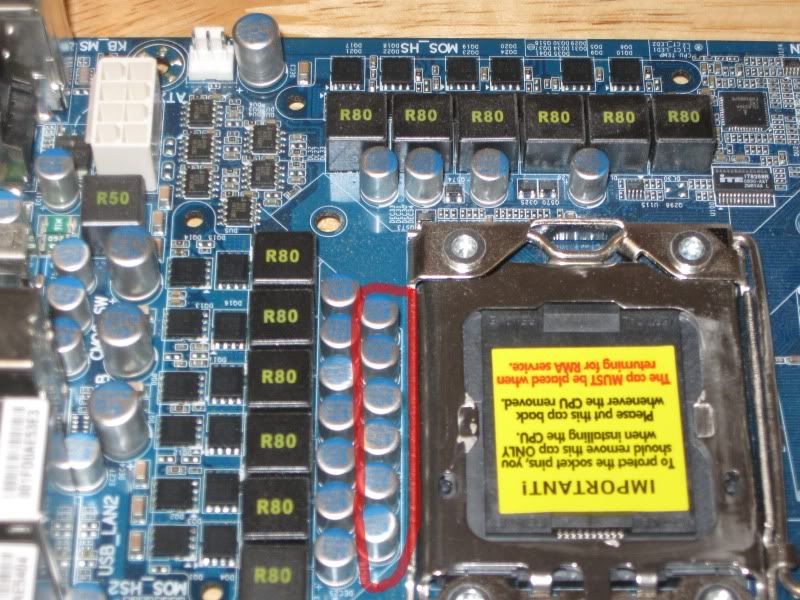
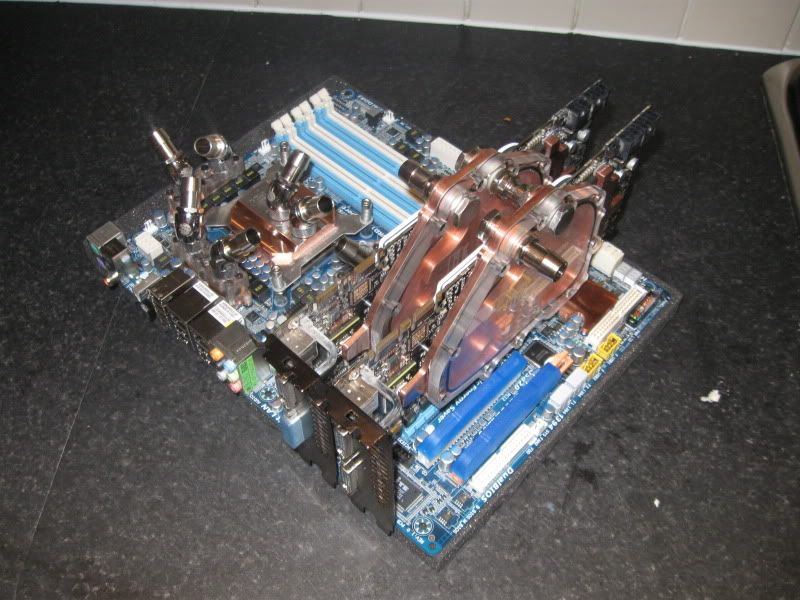
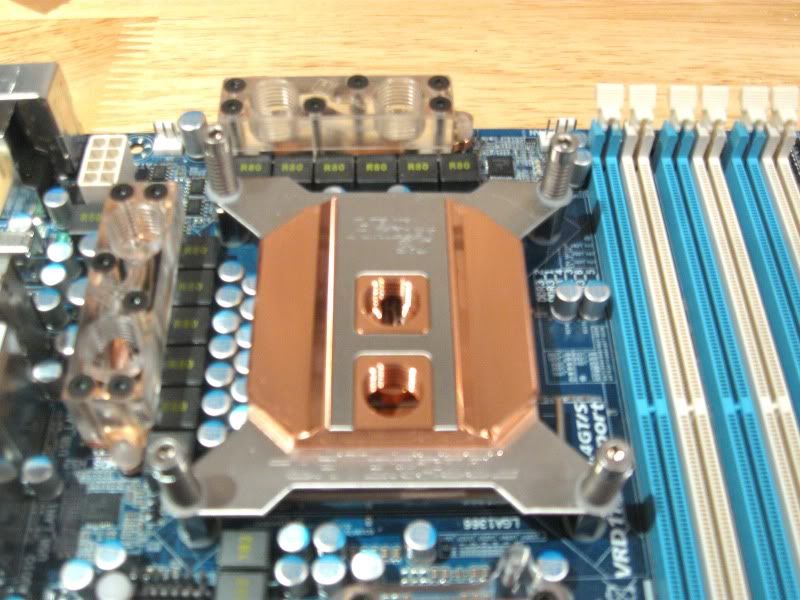
The caps are just a smidge to close to the CPU socket so with a little more (very) gentle persuasion, I bent them out of the way to allow vertical fitment of the Heatkiller:

IMG_0467-1.jpg


Sorted :)
 
Looking very nice. The capacitors being in the way seem to be a common issue on some x58 boards. I almost ran into a similair problem when fitting the new rev c bracket for my TRUE on the p6t dlx v2. On one side the screwhole wasnt capped, could have ended up screwing the spring loaded screw through a capacitor, quick change round and thankfully the opposite screw hole was properly capped.
 
Here's how the board looks now with the blocks fitted:

IMG_0466.jpg


I had a quick play with the 45 angled bitspower fittings and attached the barbs to judge how I'm going to plumb in all up:

IMG_0469-1.jpg


So with the motherboard blocks fitted thats pretty much all the prep work done save for the GPU's which I'll come to later in the build.
 
Last edited:
Seems I've spent so long spraying, braiding and prepping for the build, I almost forgot I still have to build it!

Thx for the comments as always guys :)
 
The GPU's I will be using for this build are the GTX280. While they are no longer top dog of the graphics card world, they are still powerfull, especially as the ones I will be using are XXX versions - 2 of :D.

IMG_0474.jpg


Of course it would be rude not to watercool them and overclock the nuts off them too, we'll see how that goes later. The blocks for the GTX280 I'll be using are EK-FC280GTX. Mine were bought second hand, and while thye were in good nick they needed a bit of spit and polish to bring them back to their former shiny glory:

IMG_0473.jpg


With the backplate I sprayed earlier:

IMG_0475.jpg


Stripped the cards back:

IMG_0477.jpg


and fitted the blocks.
 
Couldn't resist doing a few mock up shots of how the cards look installed:

IMG_0481.jpg


IMG_0478.jpg


IMG_0480.jpg


More to come at the weekend...thx for looking ;)
 
Cheers guys. Dunno if I like/need the bitspower angles but we'll see how it goes when it comes to routing the hose.
 
Looking great! Its a close fit with the top graphics card and the lower barb on the mobo block! Cant wait to see this all connected up and finished, gonna have your work cut out keeping the tubing looking nice and clean :p
 
Looking great! Its a close fit with the top graphics card and the lower barb on the mobo block! Cant wait to see this all connected up and finished, gonna have your work cut out keeping the tubing looking nice and clean :p

Yeah the barbs actually sits flush with the block. I almost went into panic stations when I first tried fitting the GPU's but they 'just' fit.

I'm more worried about the cable routing tbh. MM cases are renown for being particulary bad for hiding cables. :(
 
I love the design of the case, but the openess of the design dictates that everything is on display. Sadly that also means unsightly cables.
 
Back
Top Bottom