Project Whurple - White/Purple Watercooled Build - Changes to 3d printer build!!

For example
bearing_guide.jpg


That goes between my spool (mounted on top of the printer) and the extruder feed. Got a bearing in it so it's nicely free running so there's much less drag on the filament as the extruder pulls it in.

Combined with a spool holder with a pair of bearings
bearing_spool.jpg

There's practically zero friction on the spool or the filament as the extruder pulls it in. In fact, you should see it wobble when the extruder retracts a little :p

Both of these upgrades helped massively with an under extrusion issue I had at the start.
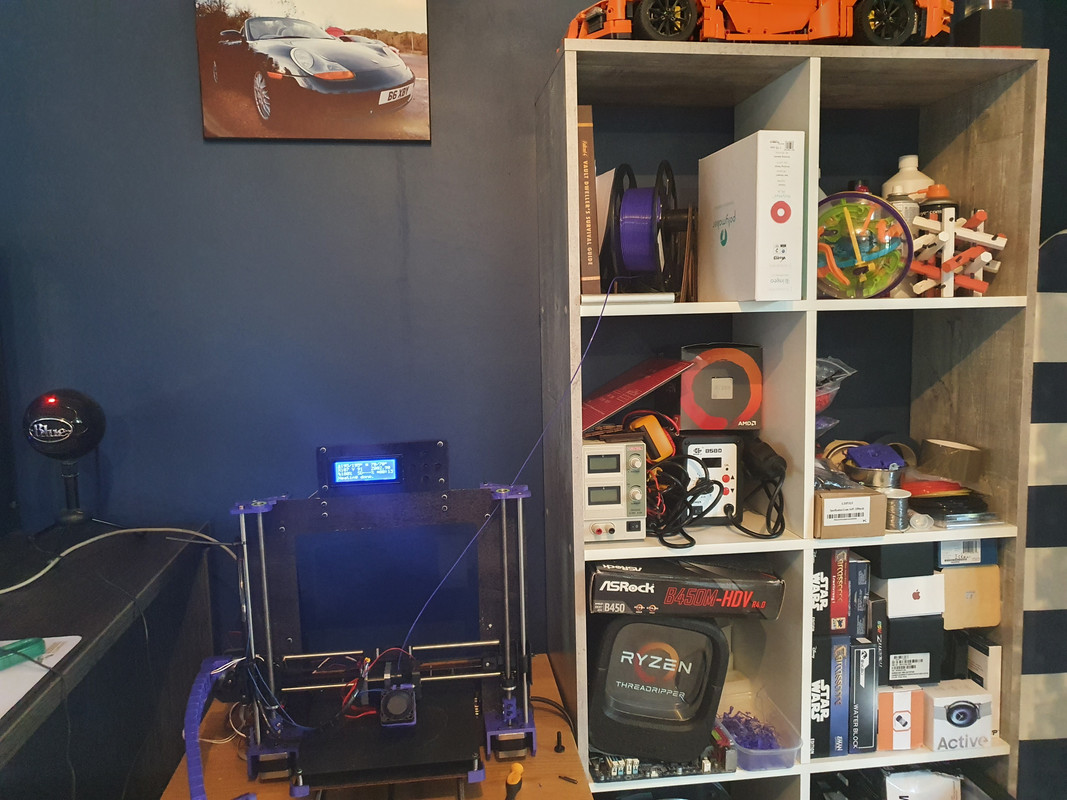
Check me out! I am far more ghetto than that. My holder is a shelf!!

 
Ive really enjoyed reading through your build log vince, and certainly like others youve inspired me for my next build and to dabble in 3d printing! For £400 id be well chuffed with that! Out of interest the upgrades for your 3d printer did you think of them yourself or are there plans available online?
Awesome thanks dude! That's the idea, a little bit of fun and something cheap to pass the time! So 3d printer upgrades there are a whole host of them already out there for any number of printers. Simply type what you want into thingiverse.com and you will probably find something for your particular printer, mine for example is a copy of a copy, of a copy of a Prusa i3, which is also basically the same as the copy of the Anet A8, so many of them are so very similar parts can be interchanged often with little to no editing at all.

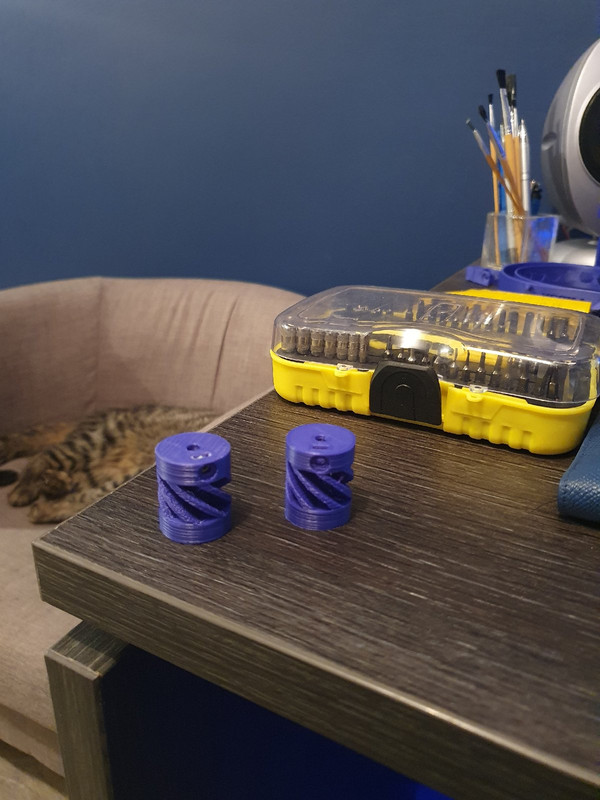
I printed these upgrade flexible couplings last night:


And installed them on my machine as the old ones were slipping slightly and I could see it in my prints.
 
I broke my printer! Last night I was fiddling and I have fried the PSU (The cable to the hotbed thermistor broke and the thing went mad trying to heat the bed up to 60c). It's only some 15amp 12v supply and I had already ordered a 40amp replacement. I have also ordered the following on top of the stuff in the picture:

- 1x Geetech gt2560 mainboard
- 5x A4988 Drivers
- 5x Nema 17 Stepper Motors
- 1 x BIGTREETECH TFT24 V1.1 Touch Screen Display Compatible 12864LCD
- 2 x 15x 8mm Lead Screw Rod CNC Linear Rail Shaft Bearing Slide - This is for either end of the gantry.
- 4x SC8UU LINEAR MOTION 8MM SHAFT SLIDING BEARING BLOCK
- Alloy Y carriage plate
- 40 amp supply
- V slot rail 400mm x4 2020 vslot
- 12 v rail wheels.
- m8 rods threaded and non threaded.
- Cork Insulation
- Loads of different types of bearings
- a case full of m3 hex nuts and bolts in various sizes

More stuff is coming for the build every day some of it I probably don't need but I want a good selection of parts for to select from :) The idea is now to get the current one running again so I can print parts for the new one :) Think I may have got carried away... For the money I spent I could have just bought a better one in the first place. Then again where is the fun in that.
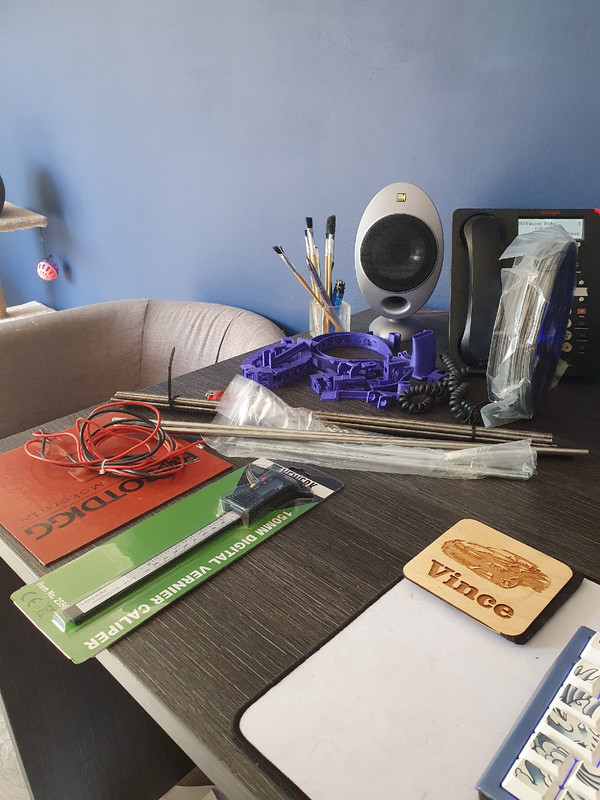
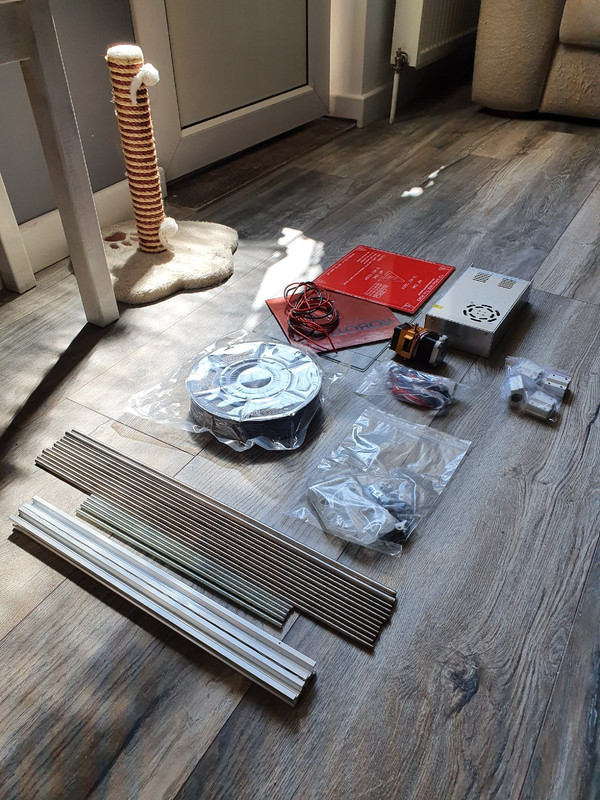
In the picture we have:

- 10x m6 500mm Threaded rods
- 2x m8 500mm solid rods (for the hot bed)
- 6x 300mm m6 threaded rods
- 150w hot pad (im told these are the daddy of hotbed heaters)
- Digital Calipers
- Some more PLA


Soon the franken printer build will properly commence. Really I need to fix this one to print parts for the new one so thats the goal right now.
 
Last edited:
I revived the board. Had it on the bench this afternoon and a couple of bodge wires later and it's back up and running. :) Its running on my bench supply at the moment :) This is good news!
 
This is what happens with kit printers. You get a base, tune it and immediately start identifying tweaks and printing upgrades for it. Then the printer outgrows your initial requirements so you add even more stuff to it. By the time it's finished, it no longer looks anything like stock. Then your requirements outgrow the fully upgraded printer so you start on an entirely new one, using the old one to upgrade the new one until the new one upgrades itself.

If I start doing ABS or exotics like wood or carbon fibre I'll just get an entirely dedicated printer for it so I don't have to keep faffing with different nozzles and enclosures, but even if I'm just sticking with PLA then my Ender 3 Pro will likely get expanded at a later date. Certainly a new bed is on the cards because mine is slightly warped. But dear God some of the things I've seen: doubled build volume from new extrusions, dual extruders, dual Z screw, a bazillion different fan ducts, Raspberry Pi and Octoprint for wireless prints, cameras for monitoring and time lapse, BLTouch and other auto-levelling kit, you name it.

Try doing this with a Makerbot :p

Yea it will look nothing like it did before. In just over a week I have sussed how all the electronics et work and last night I was this close on spending £500 on a pre built decent printer. Then I realised where the hell is the fun in that? The new one won't be using any of the parts really! Perhaps the hot end but even then I may change it from direct drive to a Bowden V6 setup. I have kind of copied some bits of the ender in my design using the v-rail gantry... I like that!

Also you said bl touch... So I bought the kit!
 
Last edited:
Glad to hear you didn't kill it :)

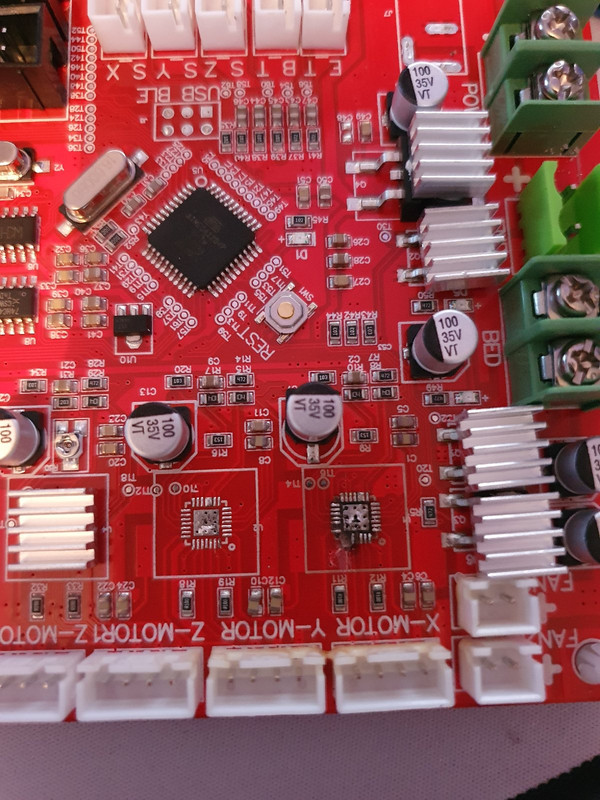
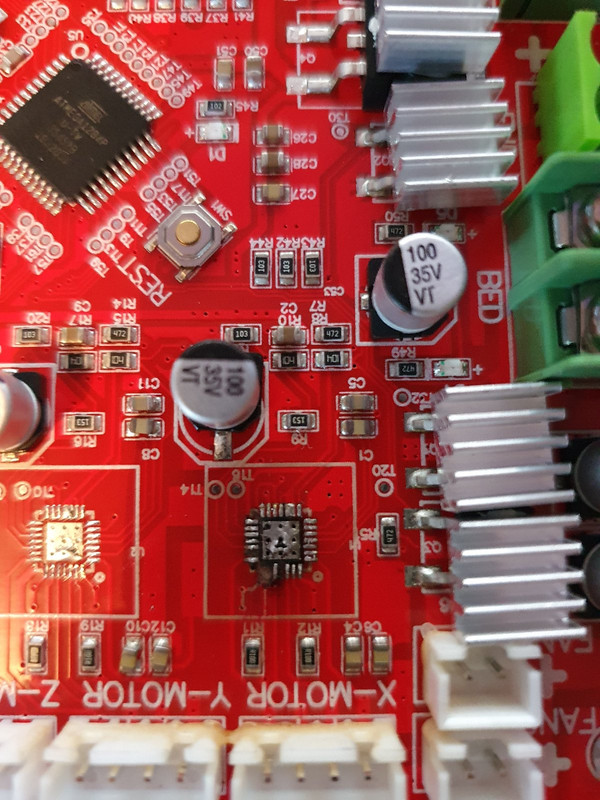
Killed it... hmm perhaps, although you could possibly fix it. Let me explain, even though I got the board to boot on my bench supply by giving it 12v - 0.1amps and running some wires to effectively bypass the stepper motor drivers, it wont boot under a normal supply and hangs. So I decided to get the multimeter out and trace the fault on the board. It didnt take long! there was grounds across components all around one particular driver, this is the result, I took the driver next to it off for comparison:


If you look closer you can see ive scraped the board to find the traces:


The bottom left two missing traces are 12v and ground, the pin next to that is also cut and I think it's a data pin of some description. With all of the shorts removed the board now boots under a proper power supply. I could possibly fix it but it's clearly junk and the Geetech GT2560 I have ordered is far superior, because it is based on an arduino / Ramps mix up the drivers are slot in so if one goes it's an easy plug in replacement.

If anybody in here really wants me to attempt to repair that I will but im thinking it's better just to wait for the new board etc to get here. I might have to transplant the board into the current printer to print some bits for the new design but to be honest in my buying frenzy and not listed above I also bought a ramps 1.4 board and a mega 2560 so perhaps wack those in this printer and build the new one on the geeetech.

This has prompted an investigation and action to be taken. I have therefore invested in some DRV8825 Driver boards as well. These boards can step 1/32 rather than 1/16 which I read makes some of the axis more stable. 8 quid for 5 it's hardly a bank breaker!
 
Last edited:
Sounds like trying to repair it may not be worth the bother

I sent the guy I got it off of a message. I Can't be bothered to attempt a repair so it has to be worth prodding to see if I can get a replacement. For what it is worth the drivers require active cooling and my kit didn't have any! That will need addressing on the rebuild.
 
Sounds like a good plan

If they replace it I will probably give this one a repair for a bit of a laugh. I can lay down a new smd and then a few jumper wires to that edge of the driver chip. Could be a fun mission to see if I can get that X driver actually running again although I wouldn't trust the board at all. As I said I have the board running just have no X driver.
 
Bits are slowly turning up. Wont be long before I make a start:


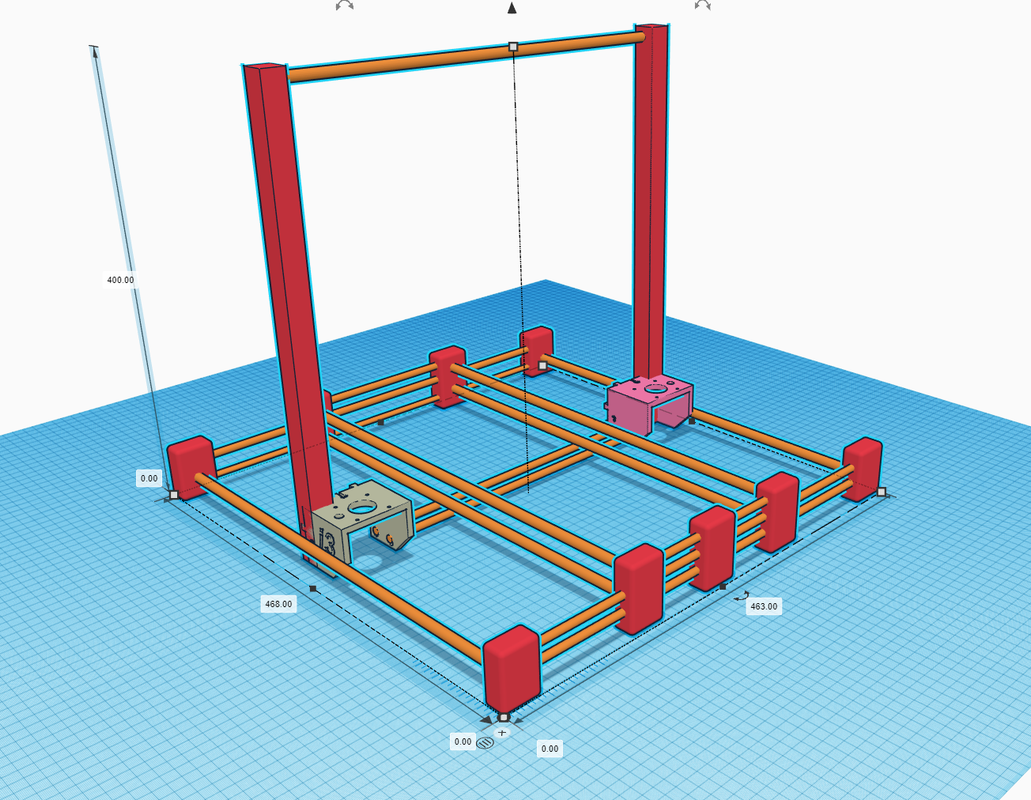
This is a rough mock up in CAD, actually it's not rough at all in terms of dimensions. What is rough is that I have a few parts in there front the original footprint of the machine to give me some idea of where things should go:


Still undecided on v slot or not for the gantry and hot plate slider. Decisions, Decisions! 20 mins in CAD but hours messing about measuring and getting all the parts layed out. Im not sure this is final yet or even how it will end up when I start building. Also 400 high might be a little too high so perhaps 350 might be better.
 
I will just nod and try to look wise lol
Obviously I know what a 3d printer is
But the actual parts will be a mystery to me lol
Unless the name of the part gives a clue

I don't even know if I am getting the names right :D Im calling the bit that goes up and over the top the gantry. The bars that run from front to back in the middle, they are the sliders for the hot plate or build area for the machine, the new footprint is 1.5cm wider each side to allow printing right up to the edge of the hotplate. The two different linear motion methods I am talking about, v rail and slider look as follows:
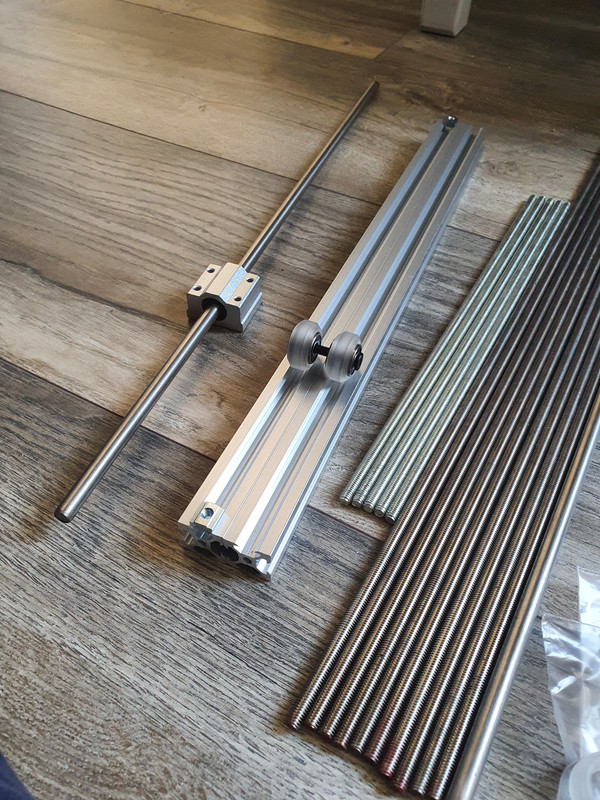


Im kinda starting off with a simple design I know I can build and write firmware etc for. After that I might design something a bit more crazy if this works out as expected. I don't even care if it doesn't work out so long as I learn some bits and bobs along the way!
 
I'm partial to full extrusions because I like the rigidity of my Ender (oo er, etc.). But if you're in it for the learning then go ghetto, identify weaknesses and determine improvements. You'll know exactly how these things work then and why certain aspects are done in a certain way.

Sounds like a plan - Can you help me with one more thing? I have 3 boards coming, one is the gt2560, one is the anycubic Trigorilla and then I have the combo of the mega 2560 and ramps 1.4 over two boards. I am just looking about working out how you might go about upgrading firmware on these when I get them, I also expect I will need to do this to see what ampage is set going to motors etc as well as setting up different motor stepping of 1/32 im planning on with different drivers for some axis. What's the process as my google foo seems to be letting me down.

Edit: Cancel that ive just compiled Marlin :) Can't flash the board I have as it is cheap chinese rubbish with no bootloader but the new boards should be golden.
 
Last edited:
Boards is where I can't help, I'm afraid. All I know is most boards don't have bootloaders so you need to faff about with something else to act as a bootloader. From the Ender perspective, people are using Raspberry Pis to bootload and upload firmware onto the Marlin boards.

Yep I see that and my board is no exception. The seller of the kit is sending me a new one and I have another 4 different boards on the way (All the decent looking ones I can find) and yes I did spend about £100 on boards just to find out what the best one is! I can always sell them on, I think I have to admit that this stopped being about the cost a long time ago, this is now about the sweet science! I will review each of them with my thoughts etc in here!!

I will also be mixing stepper drivers for 1/32 stepping over 1/16 on some axis and will also change the thread pitch of all the rods from the standard 1 pitch of the rods that came with the machine to T8 rods with an 8mm pitch. I've done the maths and it will absolutley require firmware changes but should make what I am building super smooth.

I think I may entirely change the design again after more time messing about in cad - I am starting to think an all extrusion setup with some tweaks is the way forward! If I use extrusion I can reduce the footprint by somewhere in the region of 25% while still having coverage across the whole build area. Obviously I will need to mock something up and properly test I am not talking rubbish! The Ender 3 is a great example of a small footprint machine that can print the whole bed so It has to be possible on a self build! I think I probably should have went 2040 rather than 2020 but I have 10 bars of 2020 so 2020 it is.
 
Last edited:
Bit of an understatement to say I think 3d printers have you hooked lol
Least I know who to shout if want something printed :D:D

Yea I dunno about hooked but I am certainly well into some sort of project I didn't anticipate! It's not all bad though gives me something to do and you dont learn without getting involved, or at least I don't. I could read about it all for a week and wouldn't gain the knowledge you can in 1 hour building and playing with one.
 
Very true
Book knowledge is great
But still need to be able to actually put it into practice
Sometimes you have to take things apart to see how they work
And of course reassemble them hopefully still working lol

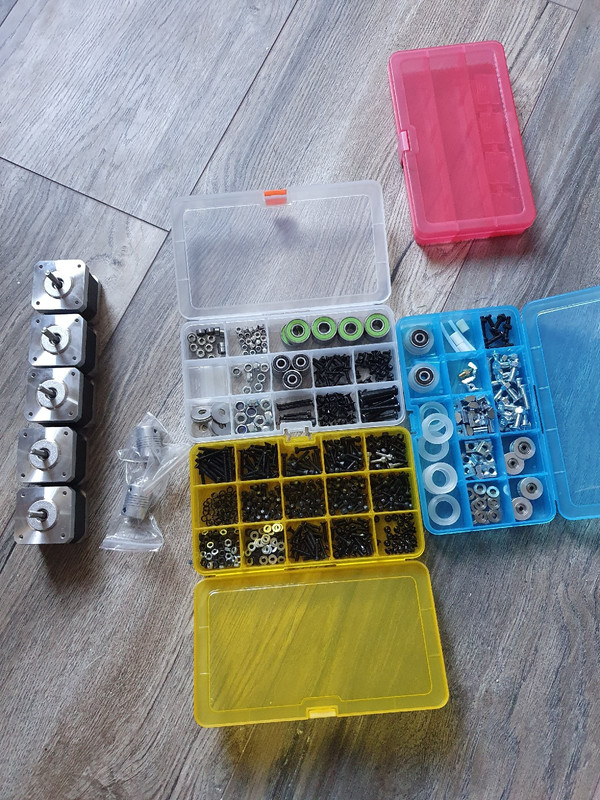
Well it's been a pretty boring day in terms of stuff for my projects, I can't get started on properly constructing things until at least 90% of the stuff is here more specifically I need boards and a few other bits arrive. Some stuff I ordered an age ago on amazon did arrive as did a few bits for the 3d printer. These little storage boxes came, I ordered a couple of sets as I have millions of screws, nuts, bolts etc for different projects so thought I would sort them all. Here are all the parts I have so far collected for 3d printer stuff all nicely organised in little boxes as well as the stepper motors I will be using, the little flexible joints are no longer going to do the job for the build so I will have to think of something else to build when I am done with the printer :)

 
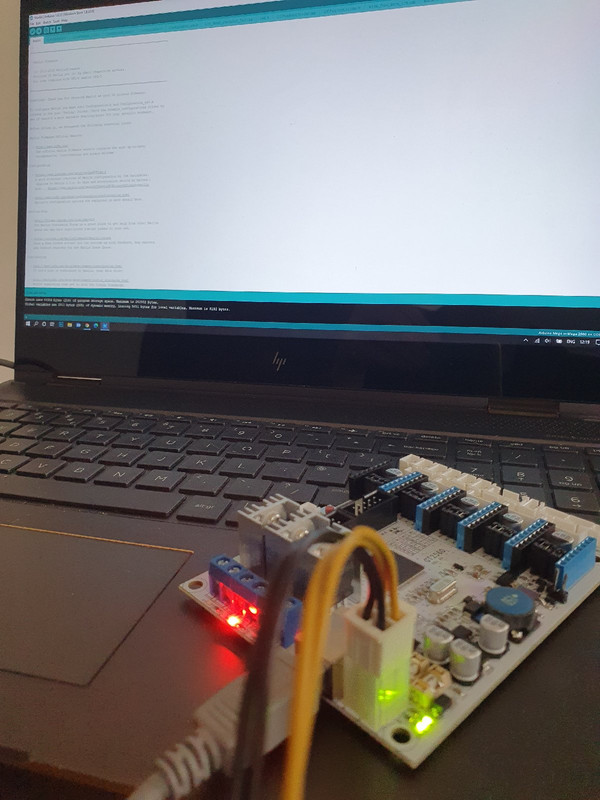
The first board is here. Meet the Geeetech GT 2560 Rev A+ (mega 2560 + ramps / mega 2560 + ultimaker) The first thing I did was update it straight to the latest firmware which it loaded straight away without issue, this means the board has a bootloader. I still cant actually drive anything from it yet as the drivers are not here yet. Still i can mess around with it and see what it can do.


I cut the 4 pin off of an old atx supply and wired it into my bench supply to get her going and updated! Next up im thinking ill see what it outputs to the lcd and check the new firmware etc went on.

What im not sure about yet is if this can take my new 150w heat pad gel mat thing for the bed. Specs wise it recons 12 amps to the heatbed which I think should be enough but I have grabbed an upgraded heatbed mosfet of 20 amps just to be sure. Ill be using a mix of drv8825 drivers running 1/32 and a4988 drivers in 1/16. Once some drivers are here ill set up a test bench and have a little go with it. I think ill need to change the firmware I have put on it to deal with that as well as the pitch of my new bars. Talking about them I have a customs card so think the kits I bought are sitting at the postie... this means I might be able to get building on Monday :D
 
Last edited:
Back
Top Bottom