Project: Self-Inflicted

Cool, I'll have a look. If you're going to the trouble, surely 'fancy' is the only way to go, no?!

In the meantime, I started wiring the CPU-GPU ARGB LED chain. Only the CPU pair so far as until I disable a PC, the GPU isn't there so I don't know the length of the wire...hence the trailing pair left.
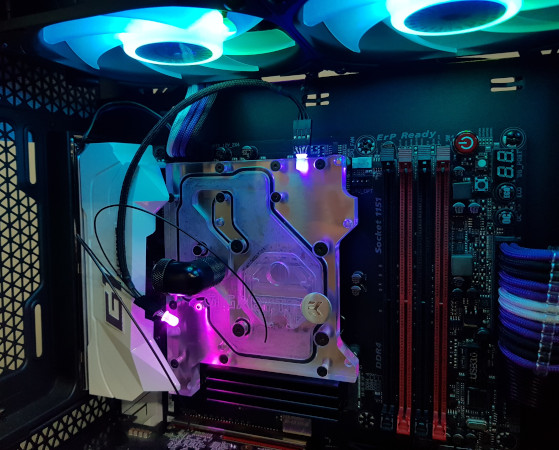


These are 5mm dome type WS2812b addressable RGB LEDs run directly from a Farbwerk 360. It may not be necessary to make the actual LEDs pluggable but I did it for my non-addressable RGB LEDs when I replaced them as an easy way of replacing them if they fail again. This way I guarantee they won't ever fail :p

Edit: Obviously when fitted properly the LEDs will be bent at 90° so the connector lies flat against the block and the wiring will be routed under the cowl at the back so it's out of sight....just no point doing any of that until the chain is complete.
 
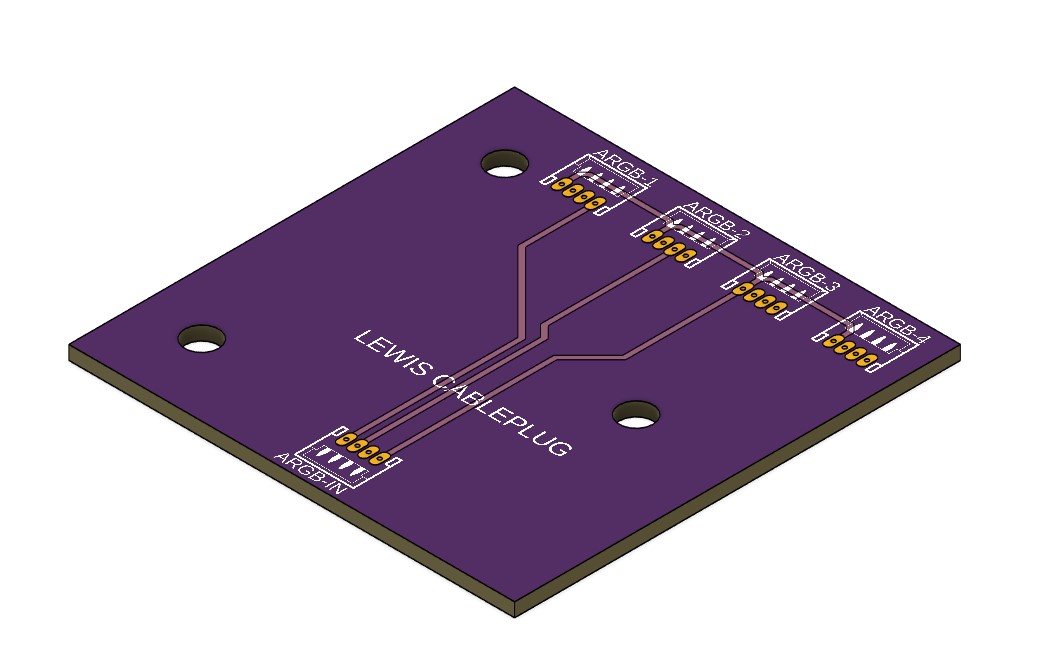
Well obviously, I blame @LePhuronn entirely for this :p but it looks PCB is going to be the route we go. Necessary? Perhaps not but it's something I've thought about doing a few times previously and never gone ahead with. At something like a fiver for the board and shipping plus something like £2.40 for the connectors (same Molex Picoblade seemed a wise choice) it's time to change that!

I've been watching some YouTube videos on how to do it in Fusion 360. It's not actually that hard once you wrap your head around the way they want you to do it...but deciphering that on your own would be a miracle!
This is what I've come up with so far:

RAM-RGB-PCB1.jpg


Now all I'm umming and ahhing about is whether to do a version with a jumper(s) that lets you select between splitting the signal and properly daisy chaining it!

Can't make life too easy for myself now can I!?
 
BWAHAHAHAHAHAHAAAAAAAAAAAAAA! the power I have!

Might have a look at Fusion's PCB maker, but I have a horrible feeling it'll be too similar to Eagle (which is also Autodesk) and Eagle rots my brain...
 
It's not similar to Eagle....it IS Eagle. They bought the company and have been rolling the two together. I suspect that's why the workflow is really convoluted - at least from my starting point. You have to start an Electronics Design - which appears to be a document but acts more like a project. Then design a schematic for it. Convert that to a 2D PCB and lay out the components and tracks. Then push that to a 3D PCB.
To complicate things, you can optionally start with making a 3D PCB from a sketch in a model - like you might want to do if you want the board to fit an existing enclosure or mount points etc. That 3D PCB then gets linked into that chain. It's a bit of a knot but it's walked through in the video that's part of a series I was conveniently already watching.
This is the video you want to watch: https://youtu.be/RRJMilcWBIQ?t=158

The only gotcha I've hit so far has been that for some reason the connector seems to flip between the schematic and the PCB; so pin 1 starts on the right and ends up on the left so suddenly you've got your data line and your N/C pin reversed and it wouldn't have worked. I just mirrored (tick-box) the connector in the schematic and all was well....but lucky I spotted it! Don't know why but it'll either be my inexperience of the product/field or just that one connector definition.
 
Y'see, I tie myself up in knots when I started with EasyEDA because I didn't need to make schematics just to stitch the pins of fan headers together, and just went straight into the PCB design.

Which was a BIG mistake.

Doing the schematic made it so much easier for me to block out all the fan headers and link pins together, omitting tach readings where necessary, and then sharing ground planes. So much easier then to have those components laid out on a board with guide lines connecting the pins regardless of how you oriented the footprints. That's when it clicked for me and ramped the complexity up with combing 4 way PWM fan hub with modular input cable, front panel LEDs and buttons and 12V modular output for LED strip all into that gorgeous little 100mmx15mm PCB for Asteria II.

So If Eagle/Fusion is saying "do your schematic first" then I'll probably get on with it much better than before.

Where are you getting the PCB made up?
 
Meant to say :rolleyes: Was looking at JLCPCB just because they have the option for cheaper shipping at £3.10 for 2-week shipping.
Probably similar to you, I'm not sure I like the auto route of traces. Not because it's bad/wrong but because it looks nothing like what I had in my head. What I had in my head was much simpler and tidier so I did it manually. If you're talking a bunch of components with lots of pins etc, I don't doubt it's a good way to go.
 
I could never get autorouting to work on EasyEDA anyway, so just did it myself.

Had great fun with a common Ground plane for my SATA-fed LED splitter board (which is probably going to delivery 12V AC power now for EL wire)
 
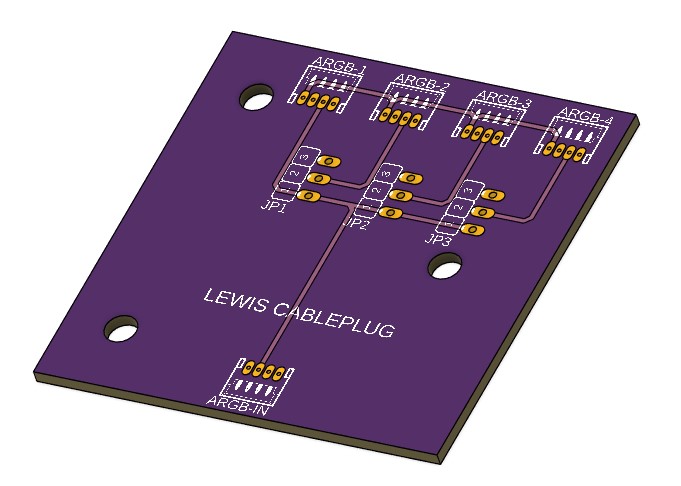
Right, I did a version that was hardwired to do a proper daisy chain of the LEDs in the DIMMS. It should be possible to take a wire from the data pin at the far end of the strip and bring that out as a data out. I didn't want to commit to definitely being able to do that - as I've not tried it yet - so I then did this version that is jumper-switchable from split to chain....and I feel very smug about it :D Order's in, now to get the connectors ordered to solder onto the thing!
RAM-RGB-PCB2.jpg
 
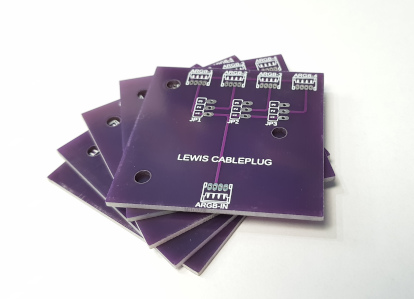
Mounting location all sorted! The case came with a fan hub thing that's mounted on three standoffs at the rear of the case. I was thinking of trying to press that into service but between the SATA power and the PWM repeater, it was more hassle that it was worth....but the mounting points are up for grabs! Hence the three holes in the board. The rear of the case has a hinged door covering the cable area that I've (obviously) spent time making look pretty. Once closed, you can't see any of it...and if you could, there's then a solid case panel that goes over the lot. So yeah, the purple colour is going to be entirely unappreciated...but it was an option...and it was free...so I have five! :D
The switches are just going to be plain old jumpers. Actually, I need to see if I can find as many as three of the things! Should be screwed down tight enough that I can pull them off quite easily...but it's not intended to be changed all that often. Nice to have the choice for an extra 86p. No change in board price but I needed the pin headers (jumper pins) to solder into the headers. Probably got some lurking around somewhere but they'll only come to light if I've already bought some replacements.

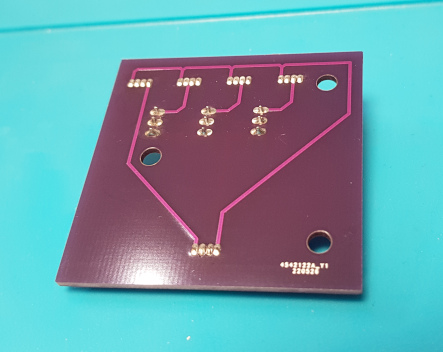
Incidentally, there's traces on the back for power - couldn't put all of it on the front as there's too much cross-over of pins and I didn't want to make the pinout non-standard to avoid that and instead cause other problems for myself when I forget that it's not the same on the outputs as it is for the input!
 
Right, I did a version that was hardwired to do a proper daisy chain of the LEDs in the DIMMS. It should be possible to take a wire from the data pin at the far end of the strip and bring that out as a data out. I didn't want to commit to definitely being able to do that - as I've not tried it yet - so I then did this version that is jumper-switchable from split to chain....and I feel very smug about it :D Order's in, now to get the connectors ordered to solder onto the thing!
RAM-RGB-PCB2.jpg
That's very cool - nice work!
 
Cheers.

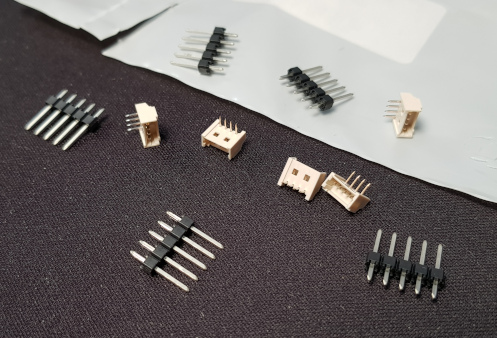
Went and collected the components that will need soldering to the board. The pin headers for the jumpers are 5-way but I can cut them down to 3-way. It's just what was available in a pack of 5 rather than a pack 20,000!
The pins on the beige parts measure 0.32mm and are 1mm apart....so wish me luck when it comes to soldering those!

 
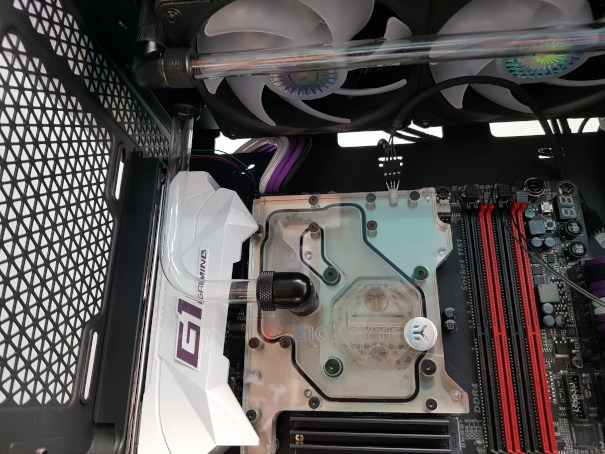
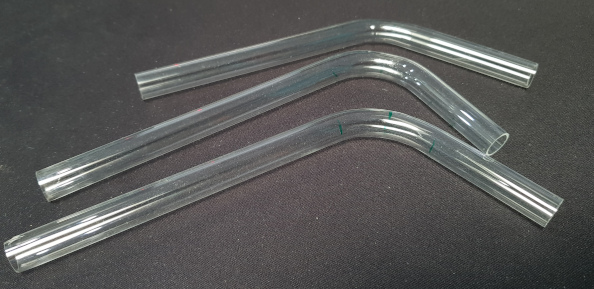
Tiny update. Had a quick go at bending the CPU to rad tube since it was possible to do that in isolation. I give you.....an unimpressive looking bit of tube :D
Also the rad to rad run that I've no shortened once I realised the fans were mounted the wrong side of the rad :rolleyes:


Obviously, because I've done this before (a number of years back now), I had no problem getting this done perfectly, first time off the bat....so there aren't any pictures of (in order of appearance):
  • Too cold - creased on bending
  • Too hot - bubbles at bend
  • perfect temperature.....but not realising that it hadn't gone a full 90 on my butchered mandrel


I've also just received the extra 4mm wide ARGB strip for making up the RAM blocks....so I'll try to get my finger out on that :D
 
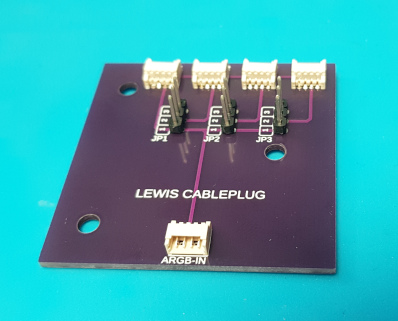
These arrived this morning :D A carbon copy of the CAD design. Like 3D printing...only better quality :D


Have to go do some actual work but I have a feeling there may be some soldering in the near future!
 
Surprisingly stress-free! Touch of trouble getting the first pin header straight. It would have worked....but you can't have it crooked! The tiny picoblade headers were easier as they have a larger base so they sat flat more easily...and were near enough to the edge that I could clamp them with a helping hand.


Now all I need to do is find some jumpers to go on them! *facepalm*
 
Back
Top Bottom